

1. Introduction
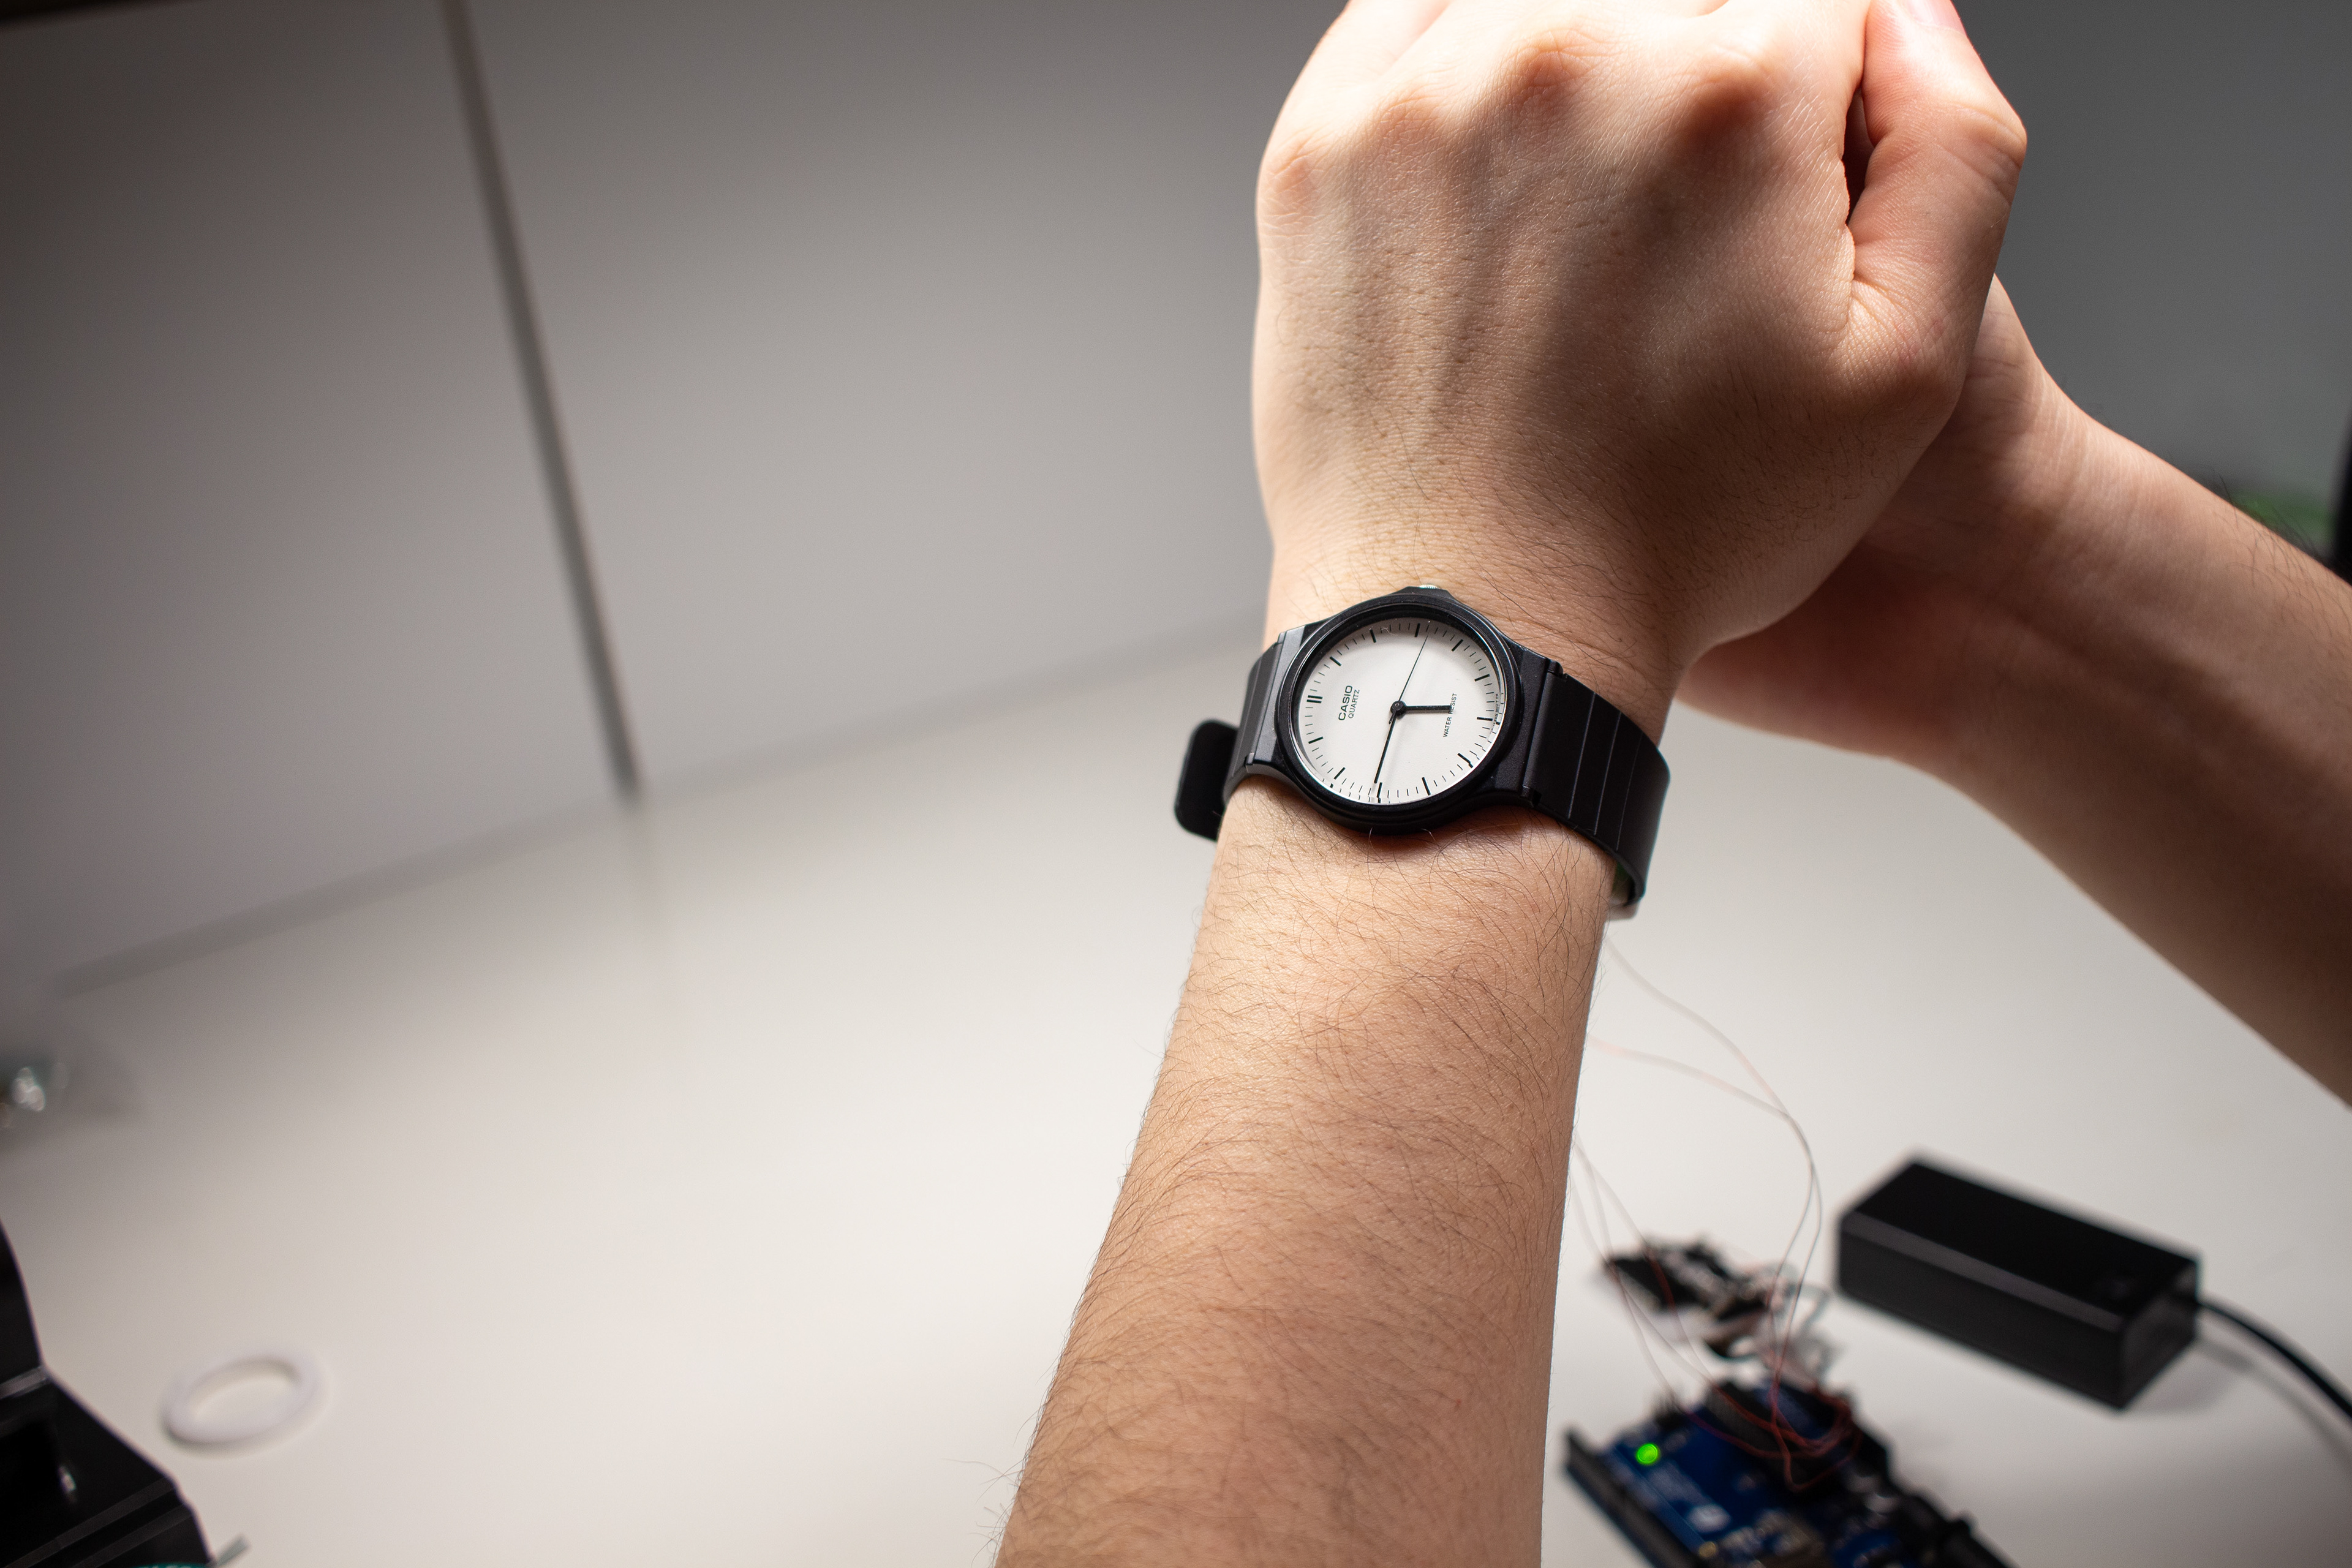
What if your wristwatch looked towards you to know what time it was?
Then, what would it mean to experience a “second” of time?
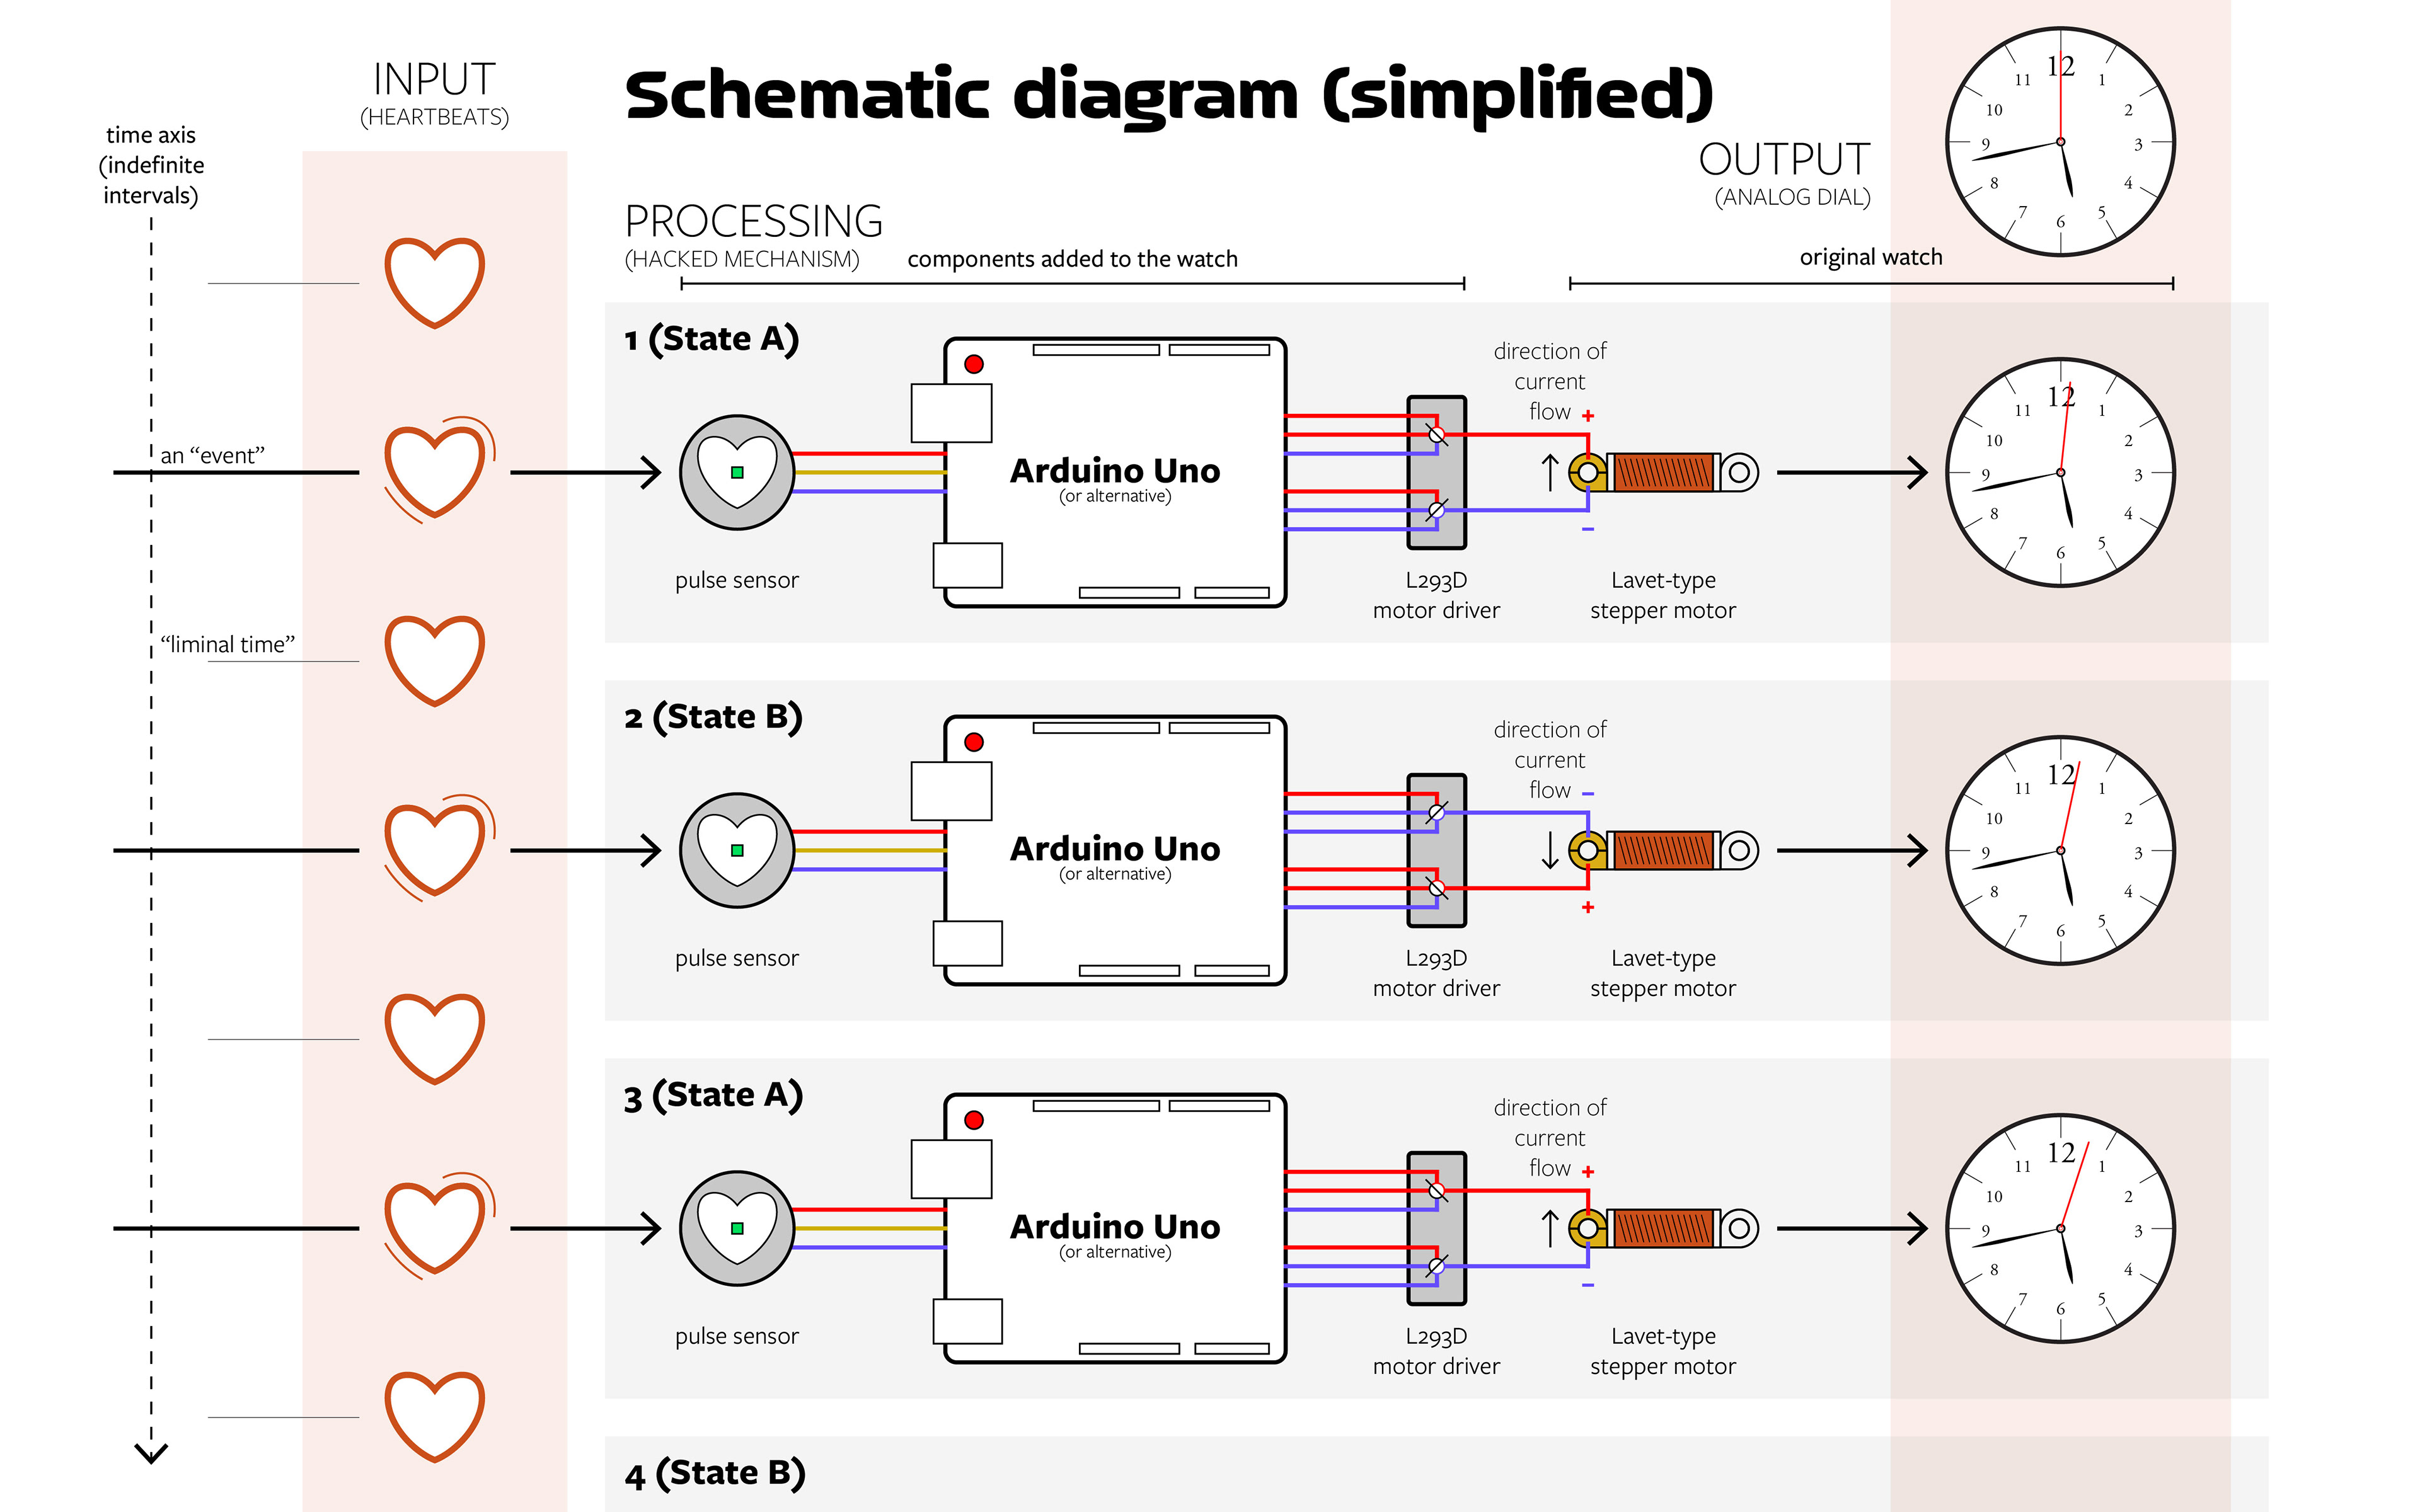
In this project, I hacked a Casio MQ-24 watch to advance at the pace of the user’s heartbeat. Every time the pulse sensor detects a beat, the second hand will advance by one. And thus a “minute” represents sixty heartbeats, and an “hour,” 3600 heartbeats. By substituting the steady vibration of the quartz crystal with the variable rhythm of the heart, you sever yourself from the system of measured time which keeps modern society in sync with itself. Rather than dwell within a time zone, you fall out of time.
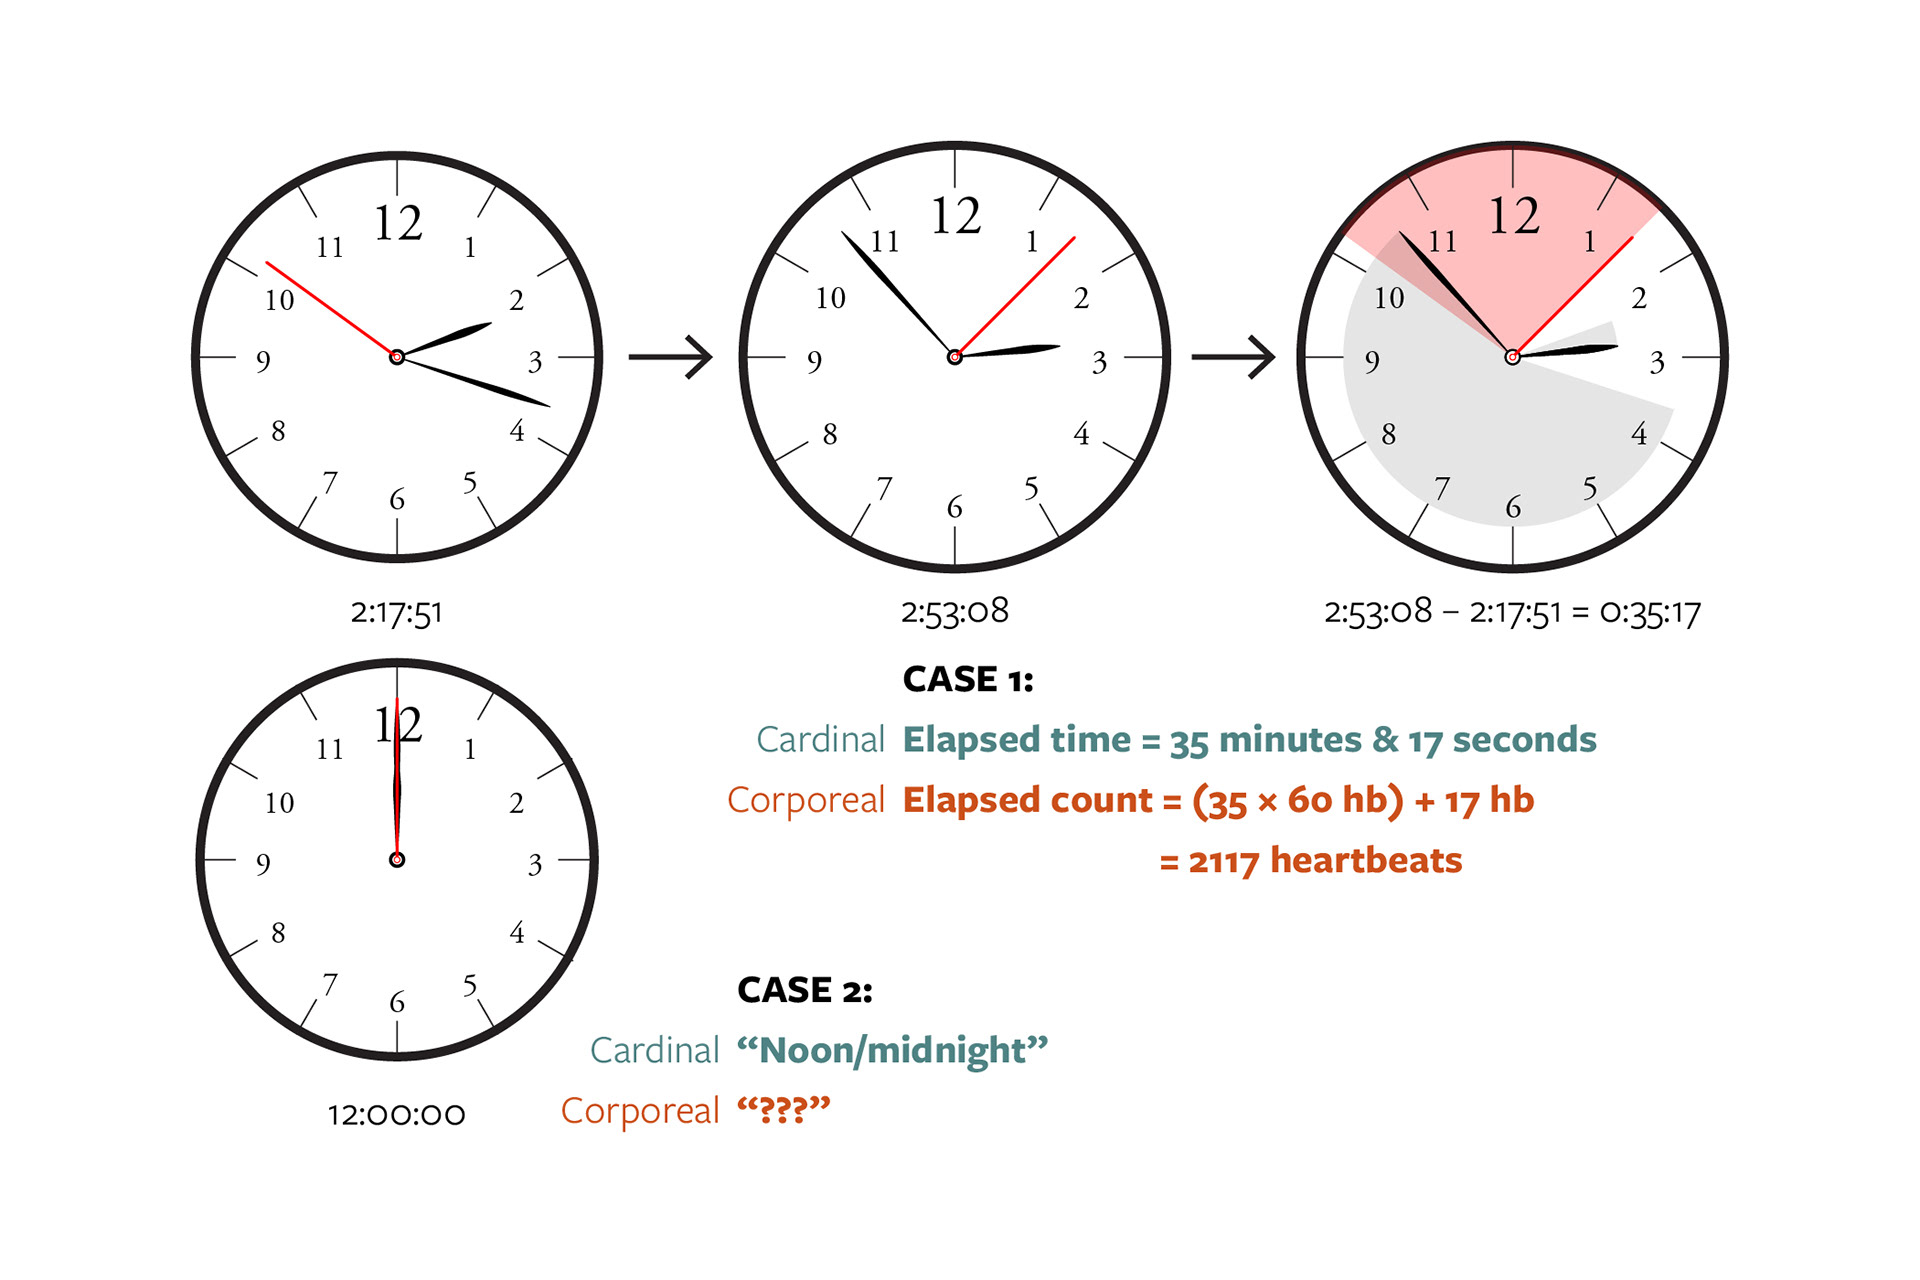
When you march to the beat of your own drum, the only “time” which exists is individual and relative. A regular watch has meaning because “12” is oriented to noon/midnight, taking the referent of the time zone, and all the intervals in between—hours, minutes, and seconds—have been quantified a priori.
However, with the Heartbeat-Watch, you never know what time it is; you can only know how much “time” (how many heartbeats) has elapsed since you started counting. Keeping time becomes an experiential act, a performance of sorts, because you cannot know beforehand how long a “sixty-heartbeat wait” will last, without having lived through all sixty of those beats. And as the clock face loses its cardinality, the numbers on it lose their inherent meaning—“12” no longer signifies “twelve o’clock.” After all, what does “noon” mean to the body?
2. Materials
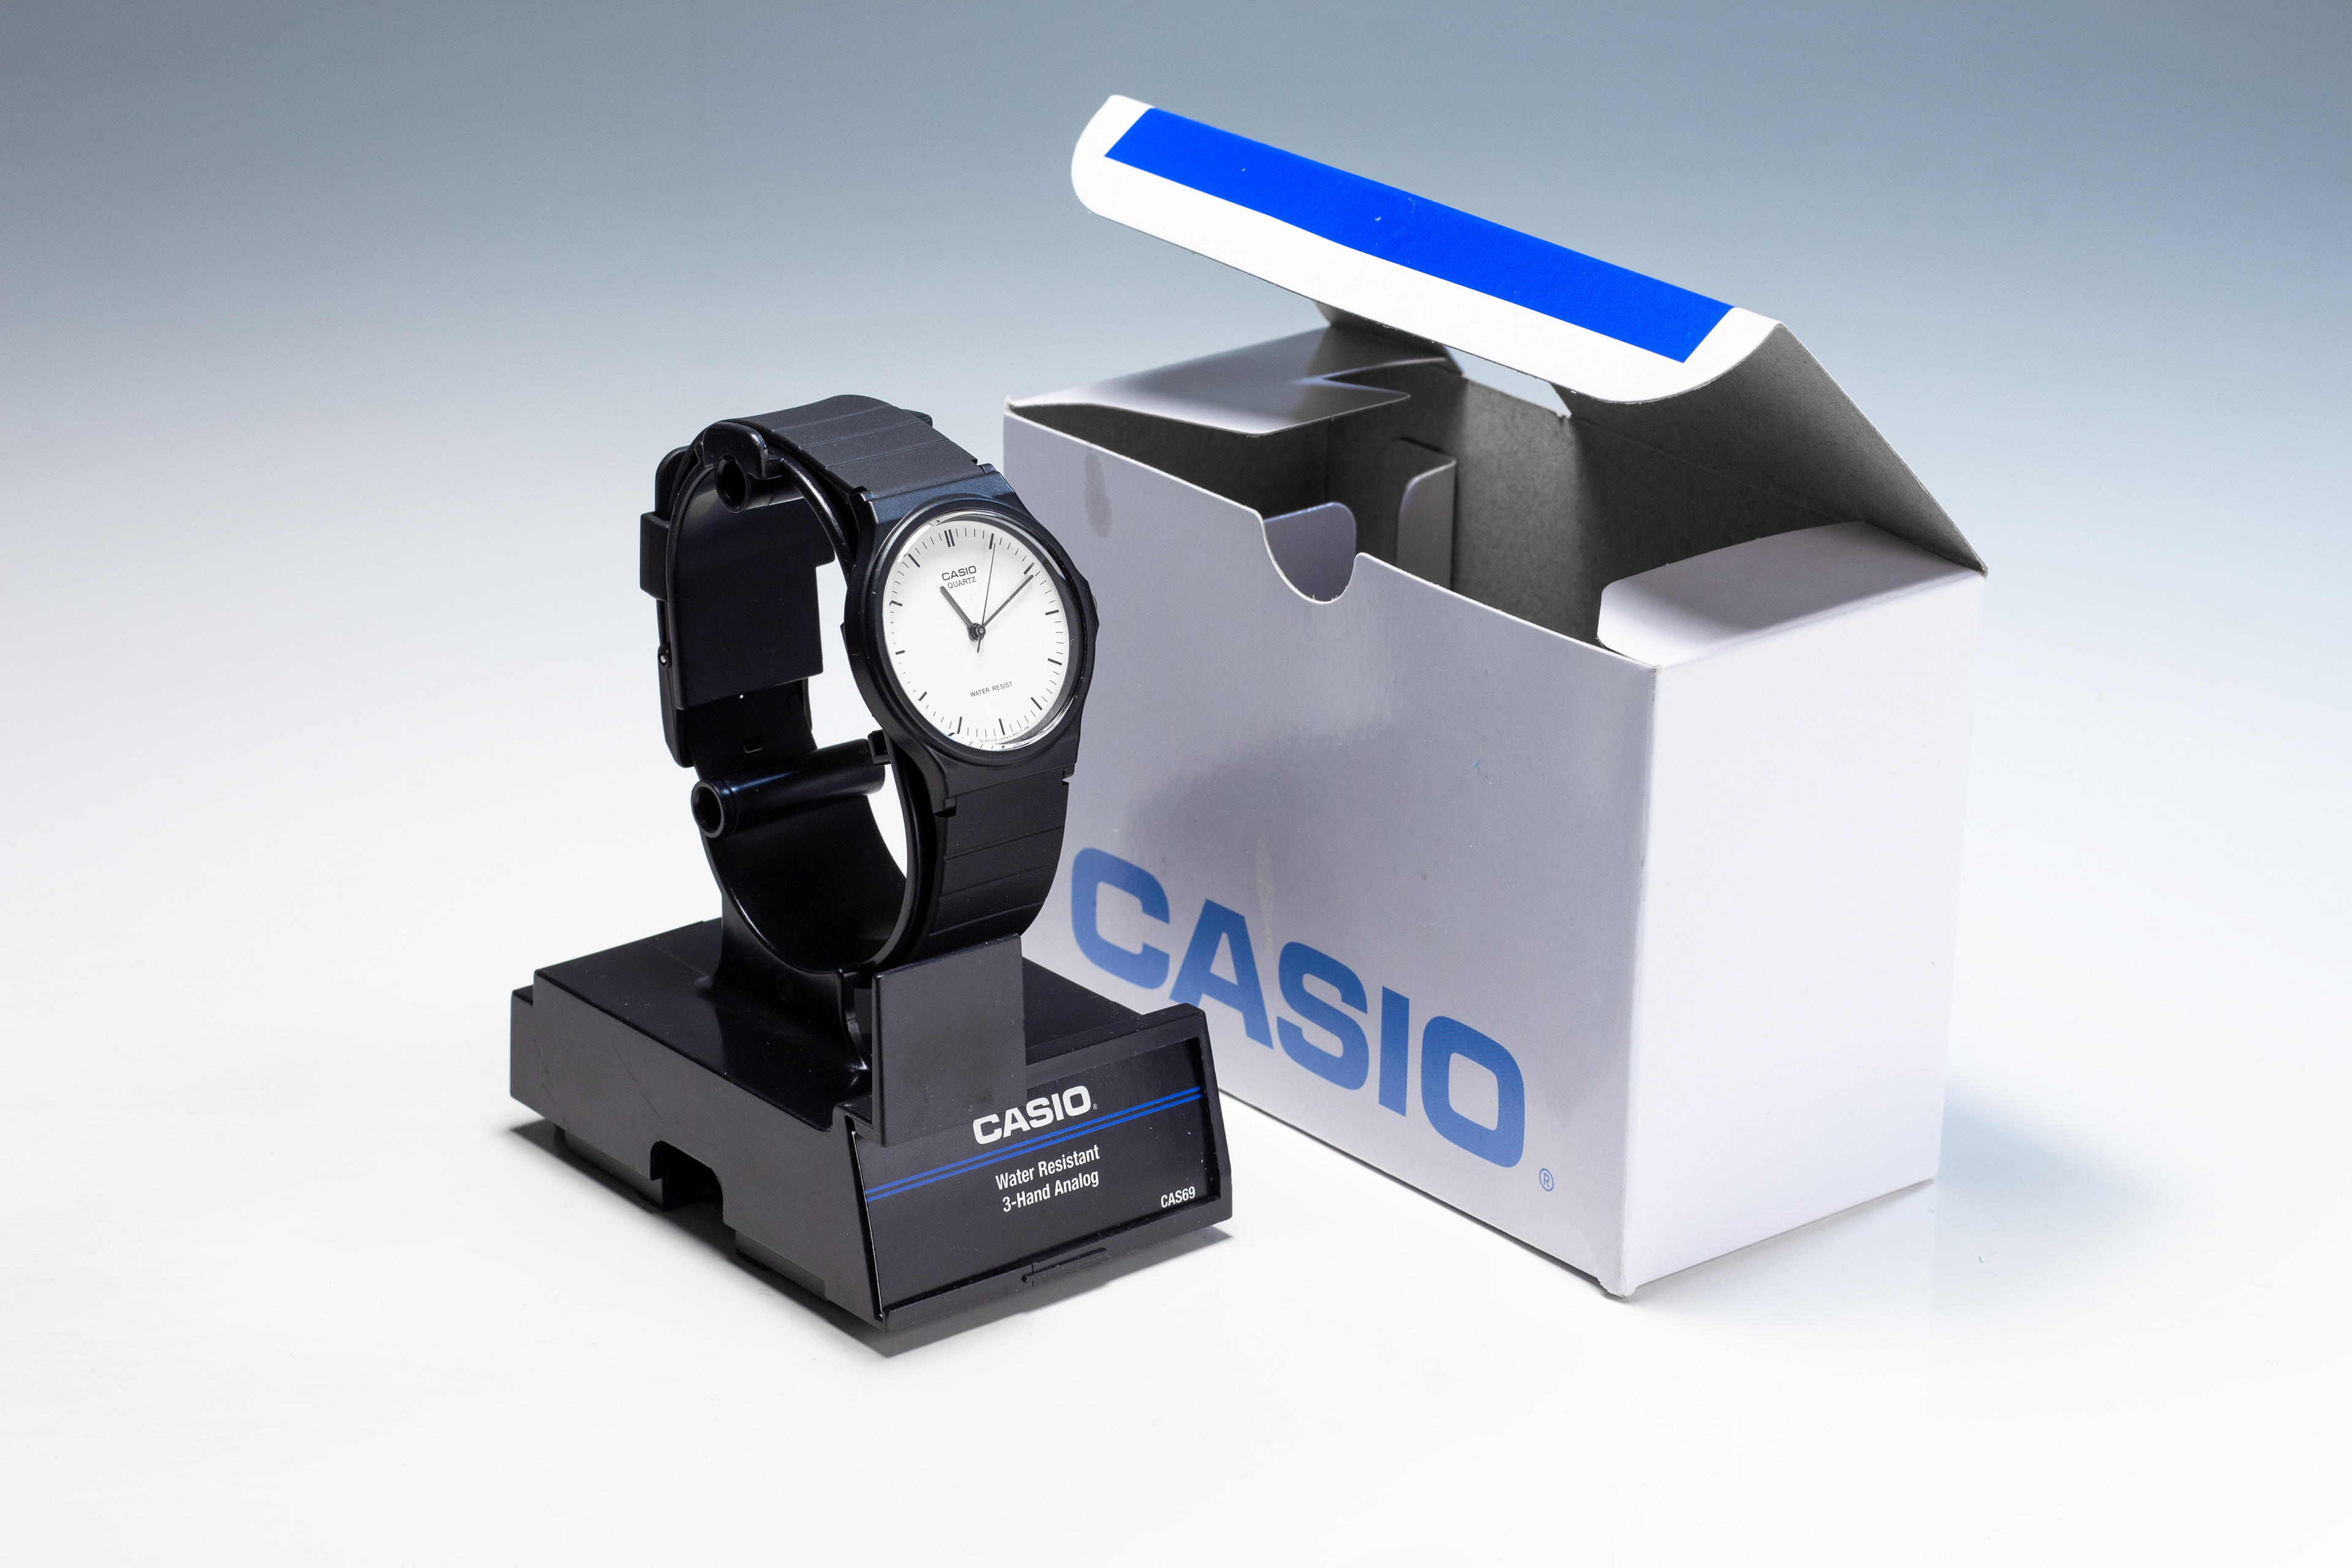
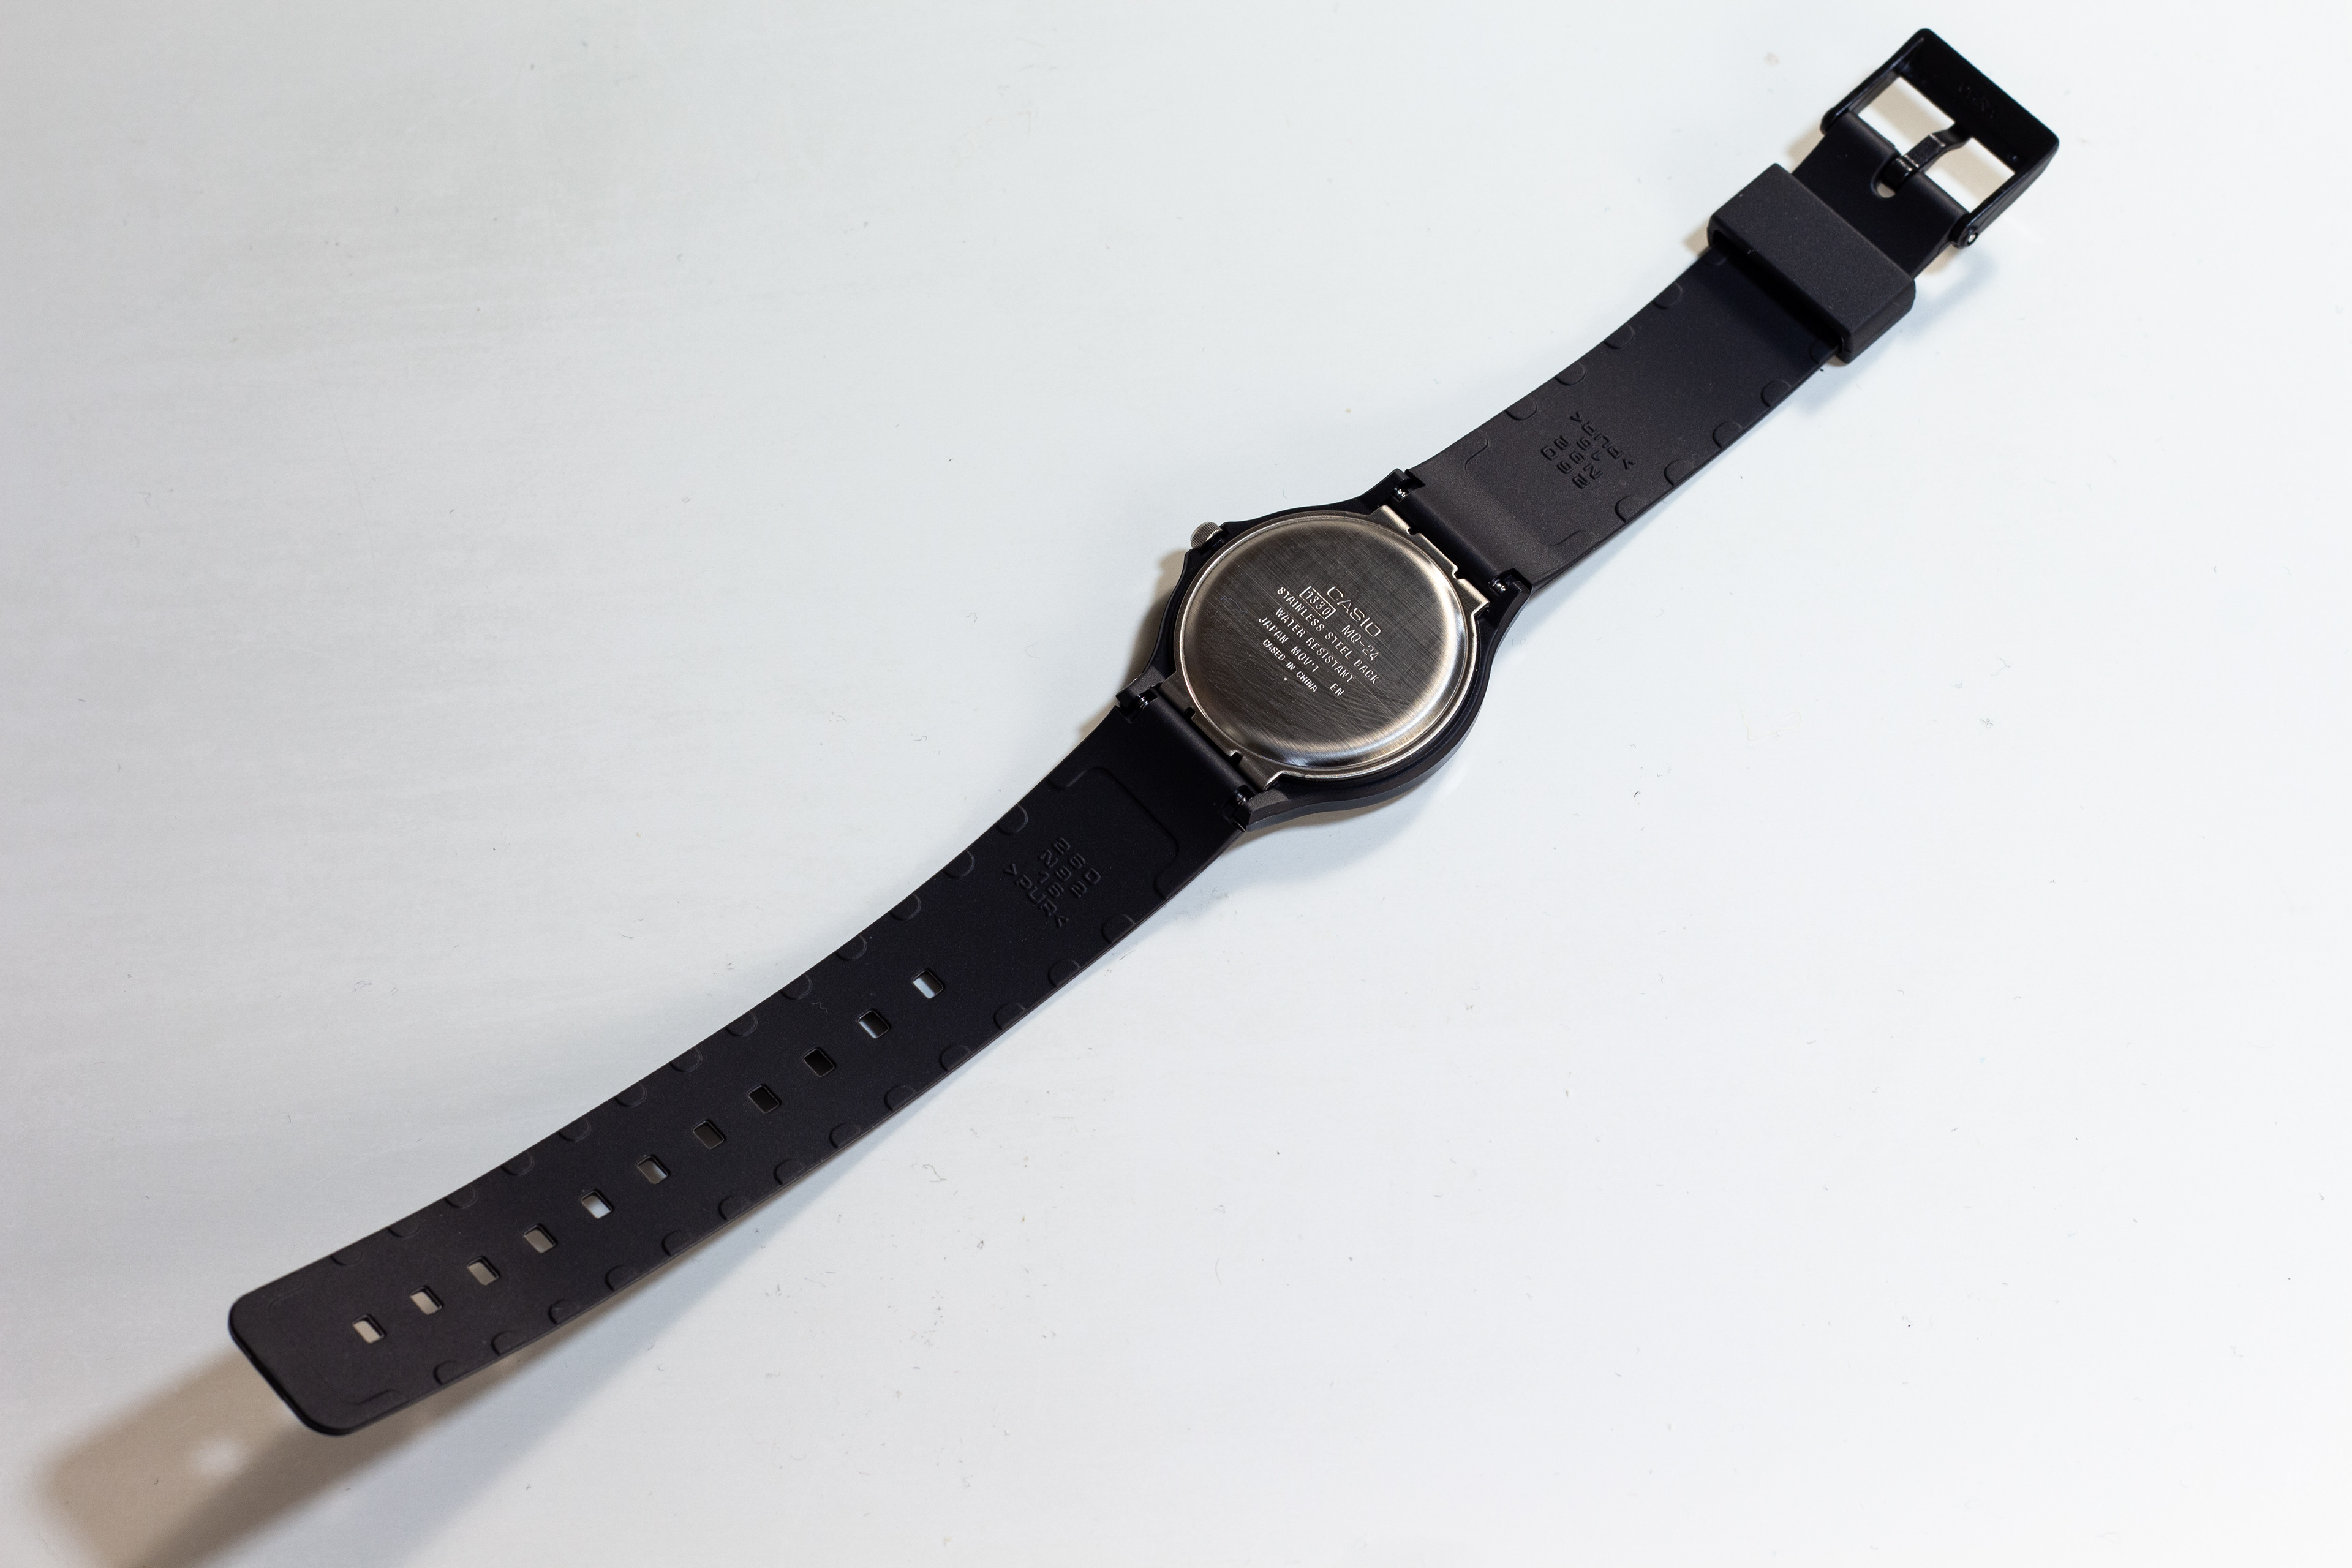
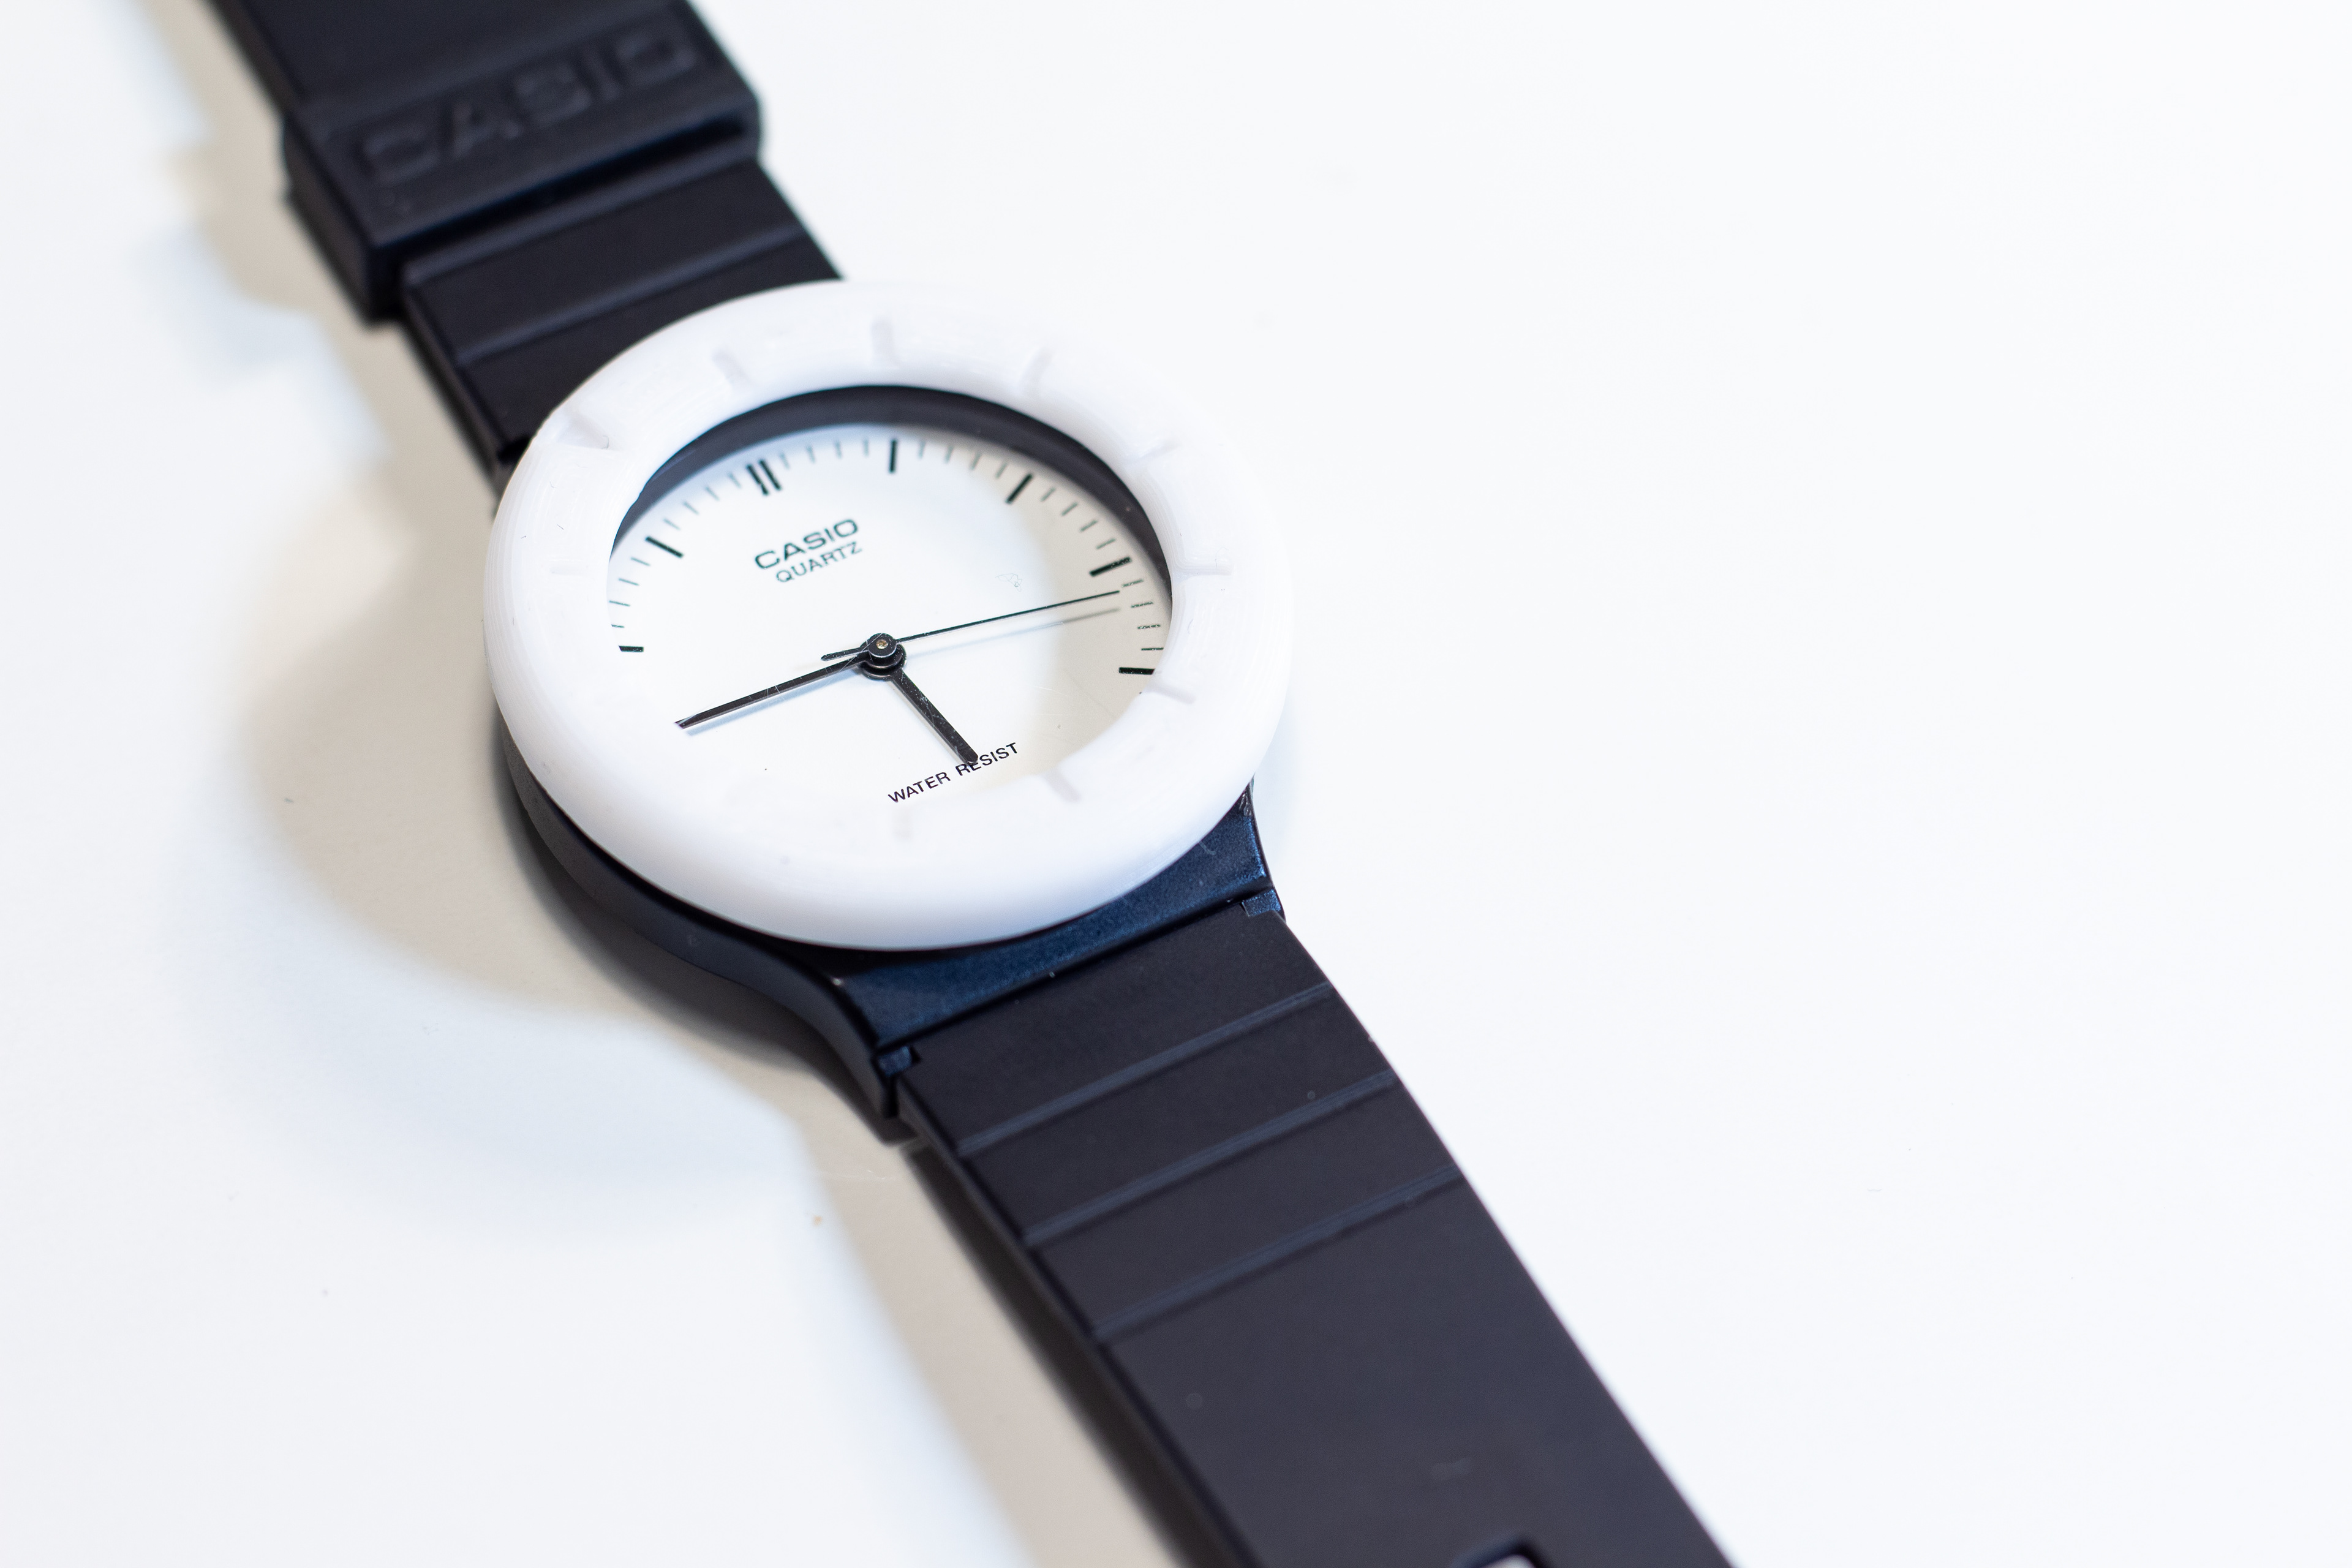
–Analog quartz watch (Casio MQ-24)*
–Soldering iron, solder, flux, & accessories
–Transformer wire (or equivalent thin, insulated wire)
–Miniature screwdrivers
–Tweezers (highly recommended)
–Tool for opening watch’s backplate (case wrench, shiv, etc.)
Arduino components:
–Microcontroller (≥5 pins)
–Pulse sensor (SPEDE-011576)
–L293D quad half-bridge motor driver
–Battery
–Multi-stranded wires, as required
–Header strips, as required (optional)
–Small breadboard (optional)
For making optional attachments:
–Calipers (or other dimensioning tool)
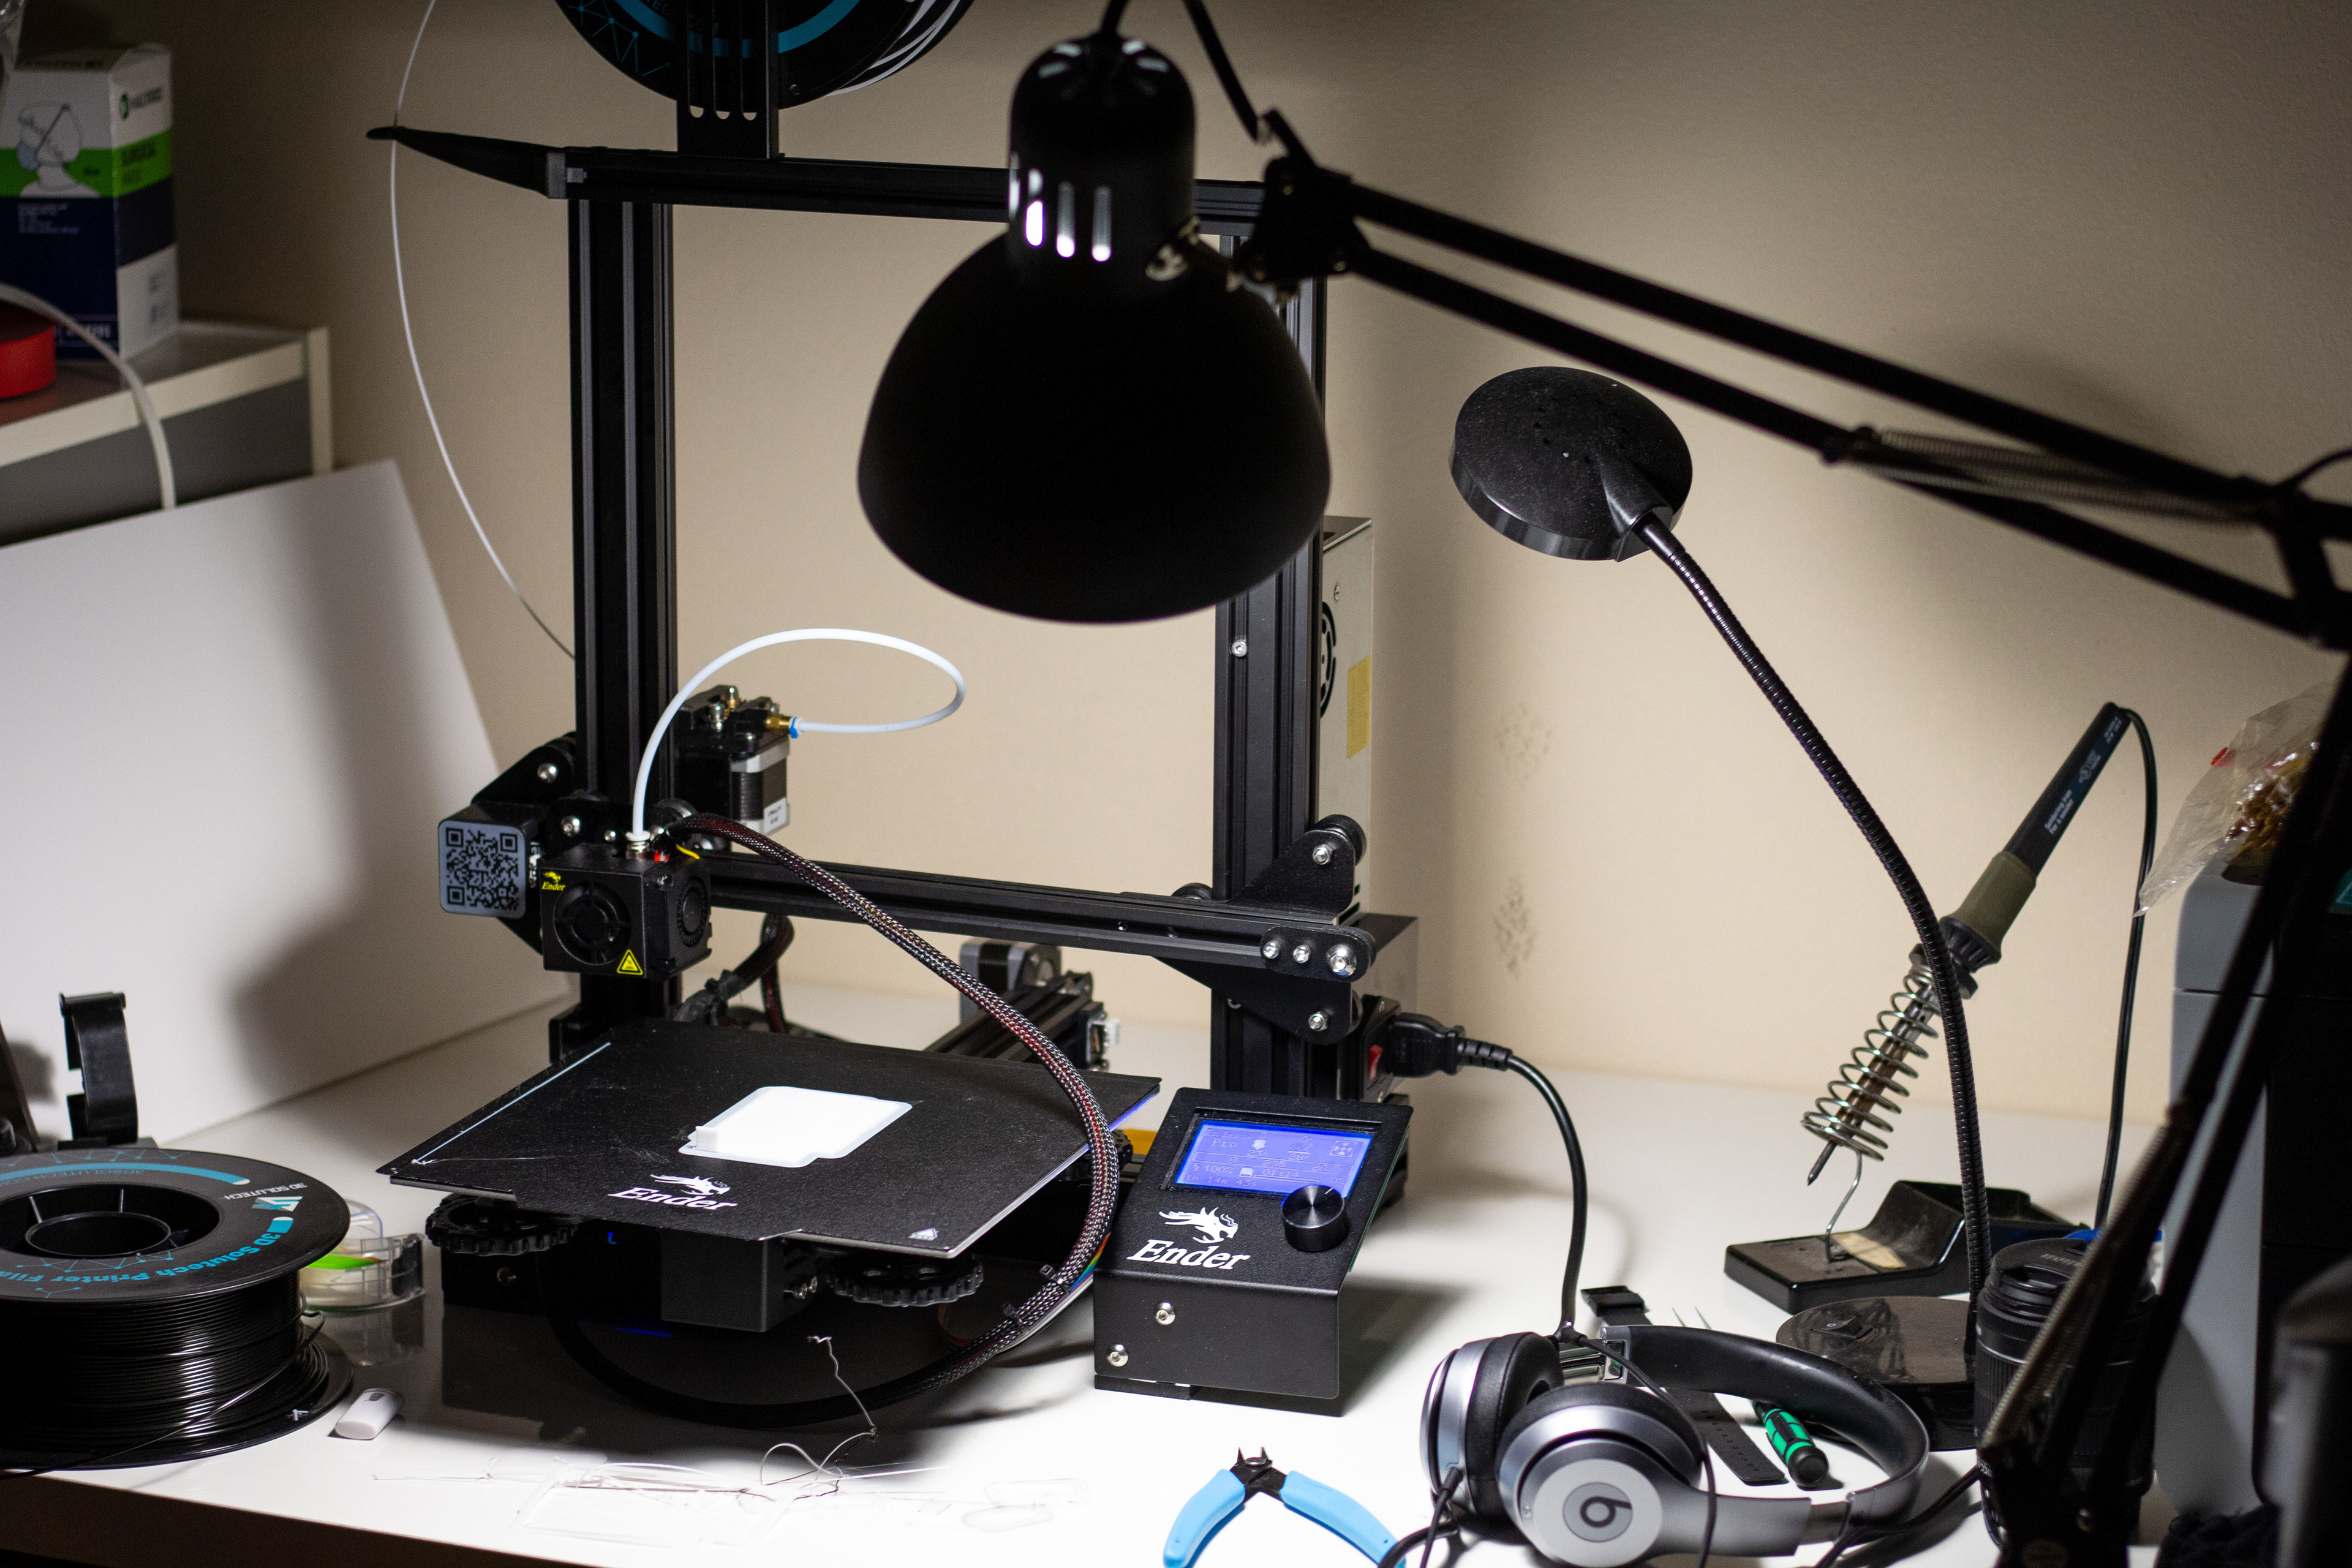
–3D printer (or other rapid prototyping machine)
–CAD software & slicer program
*A note on sourcing watches: This is the most important decision you will make. I went through six watches over the course of creating this project before settling on the Casio MQ-24 (available on Amazon for ~$18 CAD). I recommend you read through this entire tutorial to understand what the project entails before making your selection. Some criteria to consider include:
–It must be an analog quartz watch (i.e. no digital or mechanical watches), because this project requires a stepper motor to tinker with.
–Consider monetary or sentimental value: it is very easy to err in the soldering or disassembly and end up with a broken watch, so consider something replaceable.
–Mechanism should have metal screws (machine screws) rather than plastic plugs, so it can be reassembled.
–Stepper motor contacts should be reachable with your soldering iron; ideally the entire motor can be removed and replaced without disturbing the gears.
–If you intend to hide your Arduino components inside the case, pick something large enough to do so.
–Personal aesthetic preferences.
3. How it Works
A discrete quartz movement contains a Lavet-type stepper motor which rotates a precise amount (1/60th revolution, or one second) every time the current reverses direction. The Arduino, upon inferring a heartbeat from the pulse sensor readings, outputs HIGH to the L293D motor driver alternating between two pins. Based on the pin, the L293D sends current through the motor in one of two directions, thus causing the second hand to advance every time your heart beats. The other hands on the watch automatically follow suit.
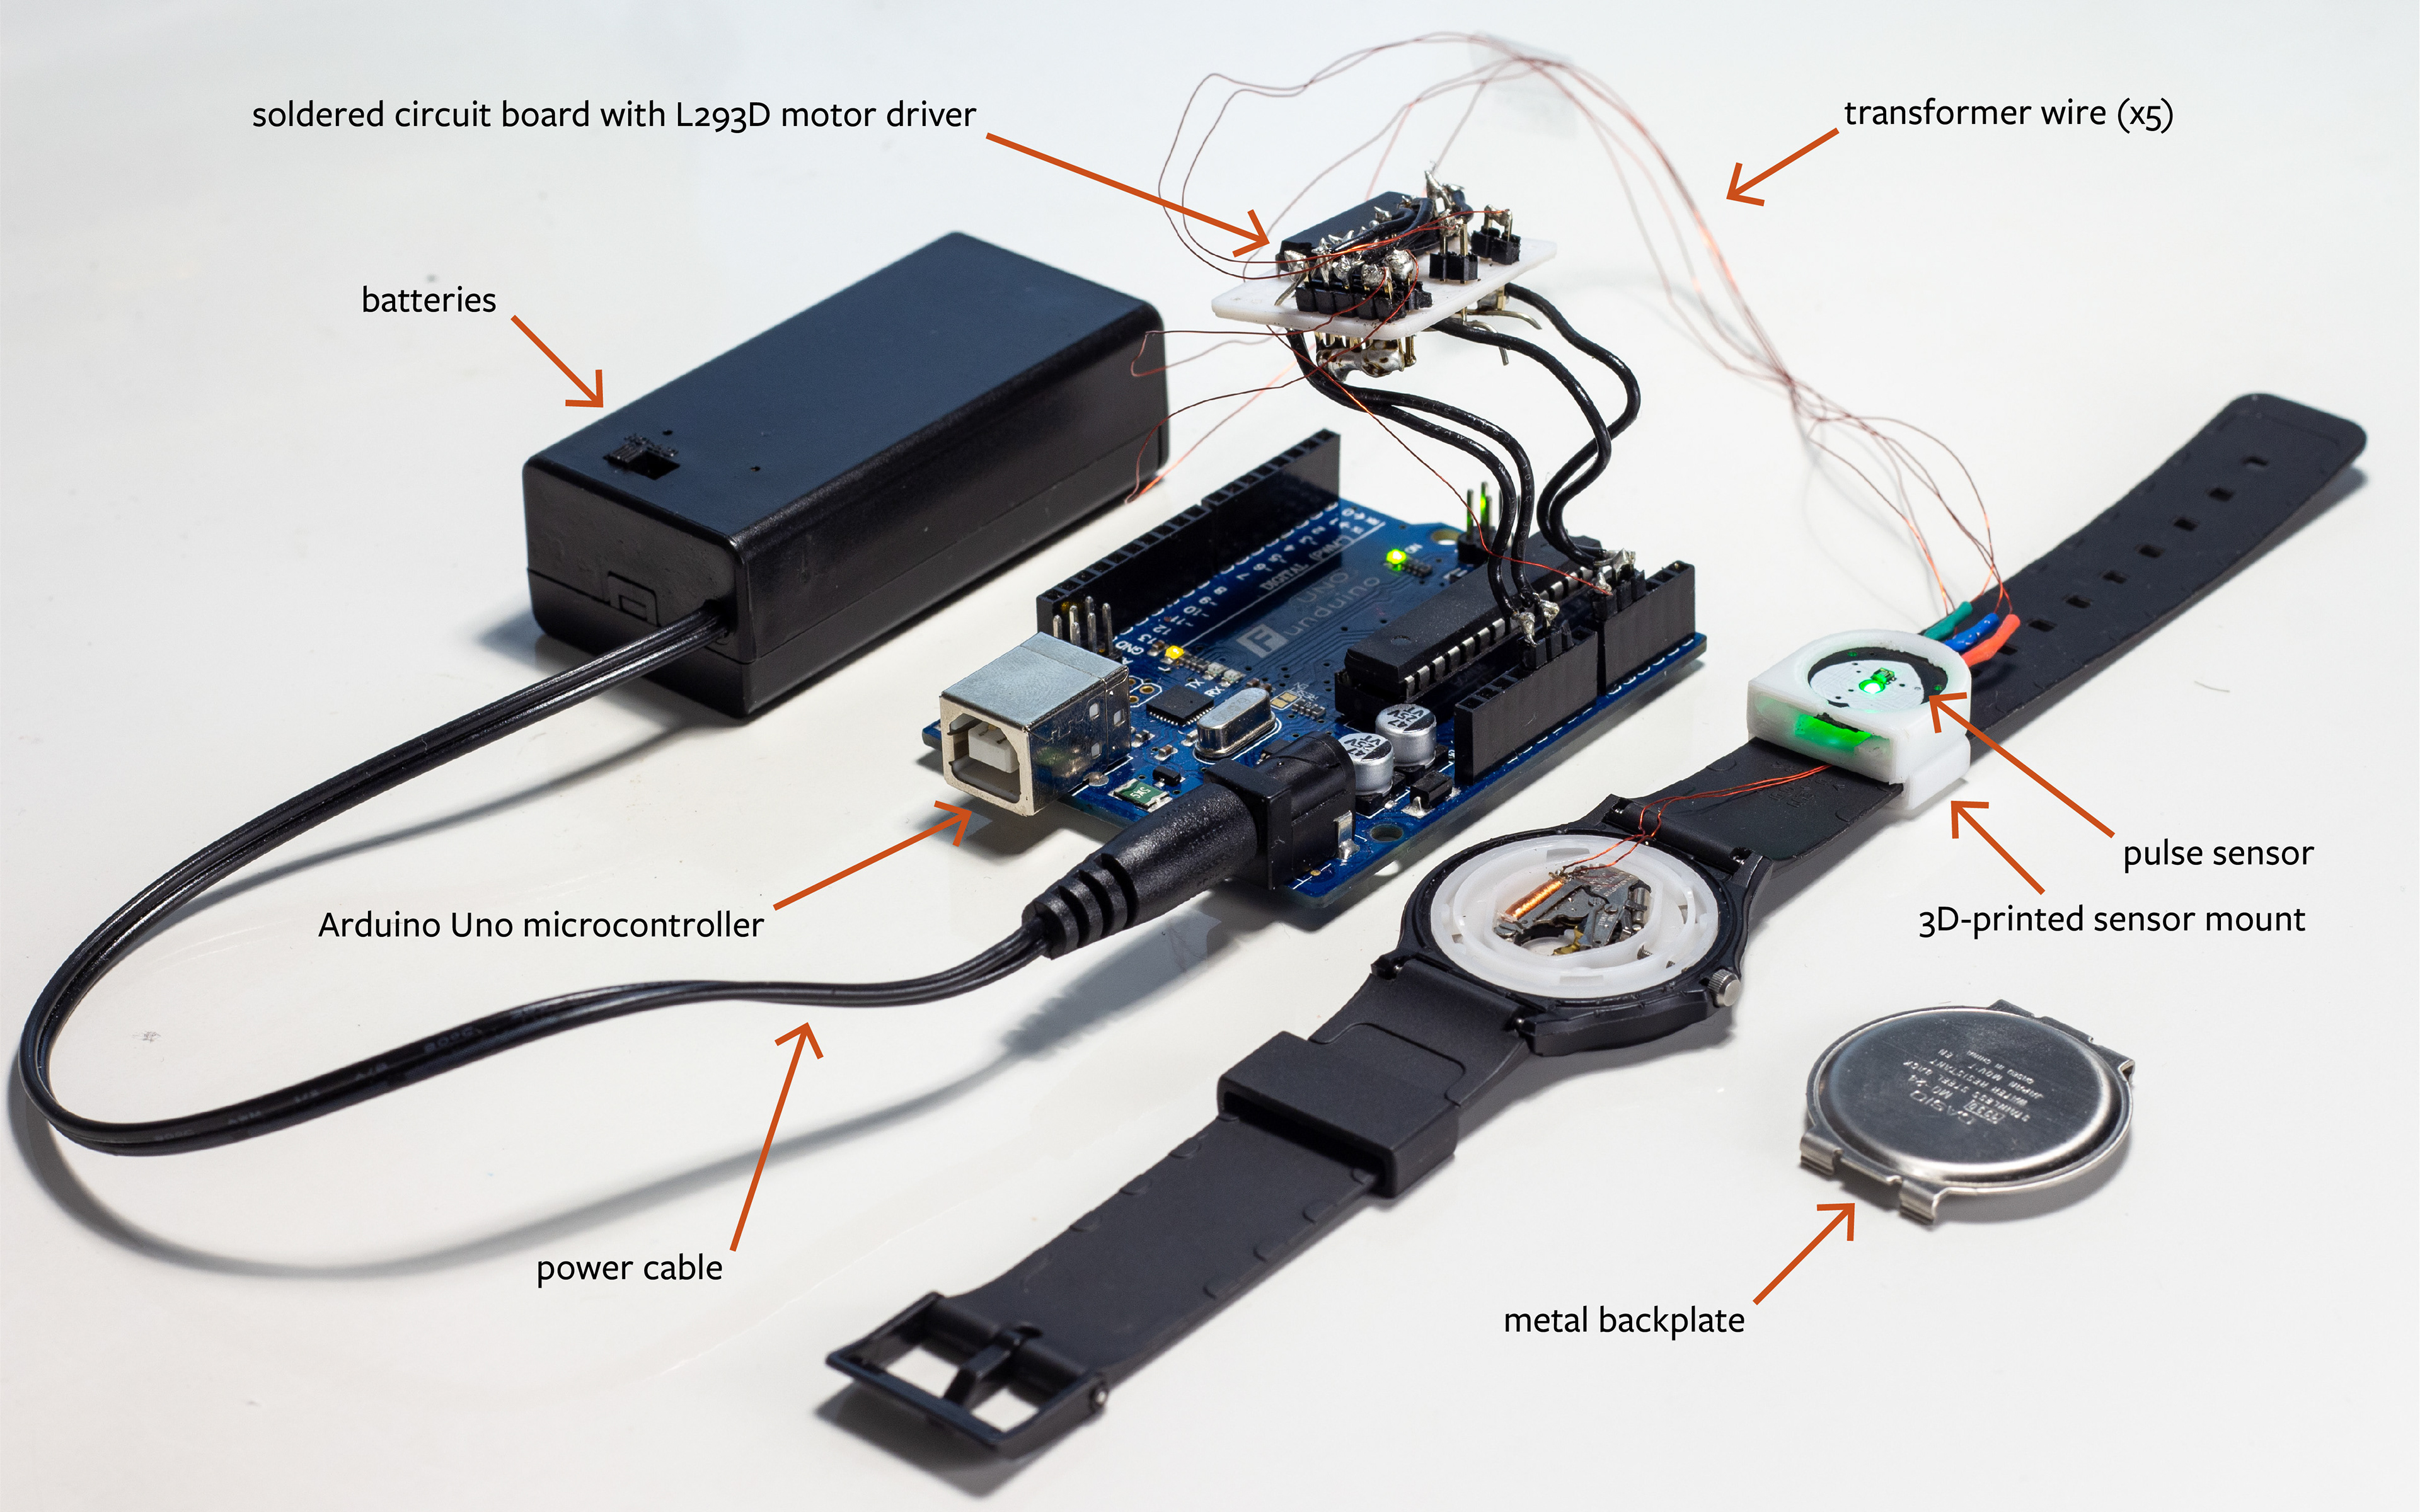
4. Arduino
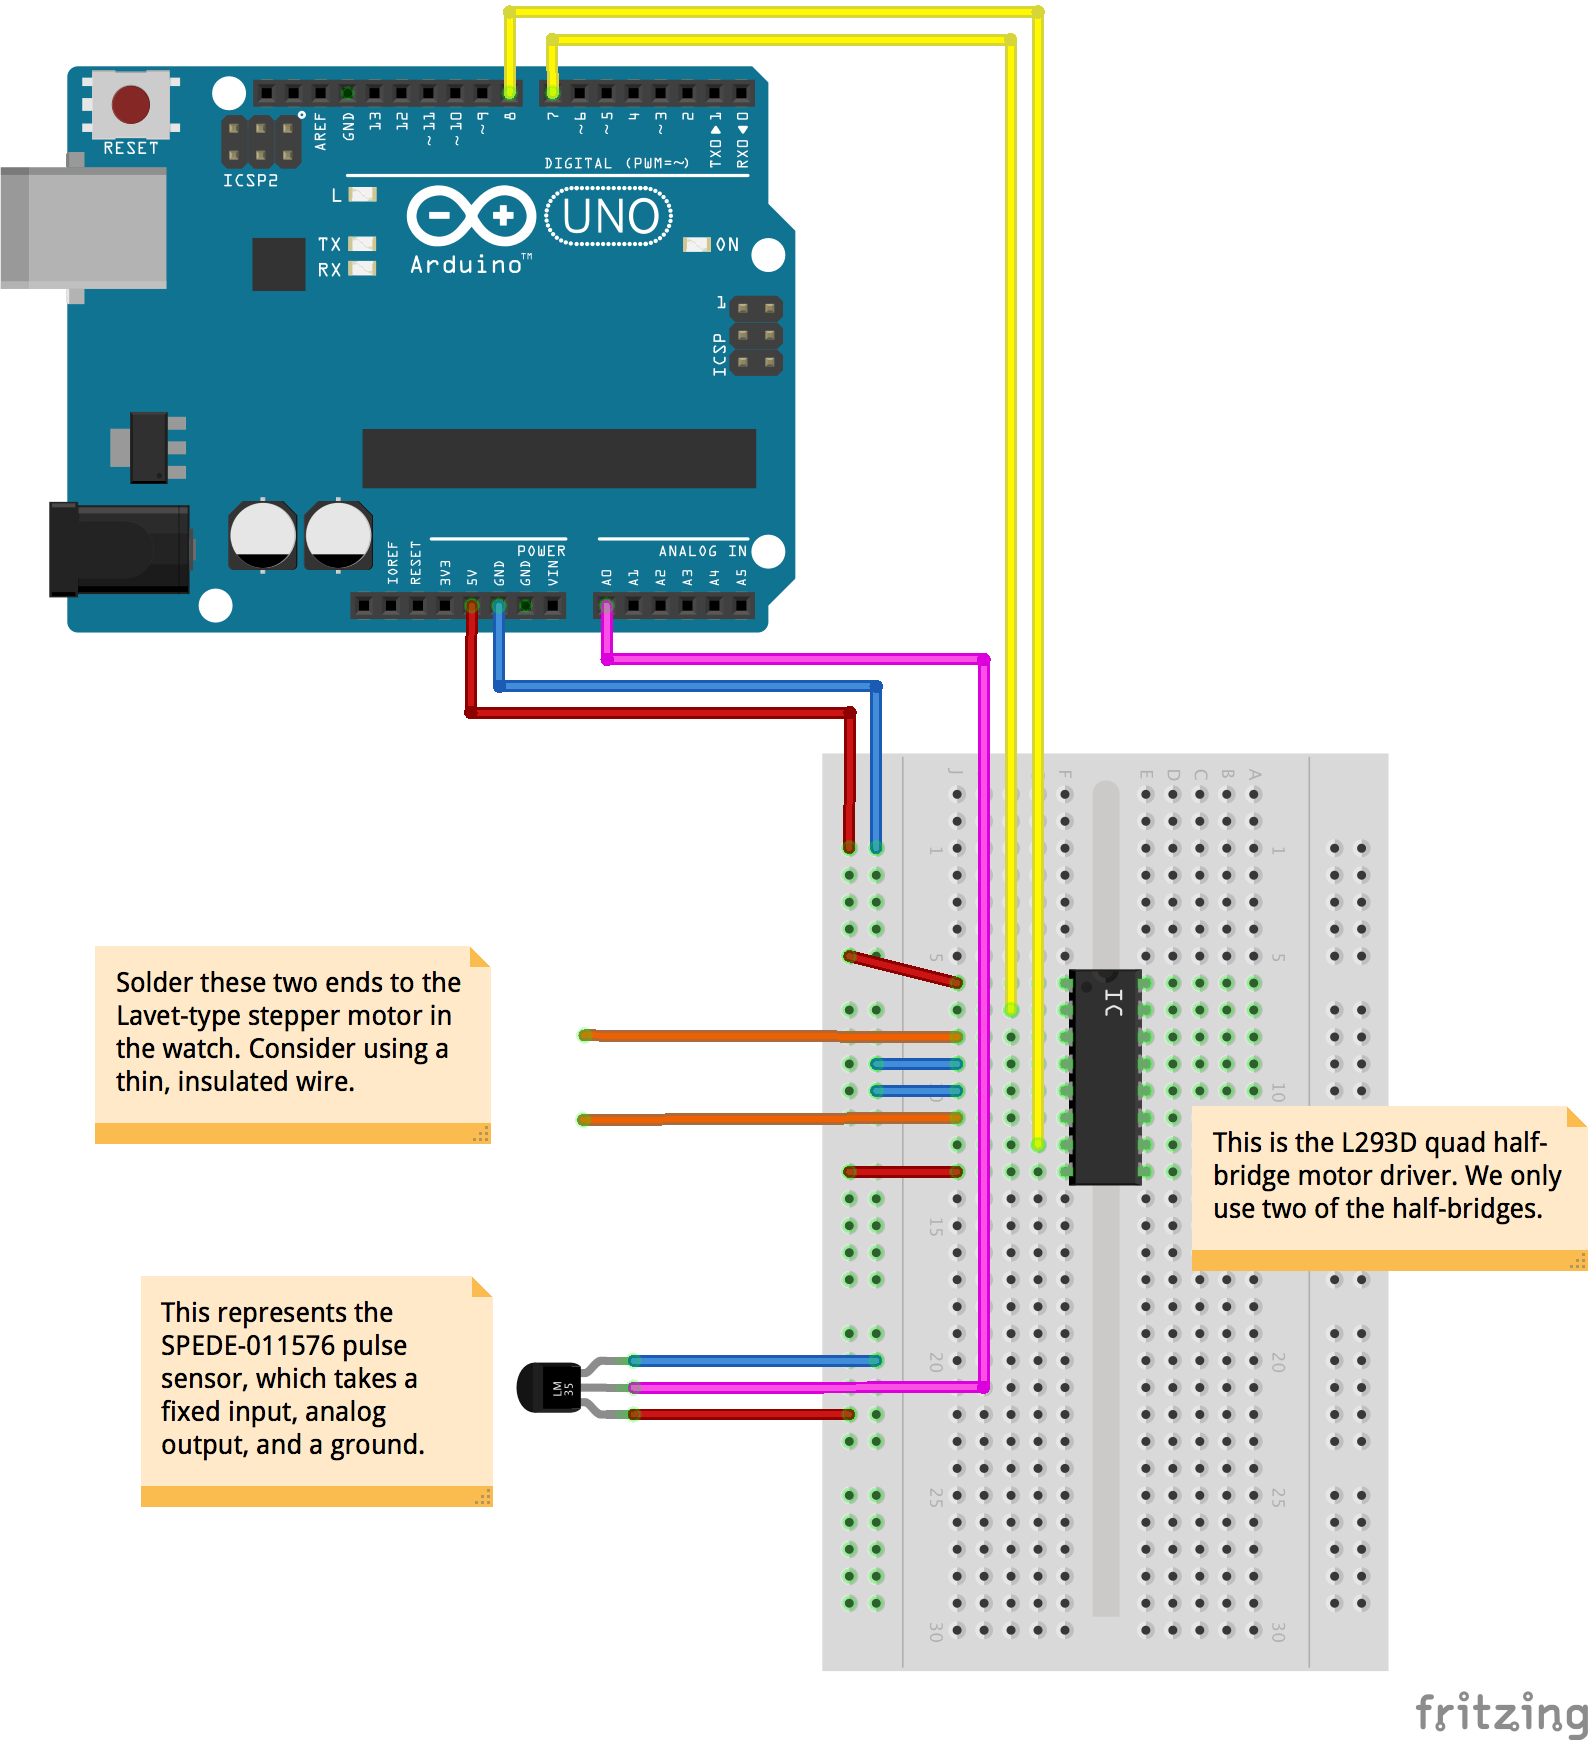
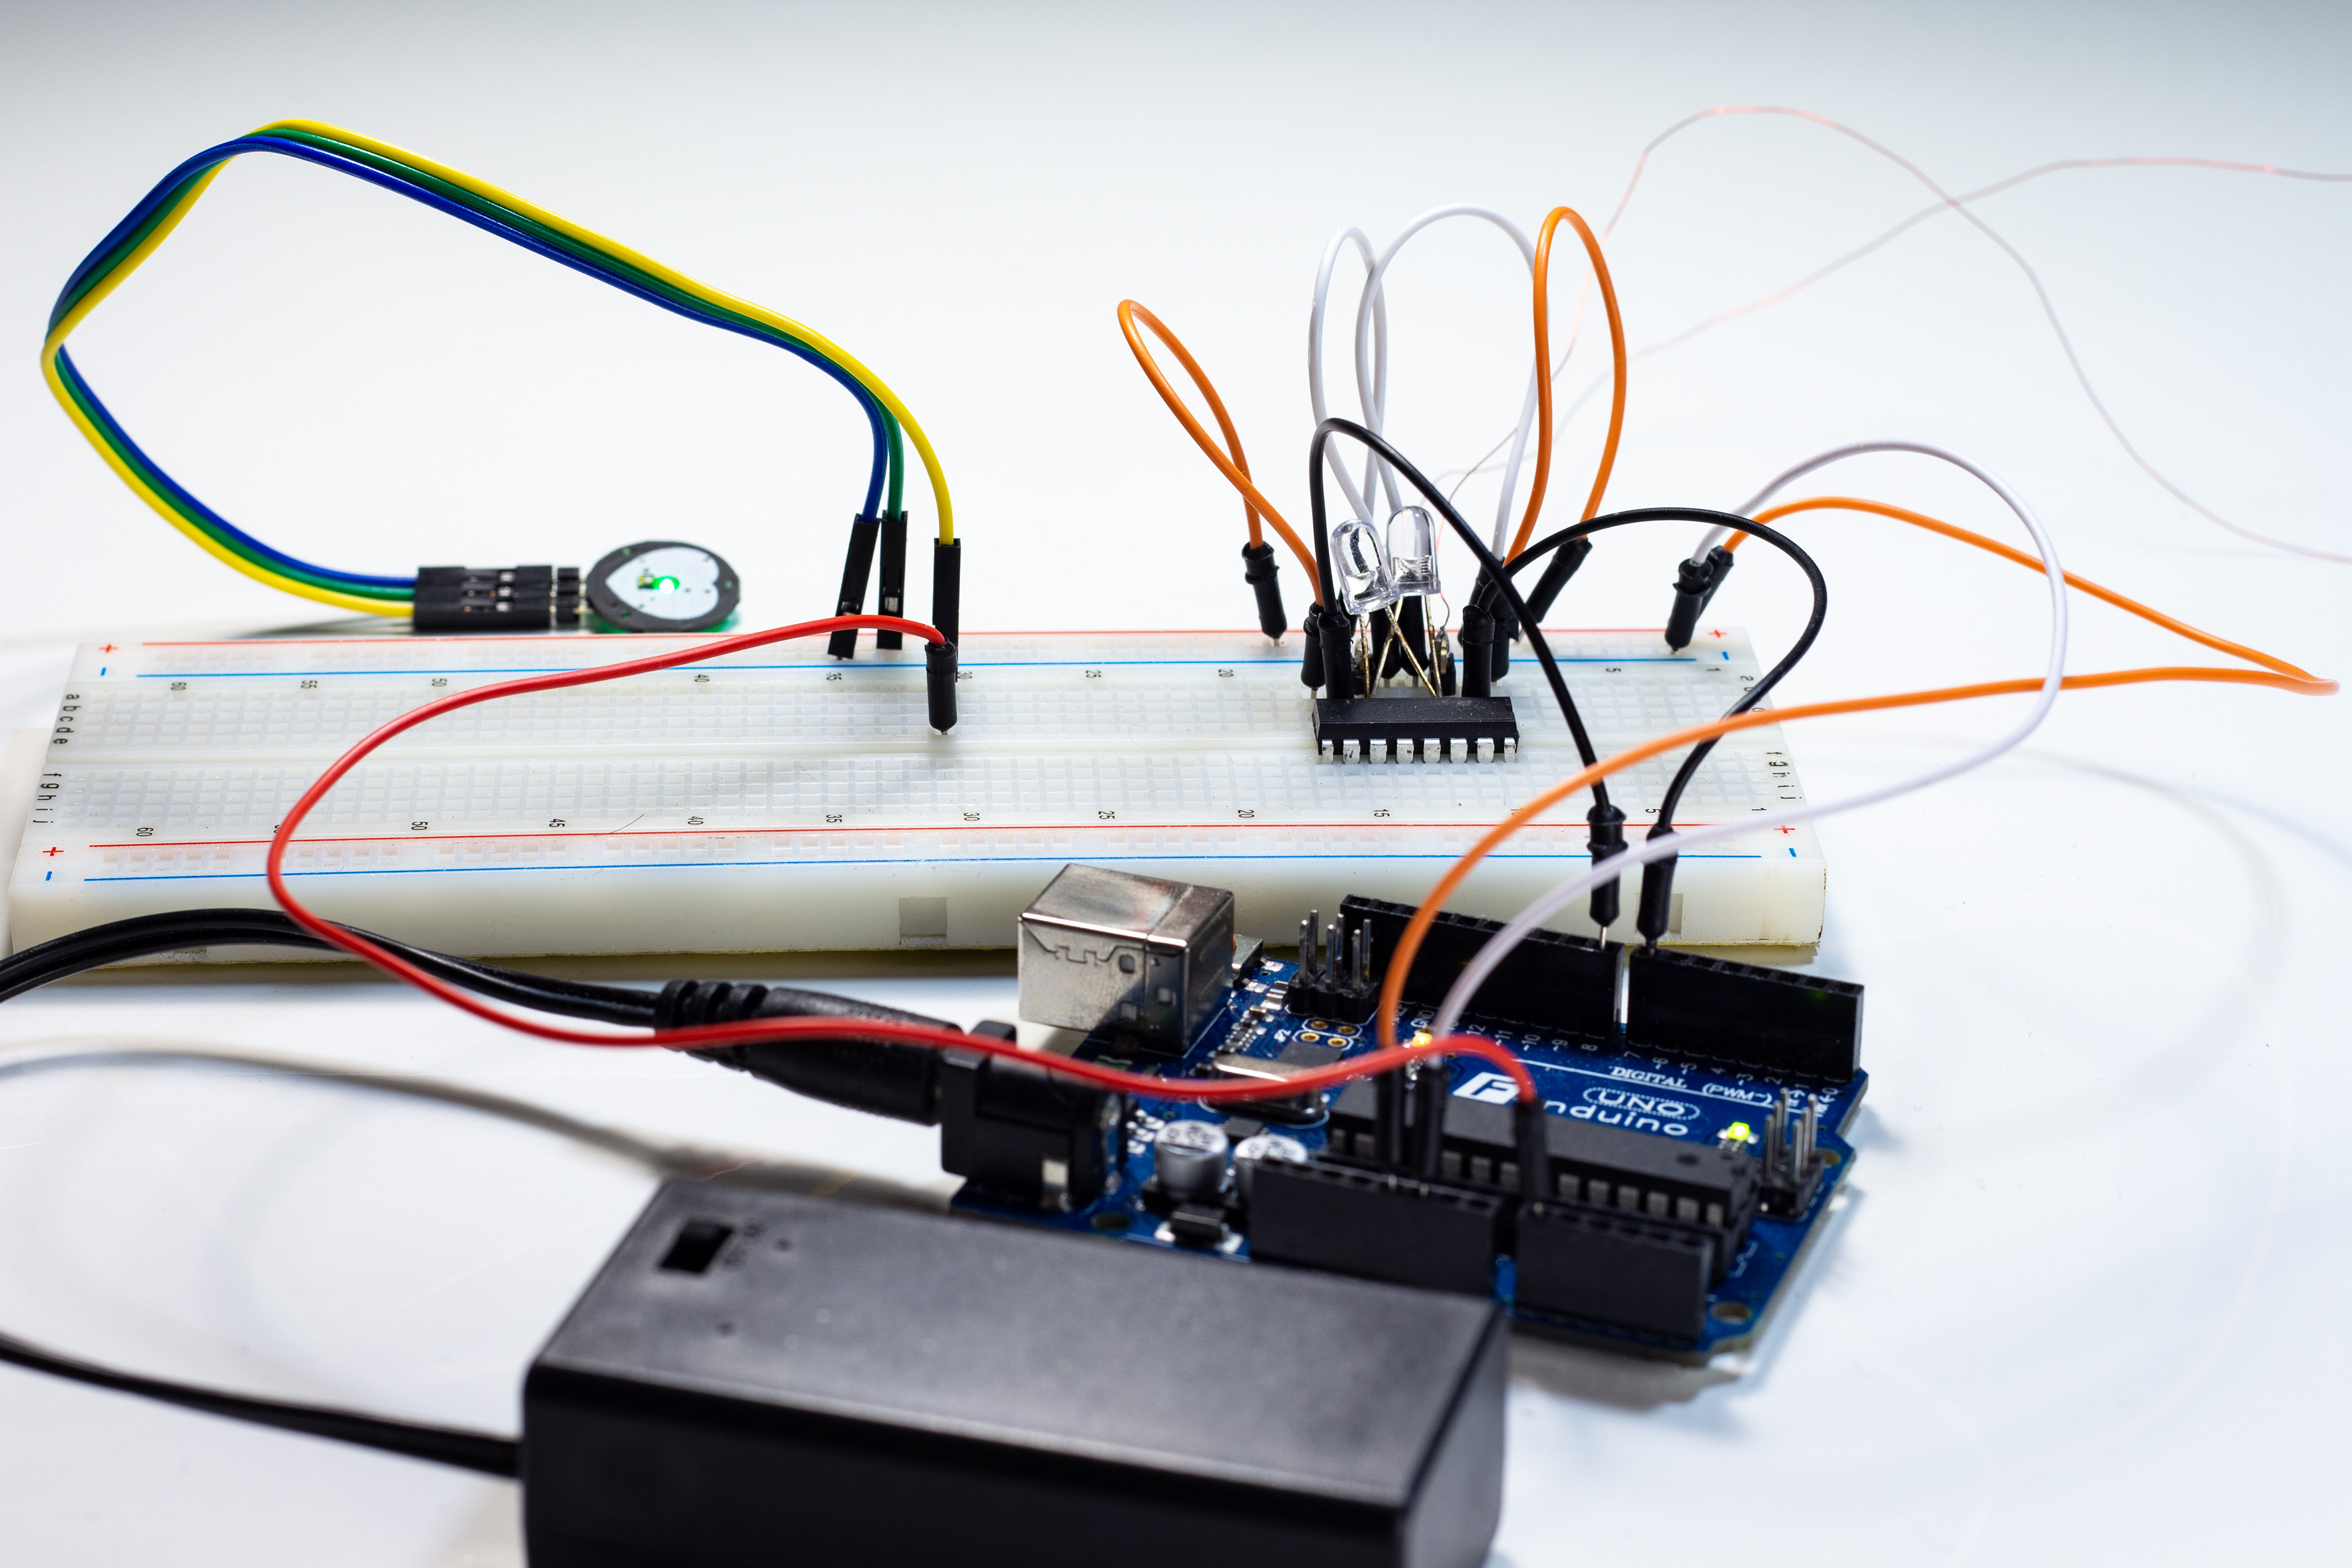
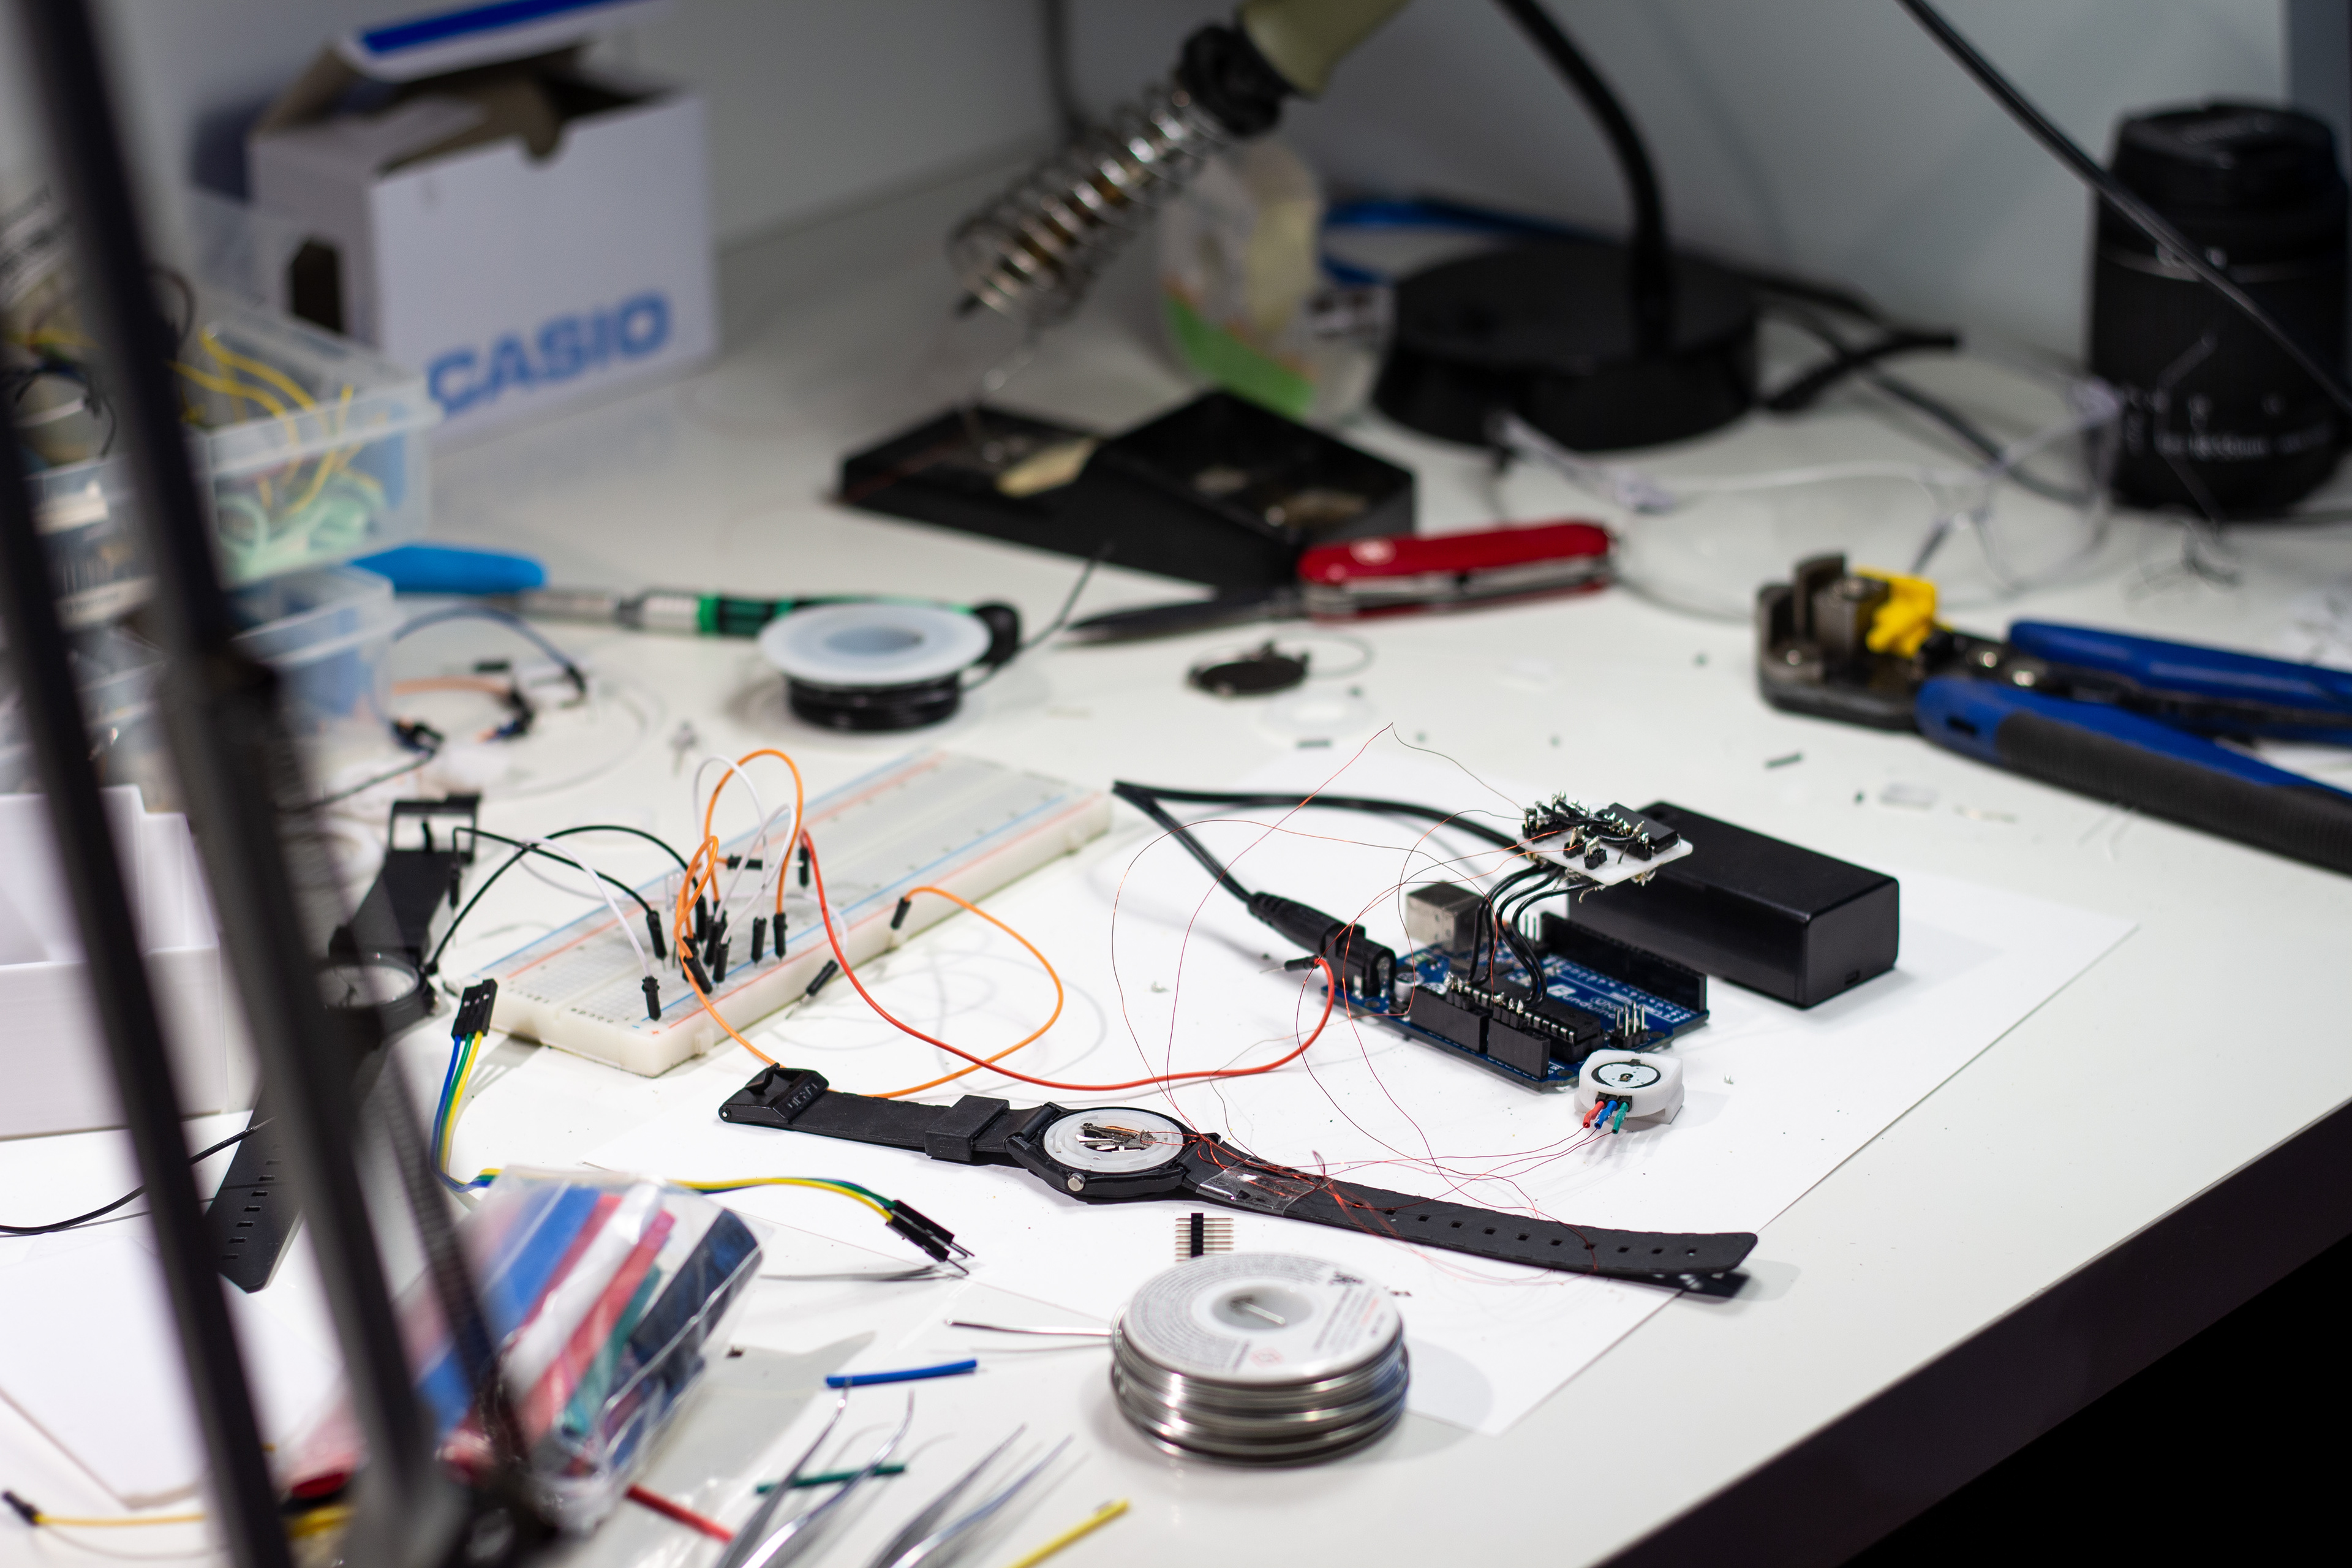
I recommend you prepare and test the Arduino components prior to soldering the watch, so you can know right away if you've got things working right or not. (You are by no means constrained to using Arduino in this project.) Consult the Fritzing diagram and code provided to see what I used.
5. Disassembly
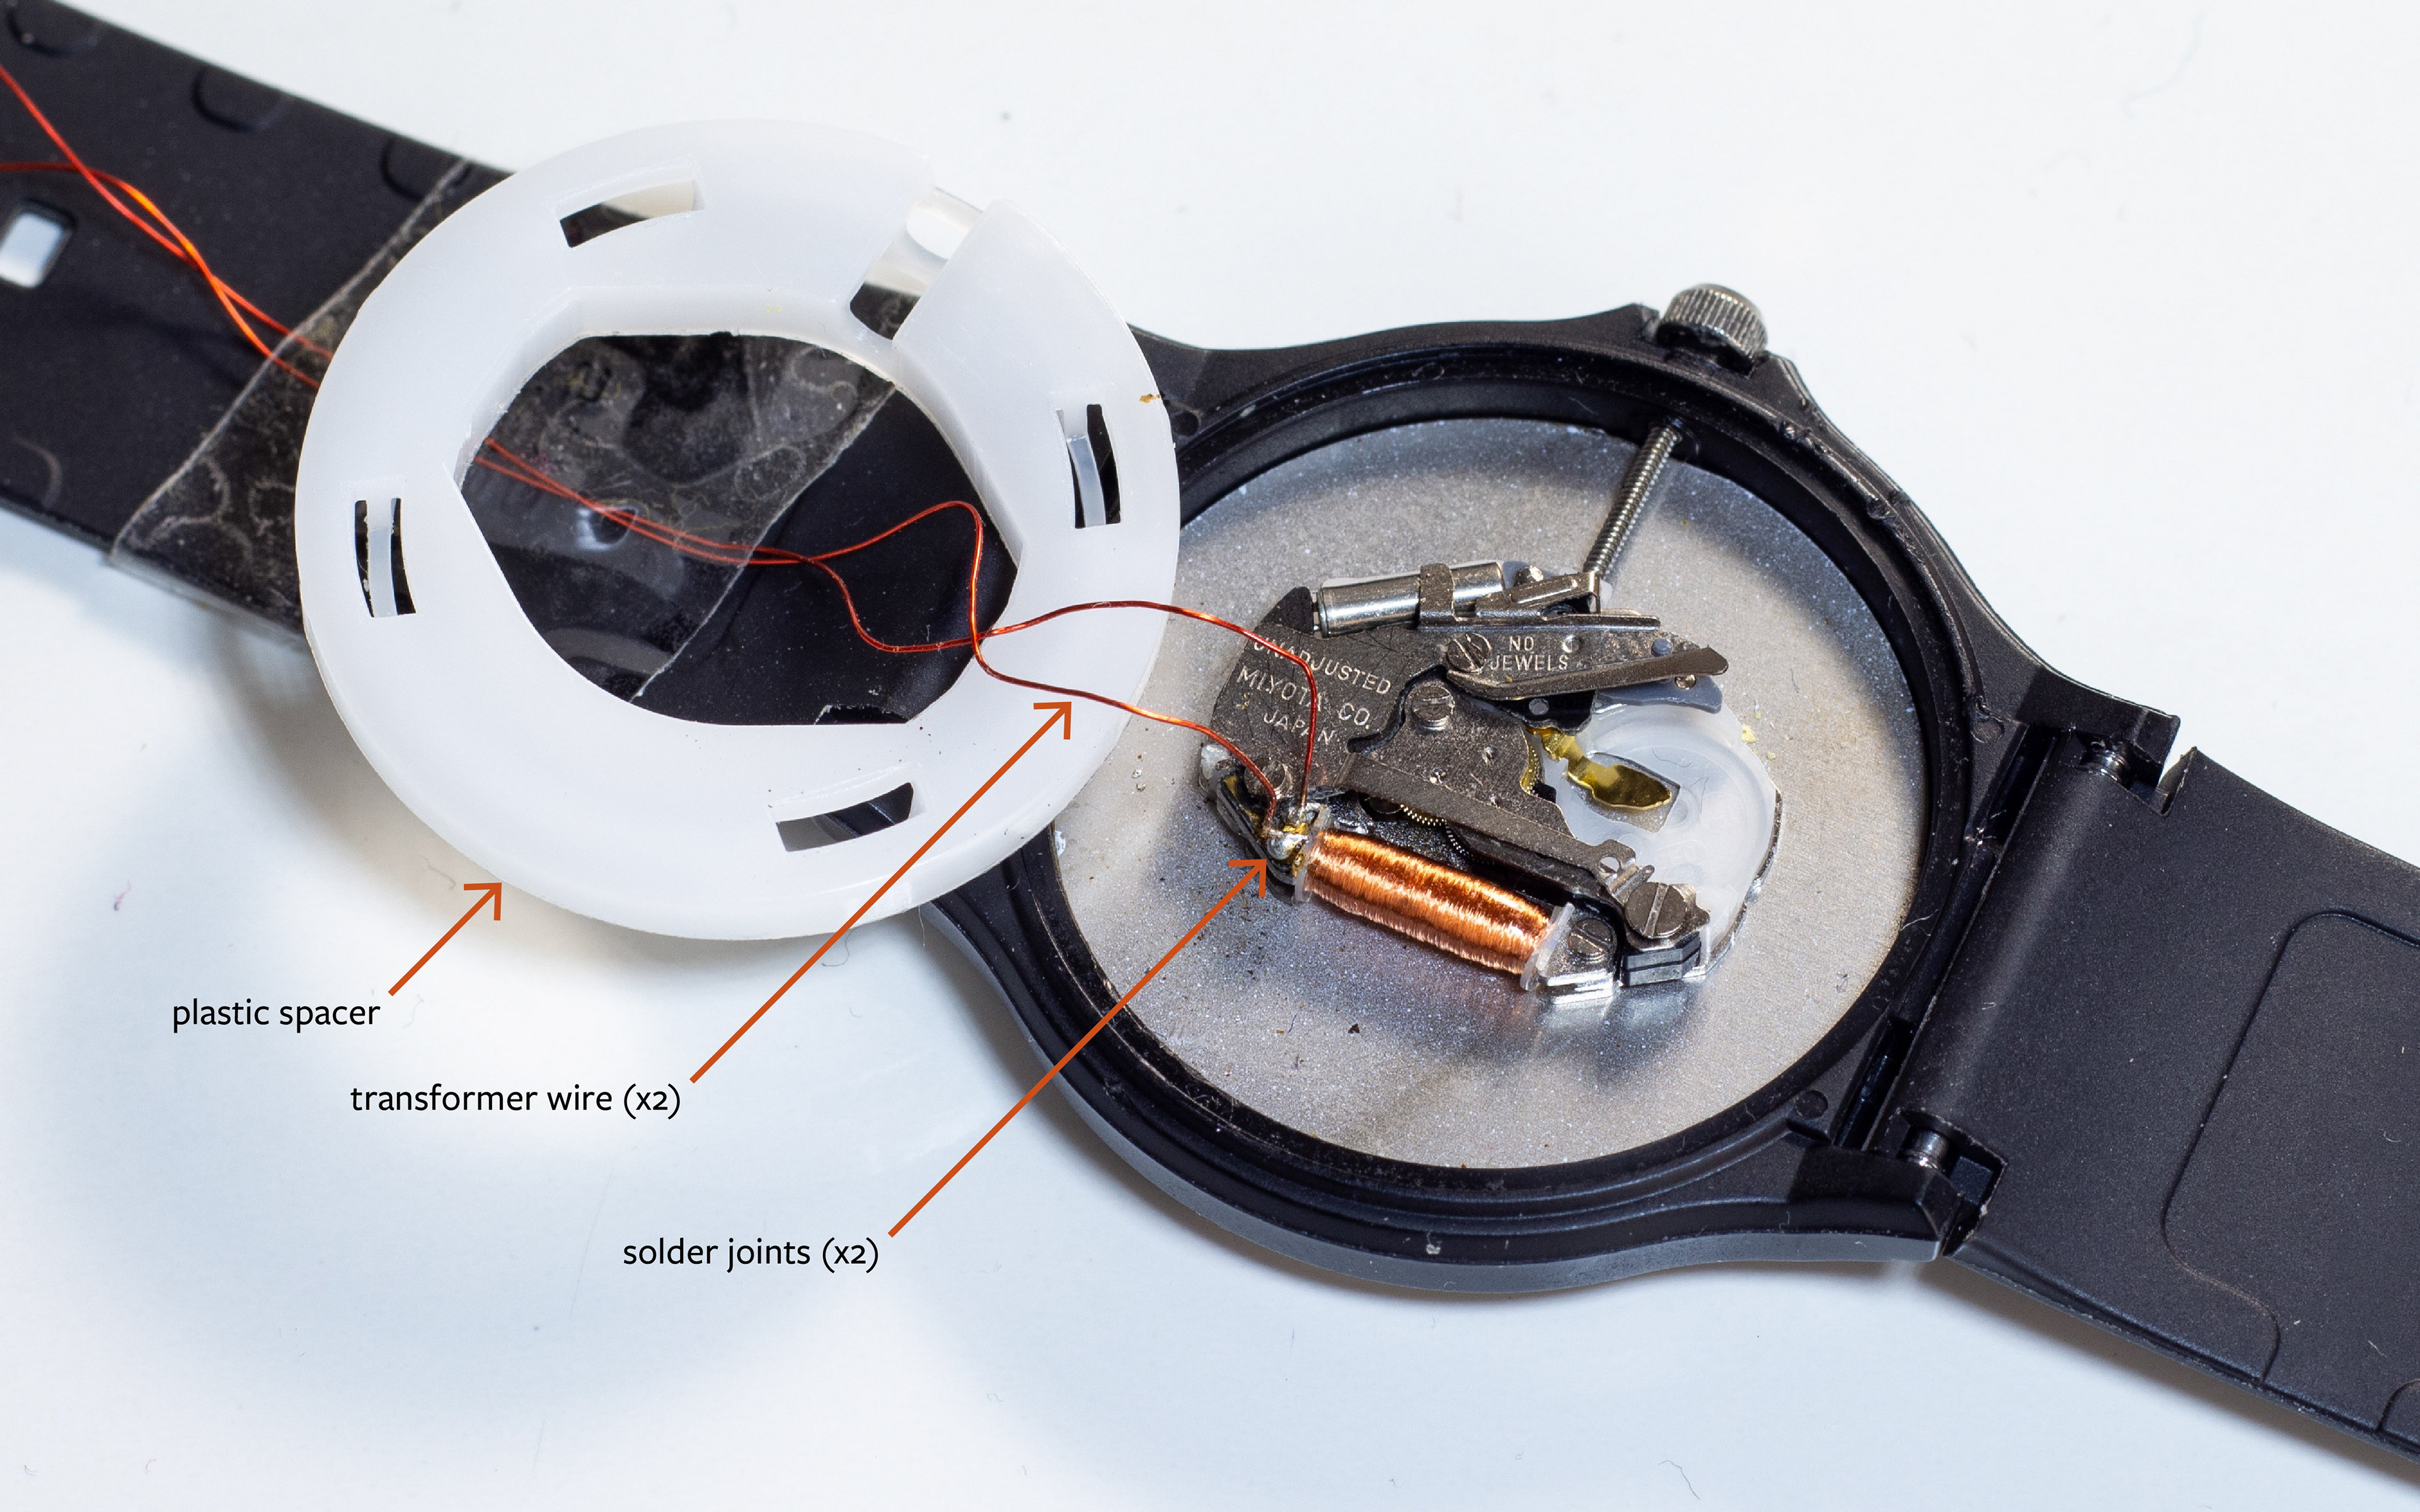
Remove the backplate of the case to expose the mechanism. Depending on the watch, this may require various tools (the Casio MQ-24 is a pry-open case). Then remove the plastic spacer and rubber gasket ring to expose the mechanism itself.
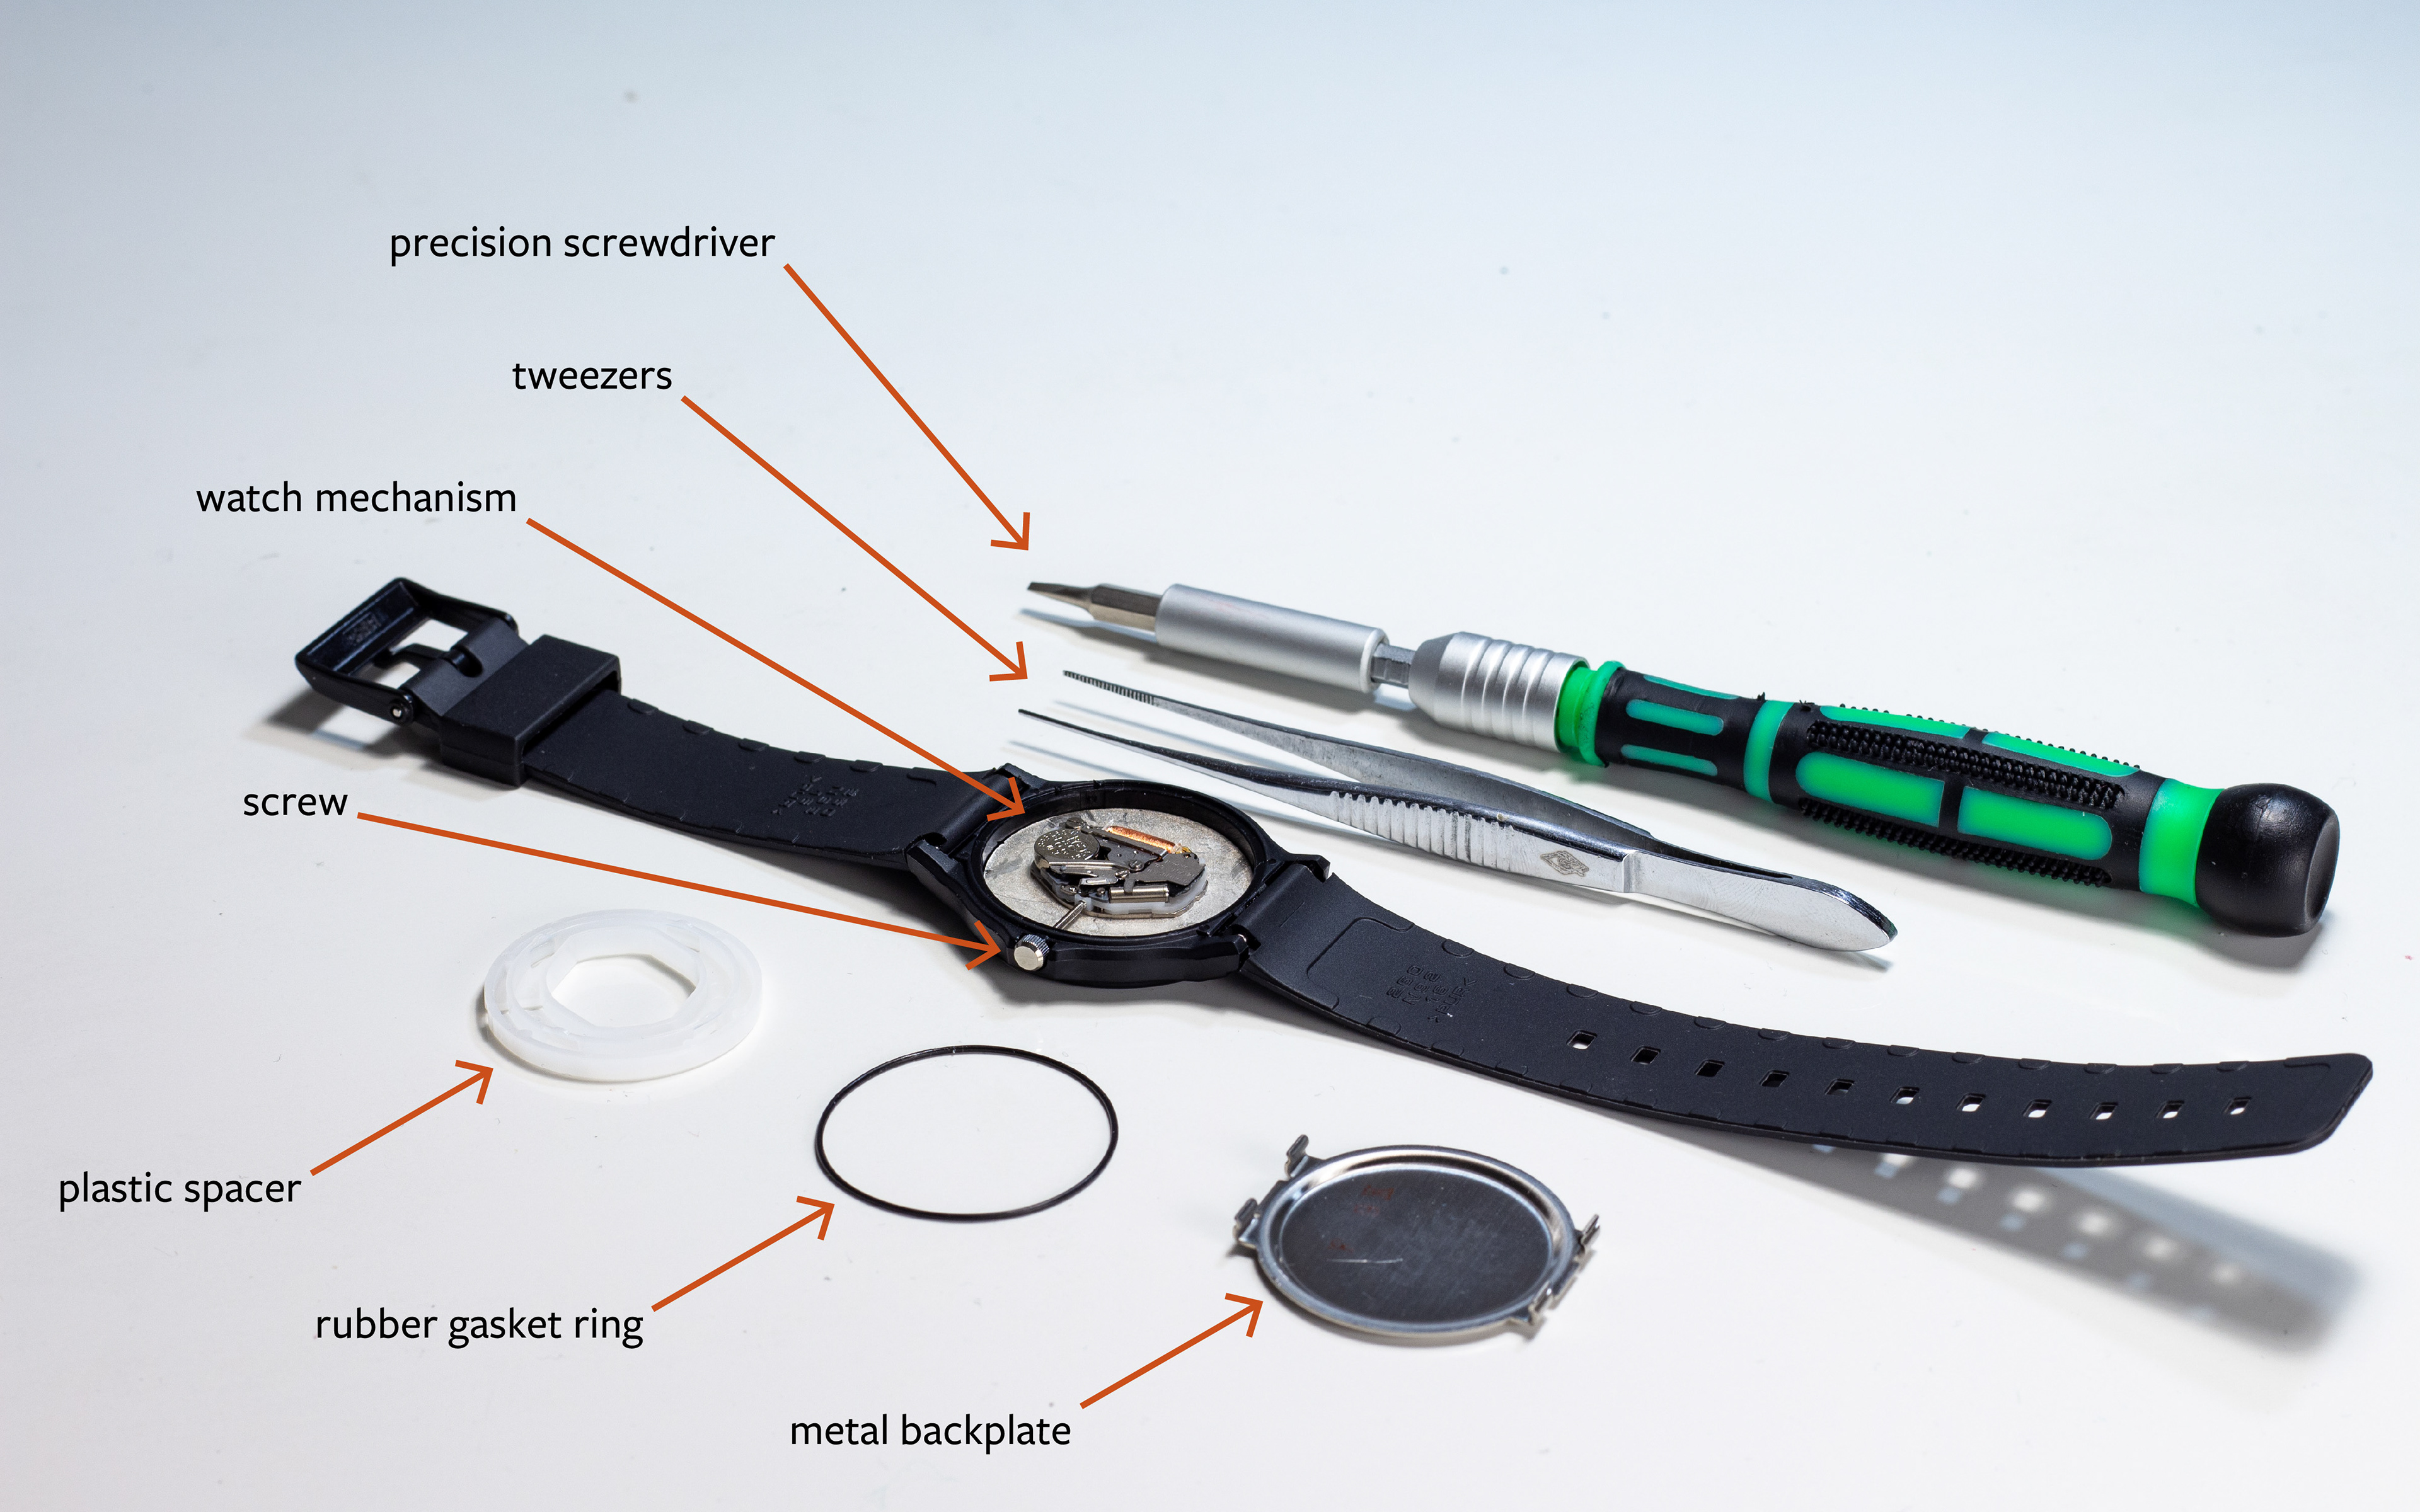
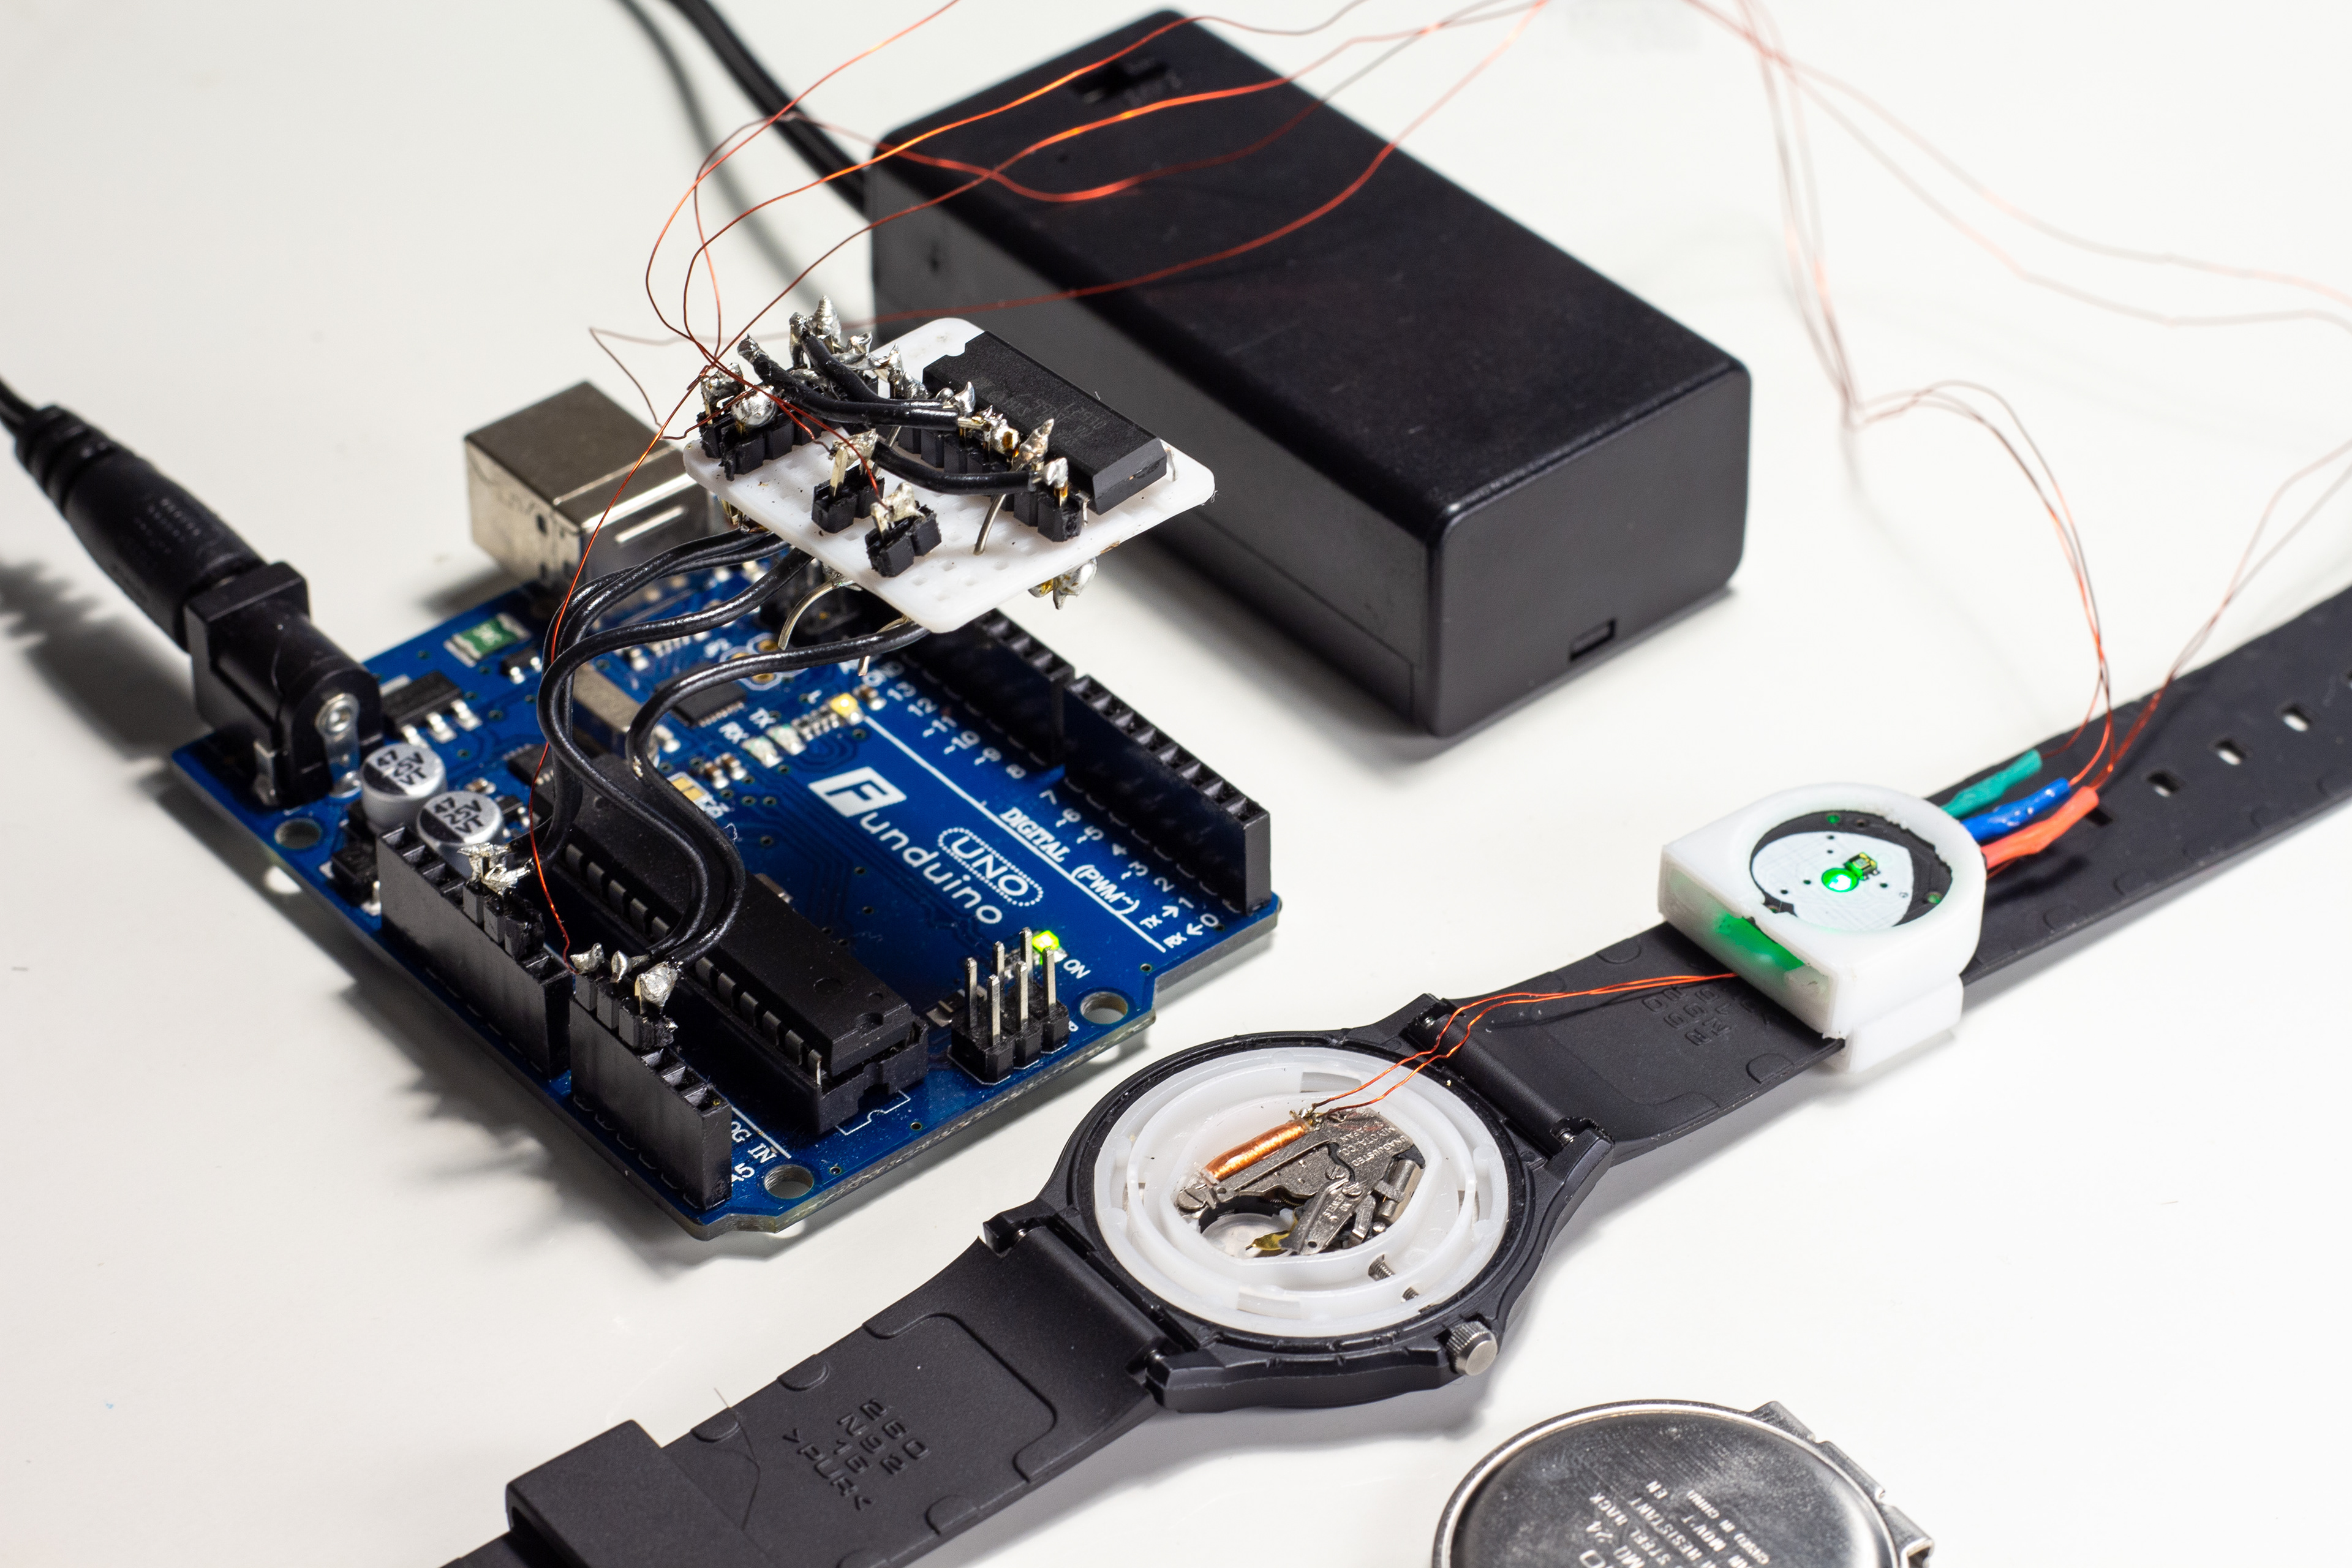
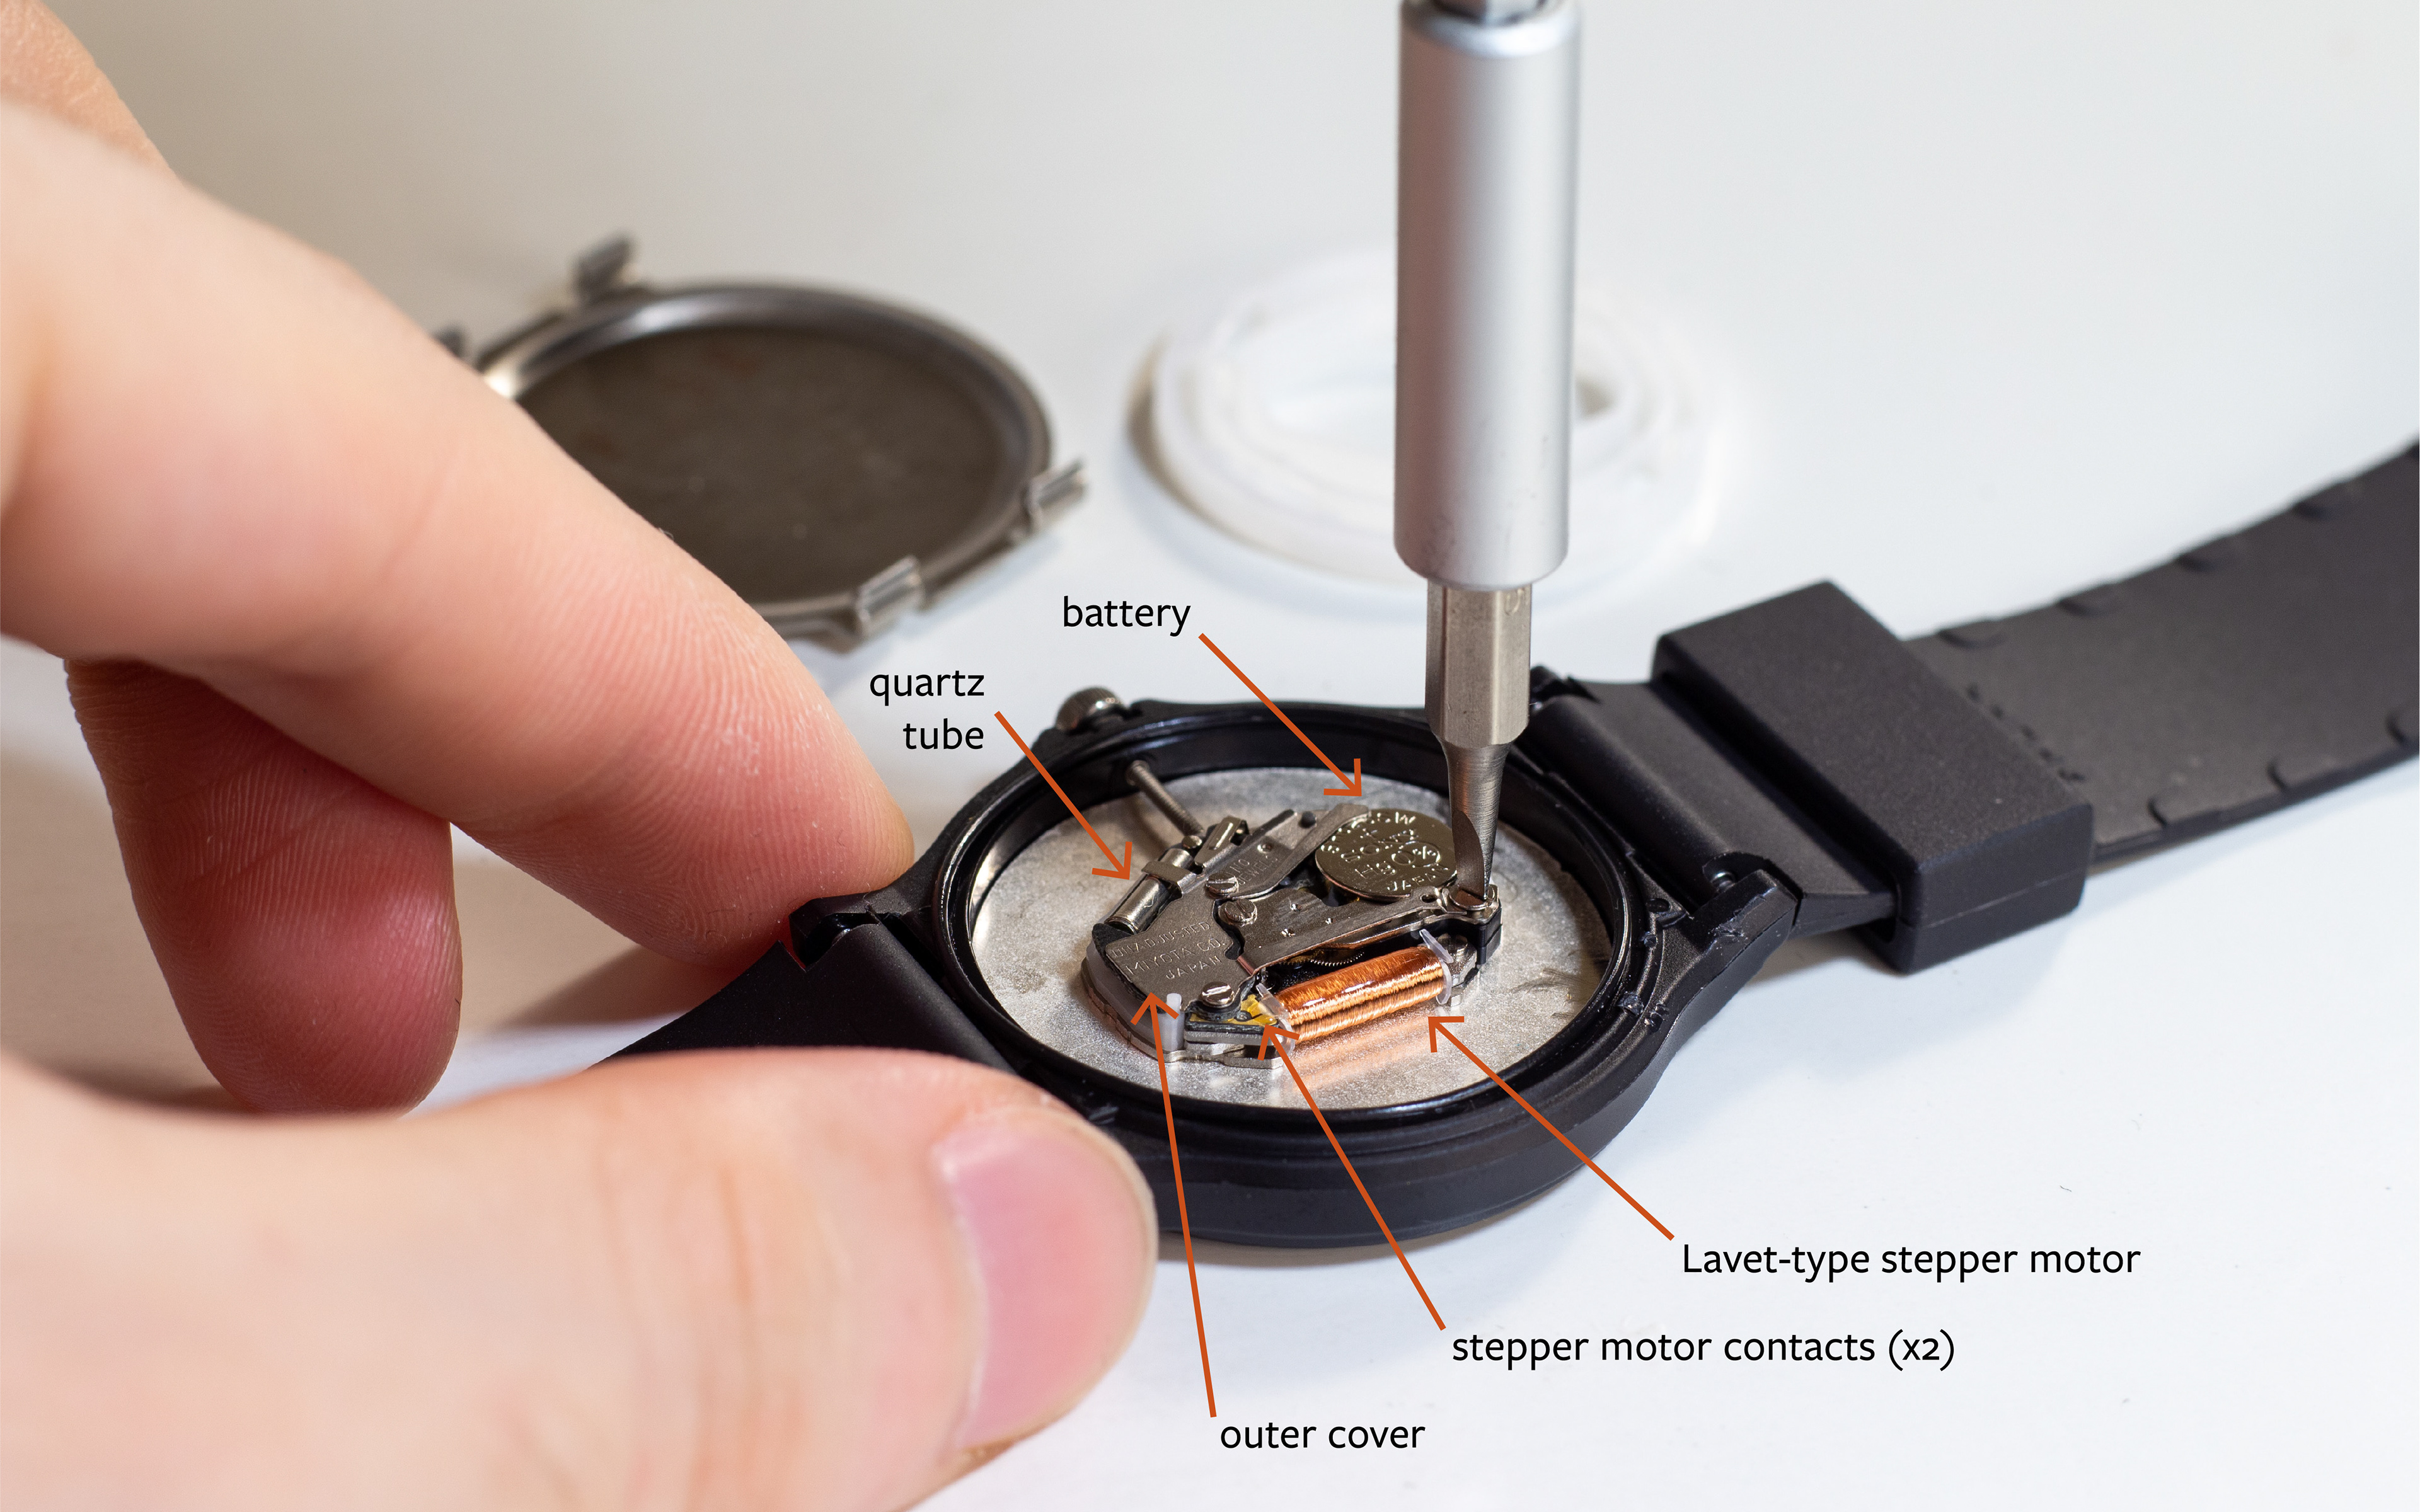
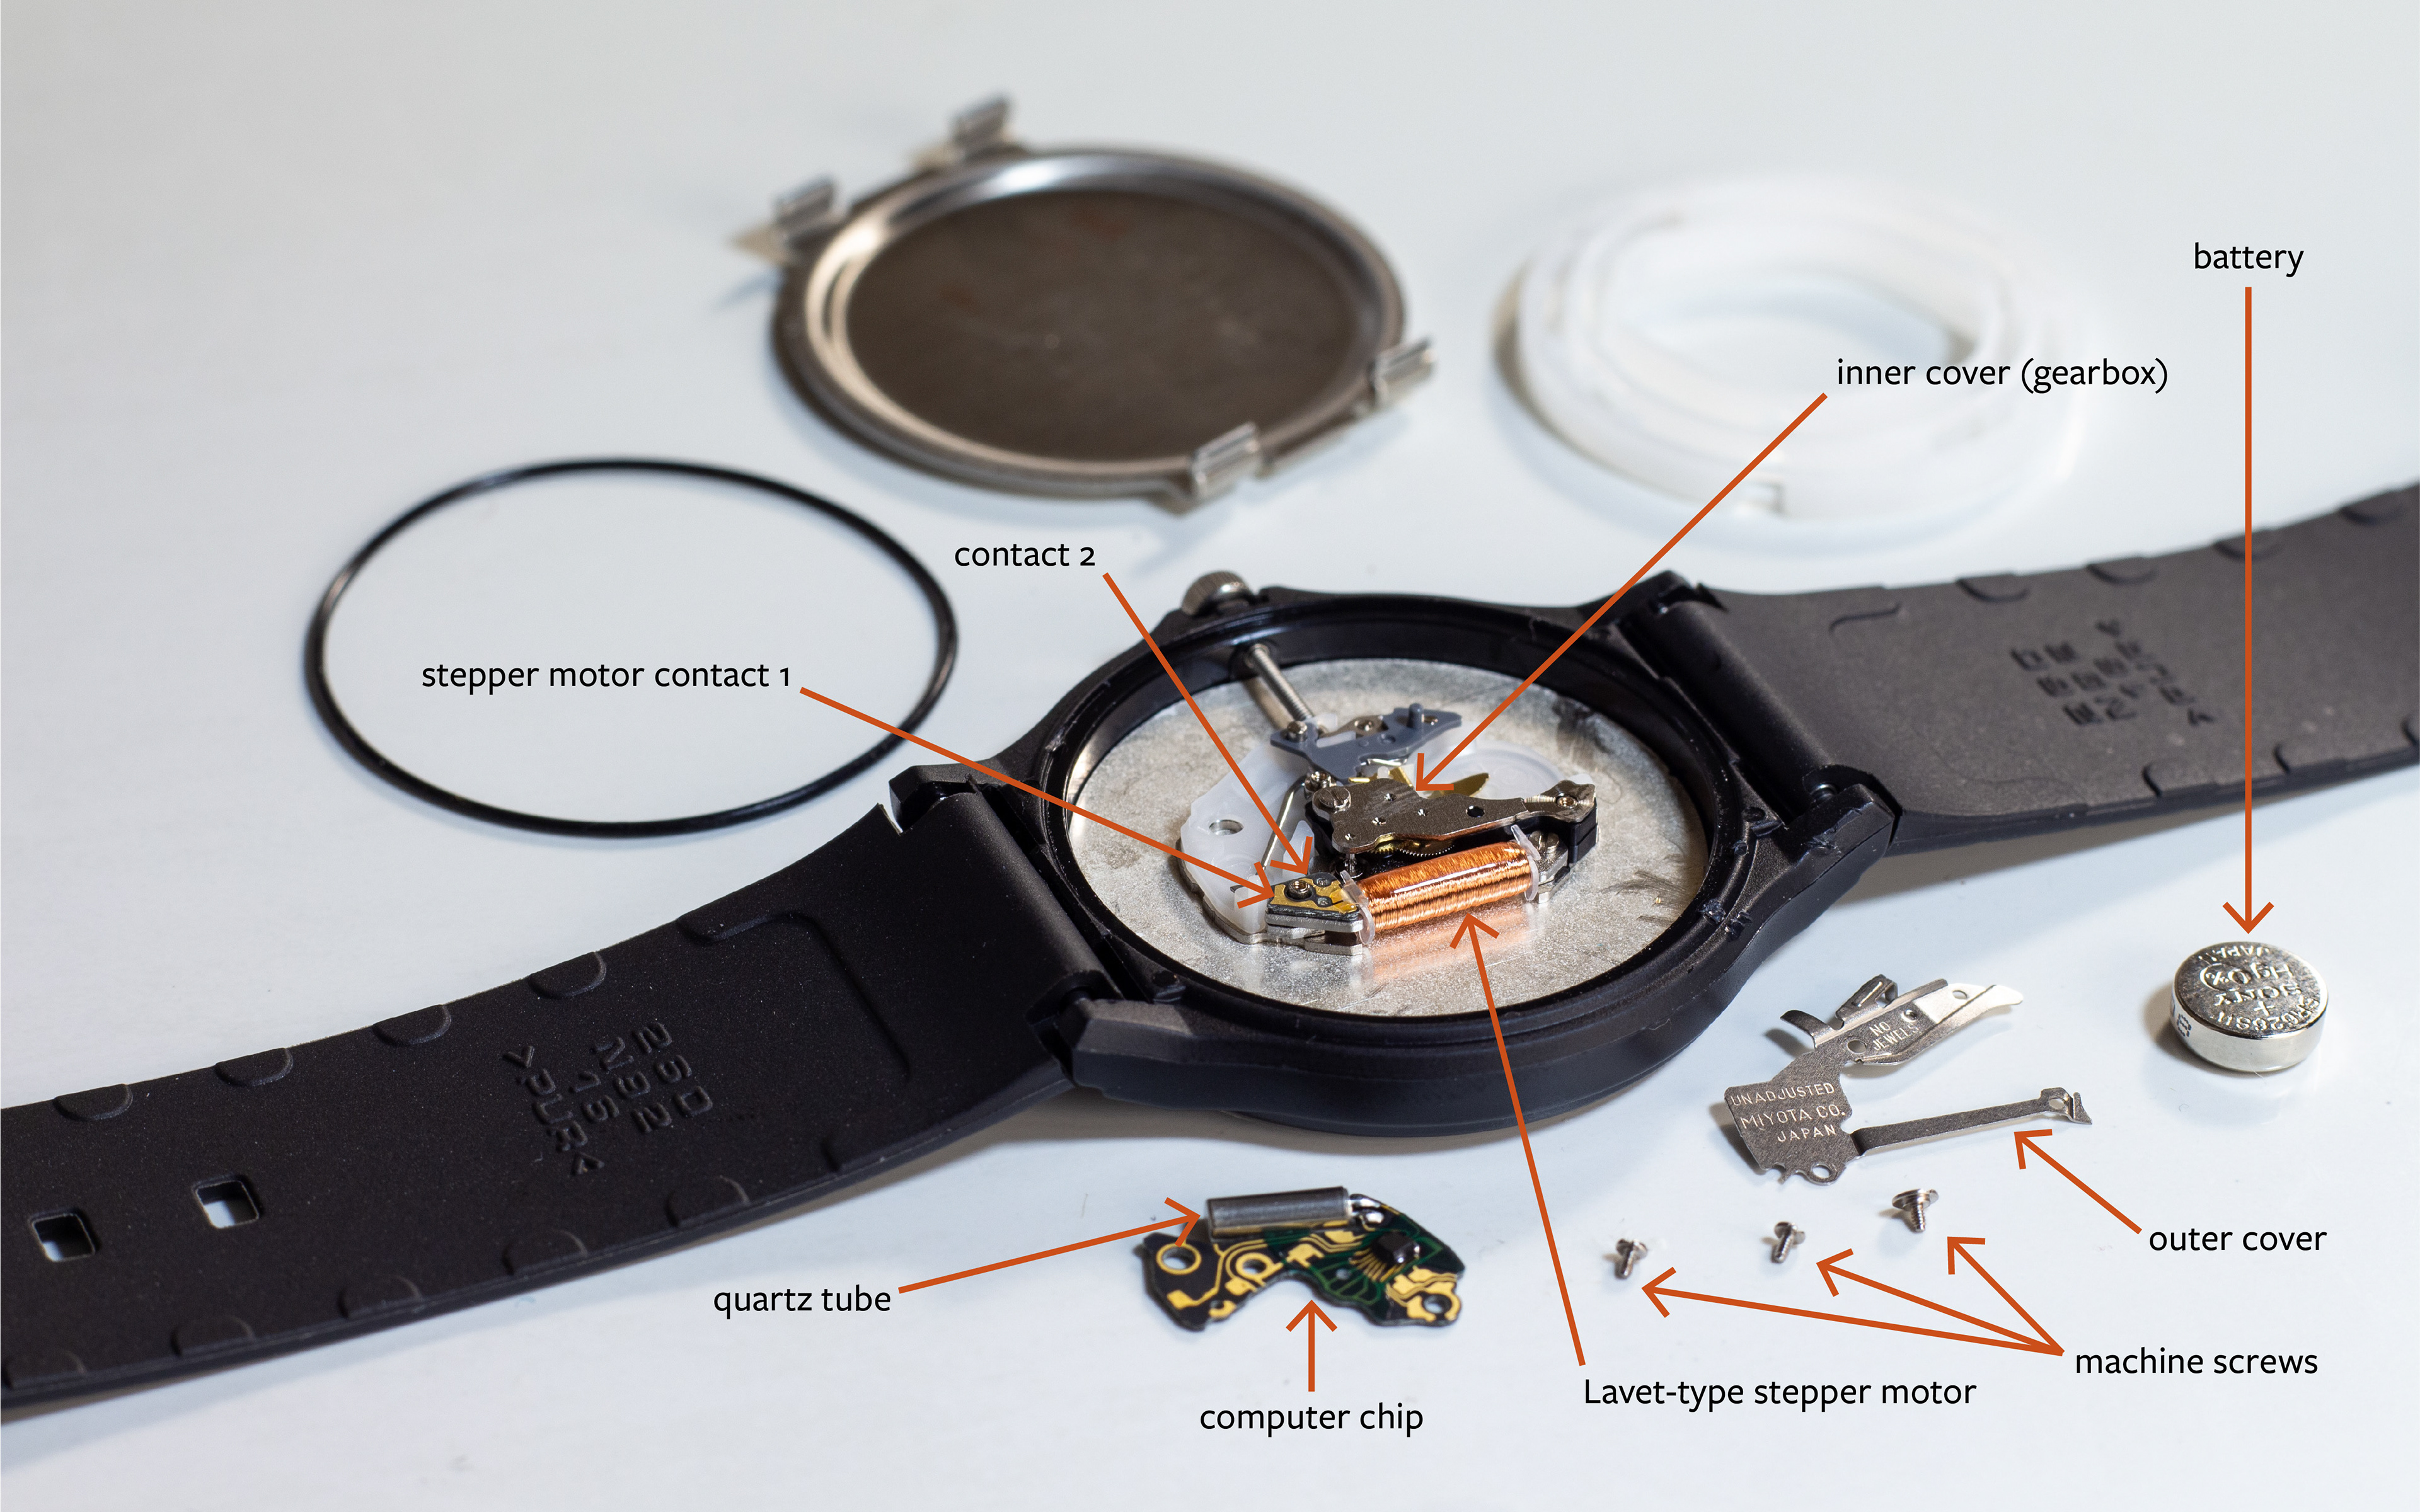
Identify the parts of the mechanism as labelled in the images below, especially the two metal contacts on the stepper motor which you will be soldering to. Remove the battery and take apart the mechanism until you have clear access to those contacts (consider taking out the motor altogether). Store the screws in a safe place.
During this process, try not to disassemble more than you have to, in case you disturb the gears. In this mechanism, the gears are contained under a second plate with its own machine screw.
It should not be necessary to remove the watch screw (the knob you turn to adjust the time) unless you wish to remove the entire dial. To do this, use a small stick to push down on a lever adjacent to where the screw enters the mechanism, while pulling gently on the screw itself.
6. Soldering
Now comes the most difficult part of the project, which took me several attempts to get right. Solder one transformer wire to each of the metal contacts on the motor. This is much easier said than done. Some things to keep in mind:
–The contacts are very small in this mechanism and spaced ~1 mm apart. Do not bridge this gap in any way or you will have a short-circuit.
–Be mindful of the other pieces in the mechanism, and try not to obstruct them with your solder joint (for reassembly) or create an electrical connection to another metal piece.
–Most importantly, be mindful of how much heat you are applying to the contacts, as too much heat may destroy them and render the motor unusable.
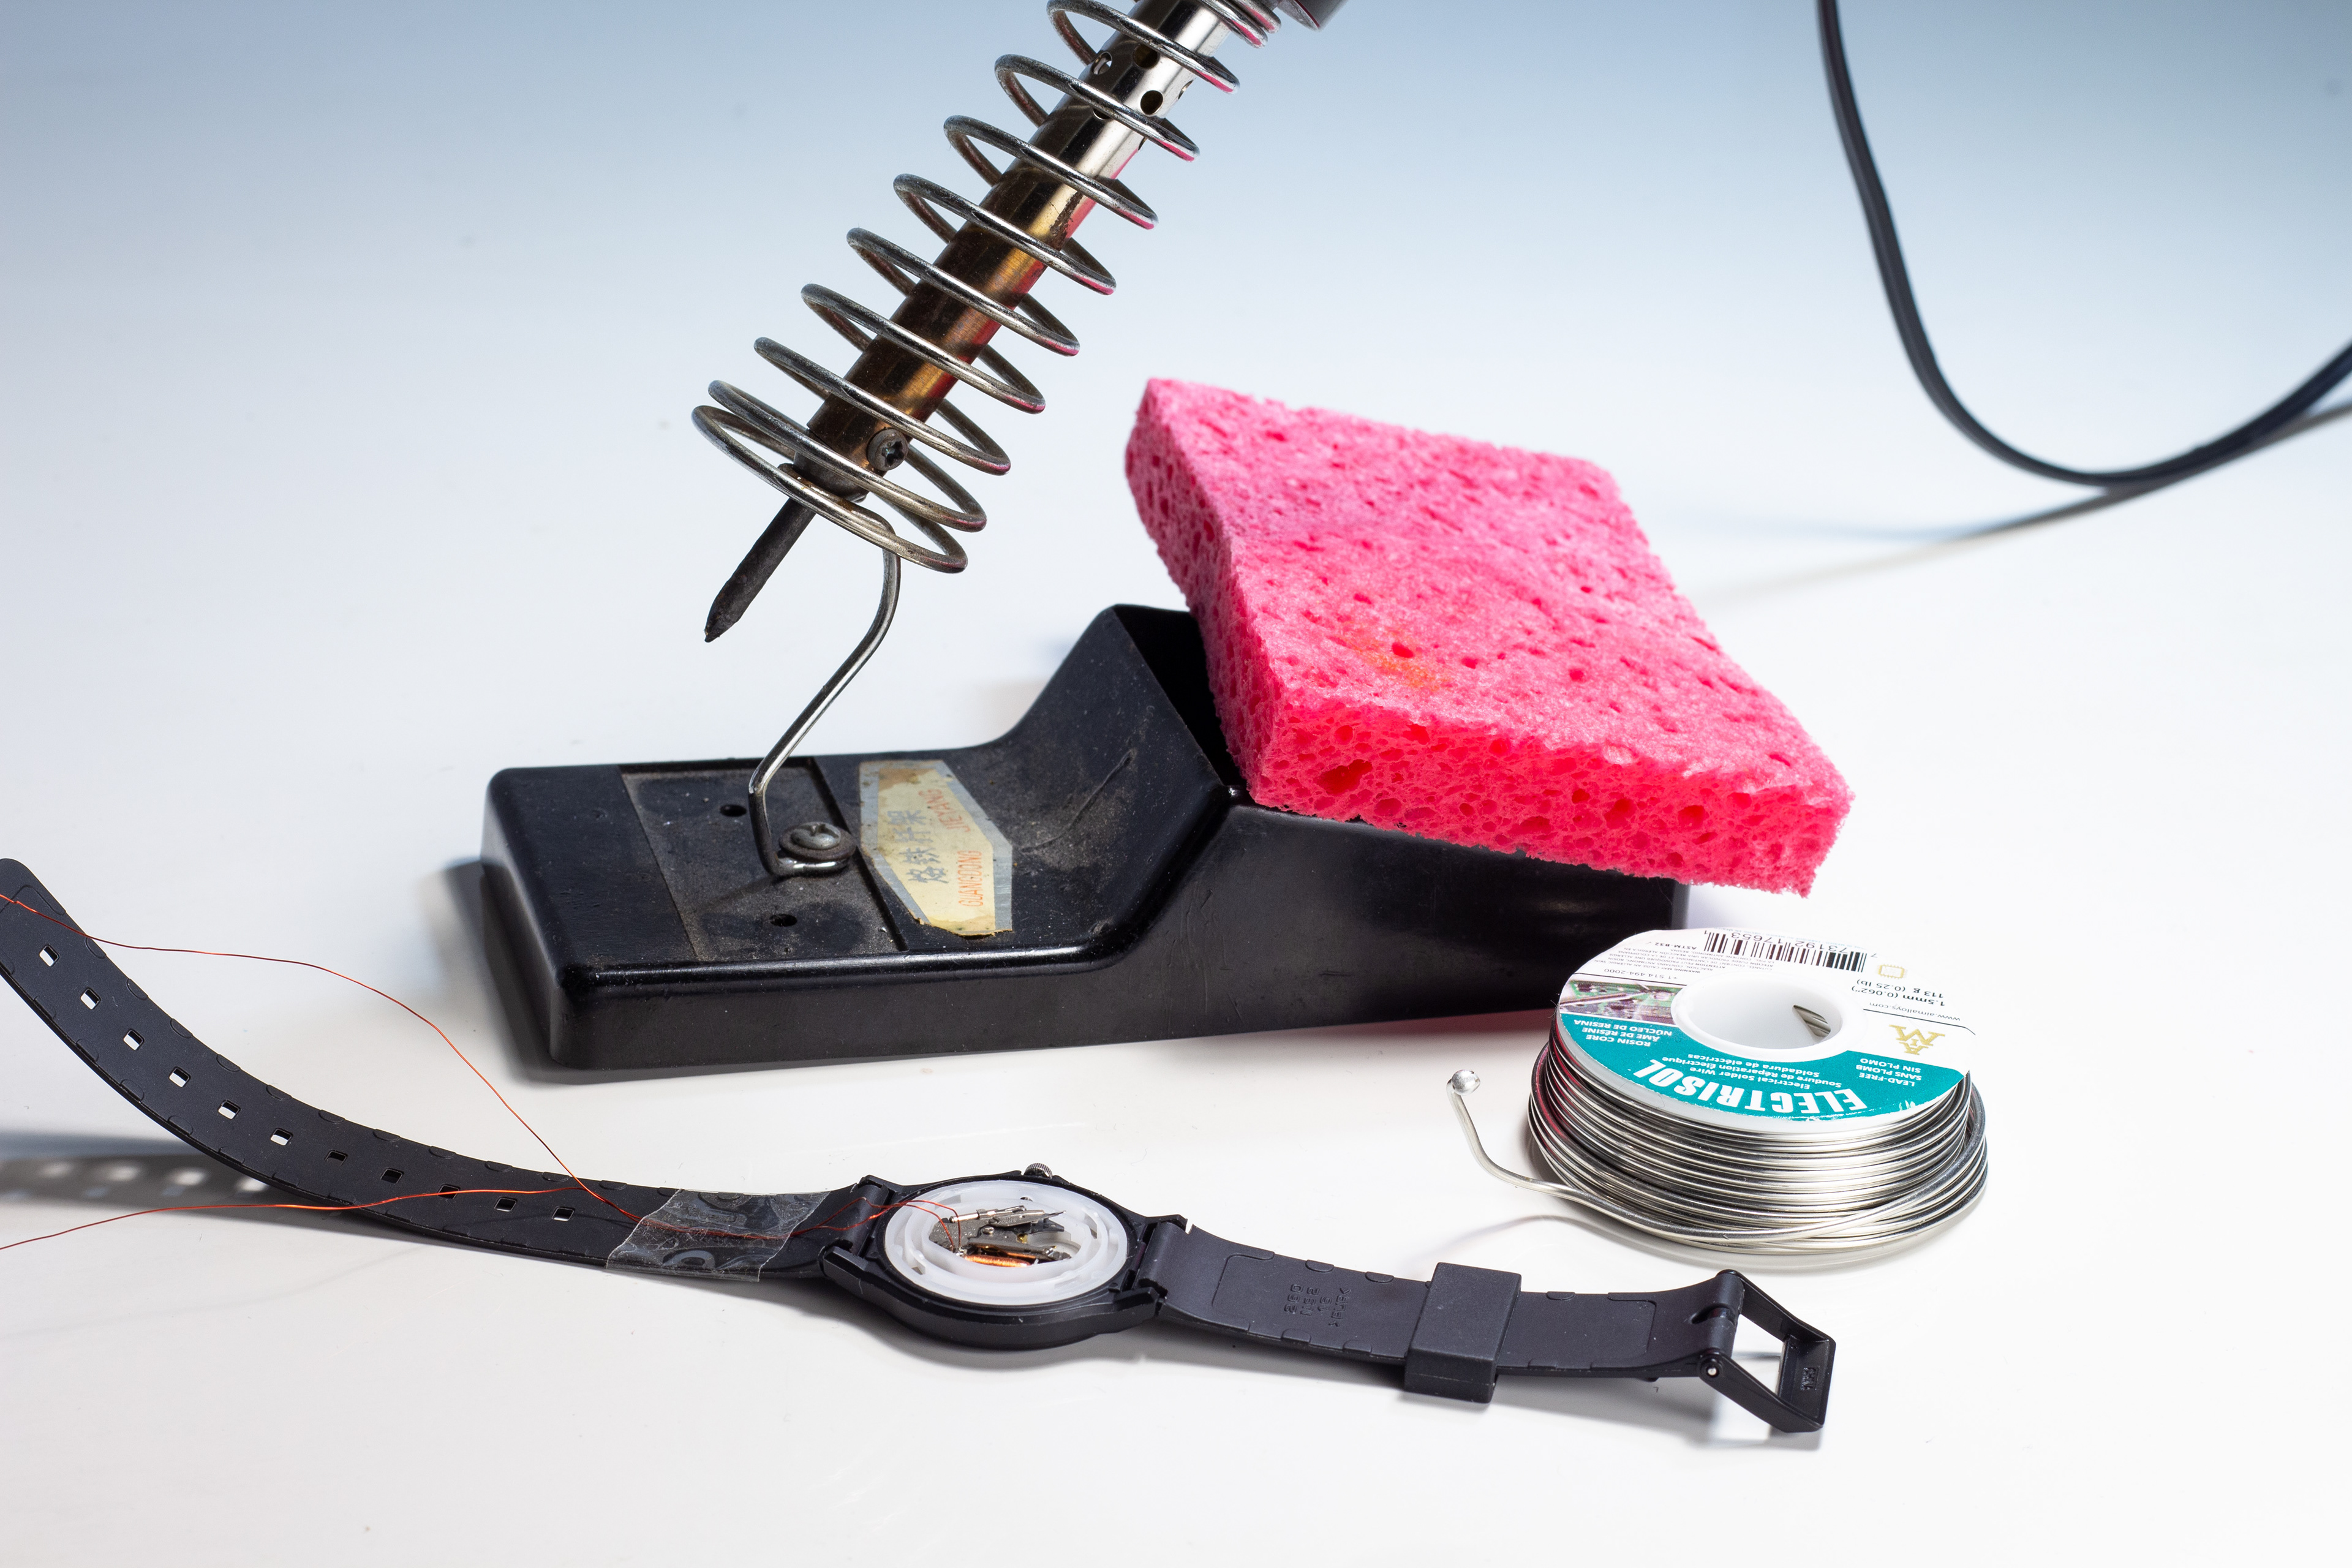
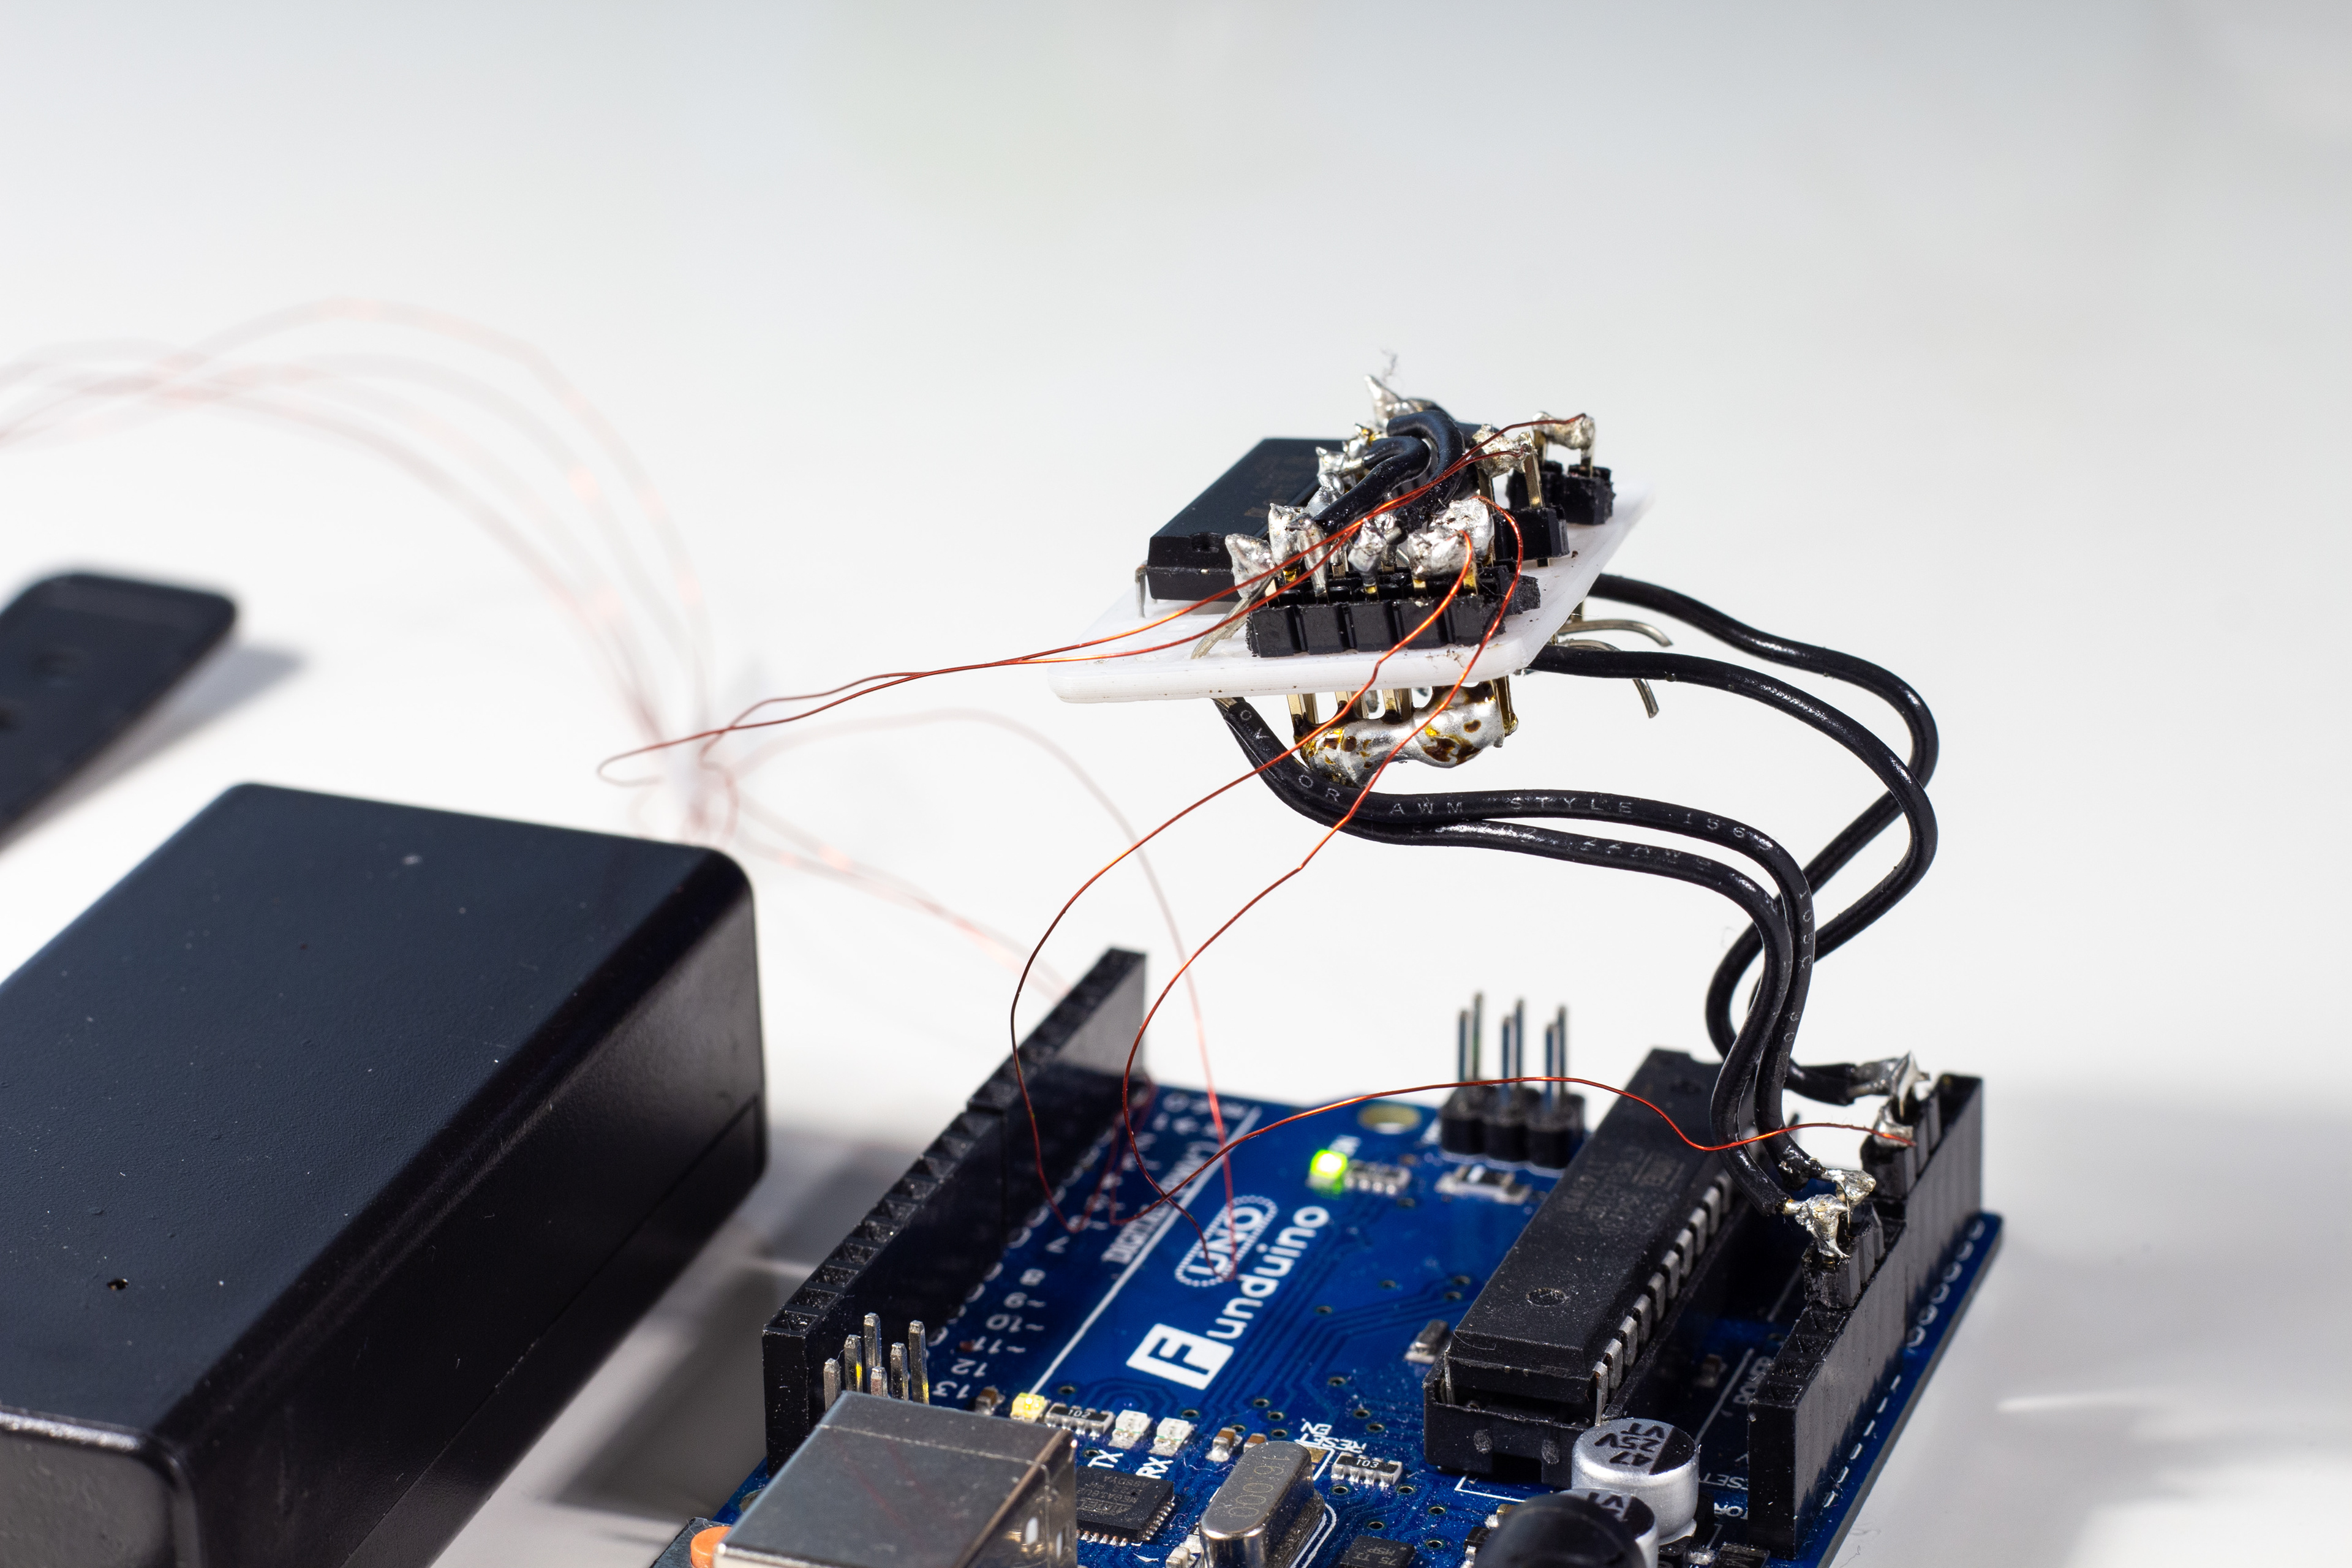
Immediately after you finish soldering, I recommend you tape the transformer wires to the watch strap so that an accidental tug won't break a solder joint and require you to redo it—possibly a frustrating process as it happened several times to me. Make sure the other end of the wires are connected to your L293D driver; if you are running them through a breadboard, soldering the wires to pins on header strips may be useful.
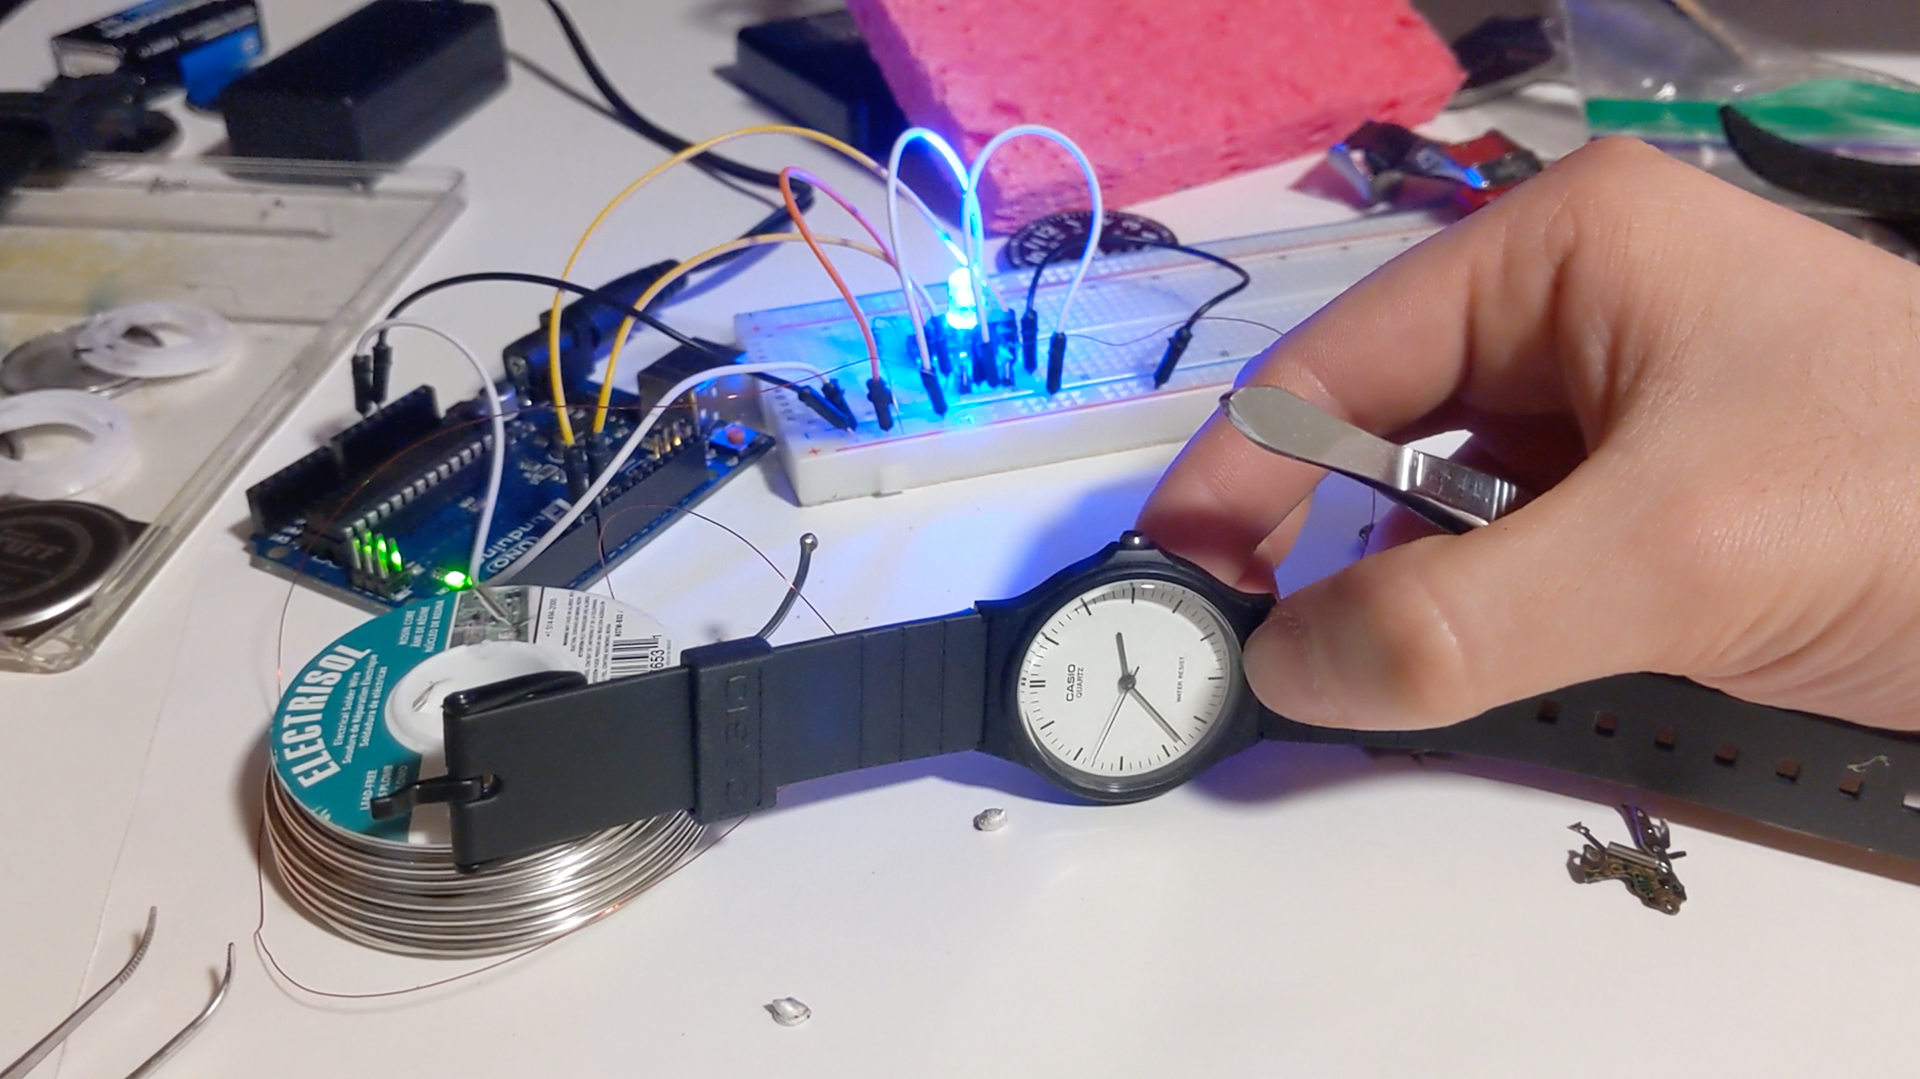
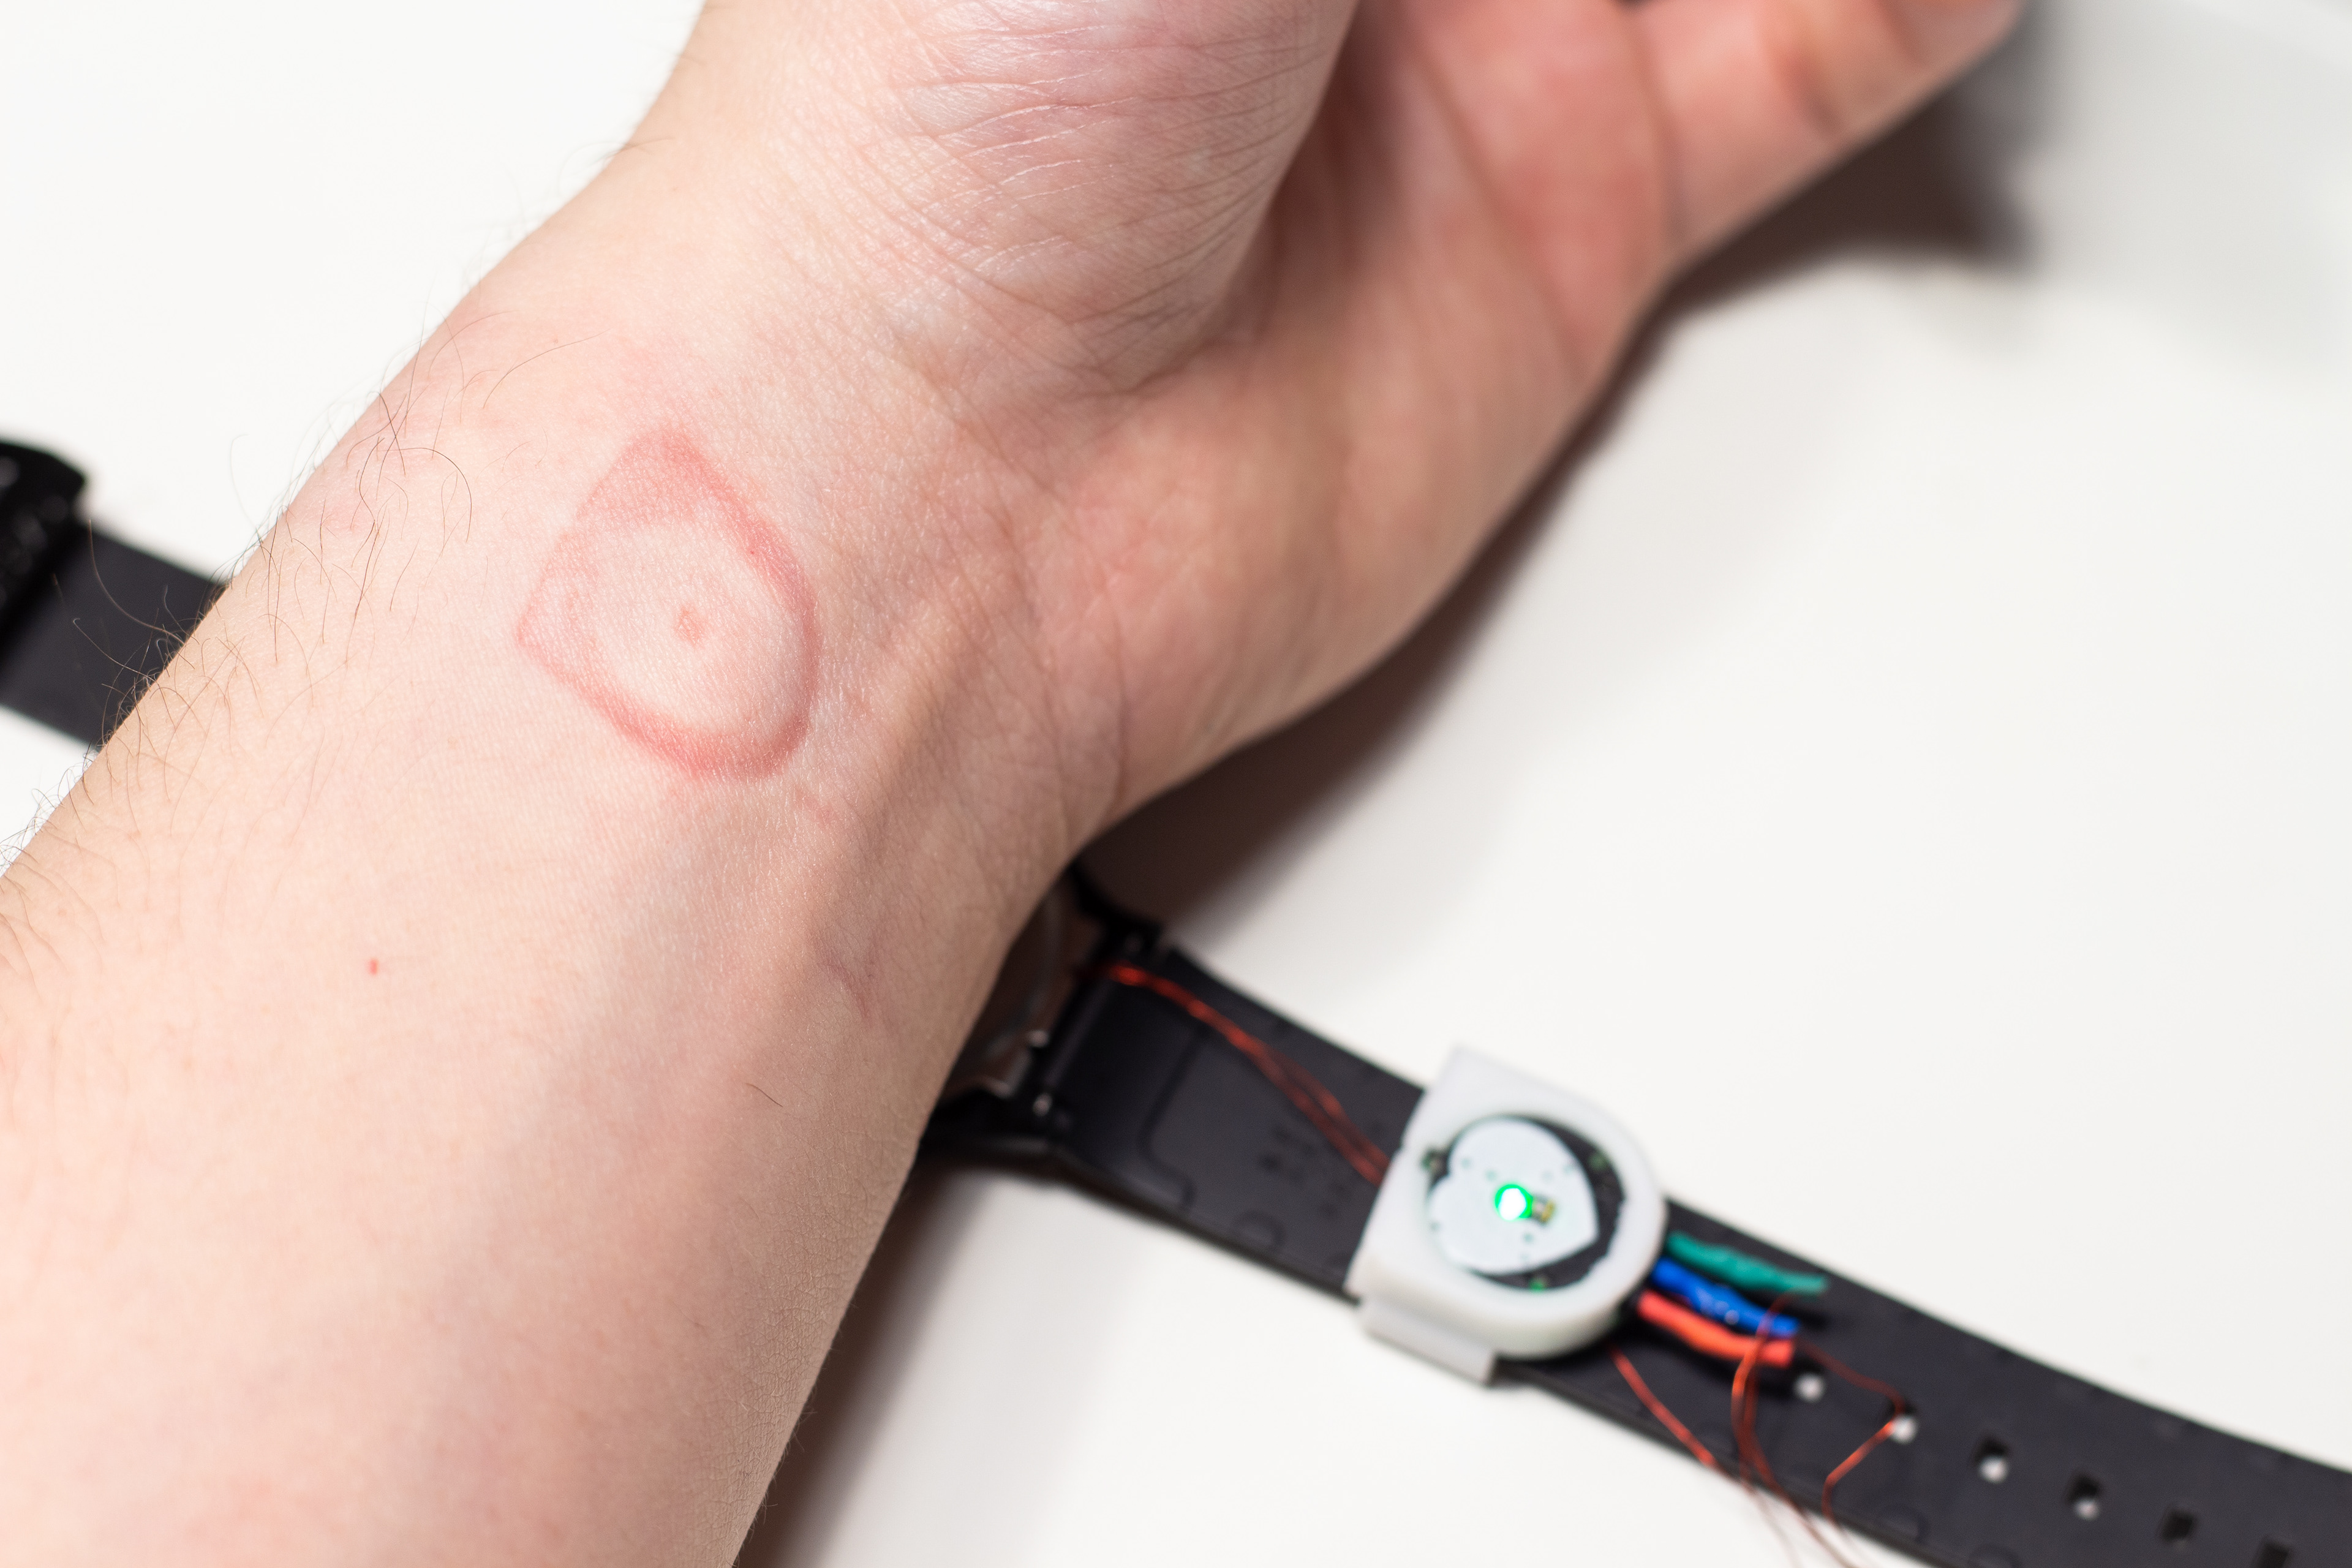
Then, test everything to make sure it works properly. For me, this was the big moment in the whole project where all my effort paid off (especially because I wasn't sure if this was even possible in the first place), when I had one hand on my jugular and the other on the pulse sensor, watching as the second hand on the dial advanced in time with my own heart, second by second, beat by beat. To put it poetically, it was like the face of the watch was staring back at me.
7. Finalization
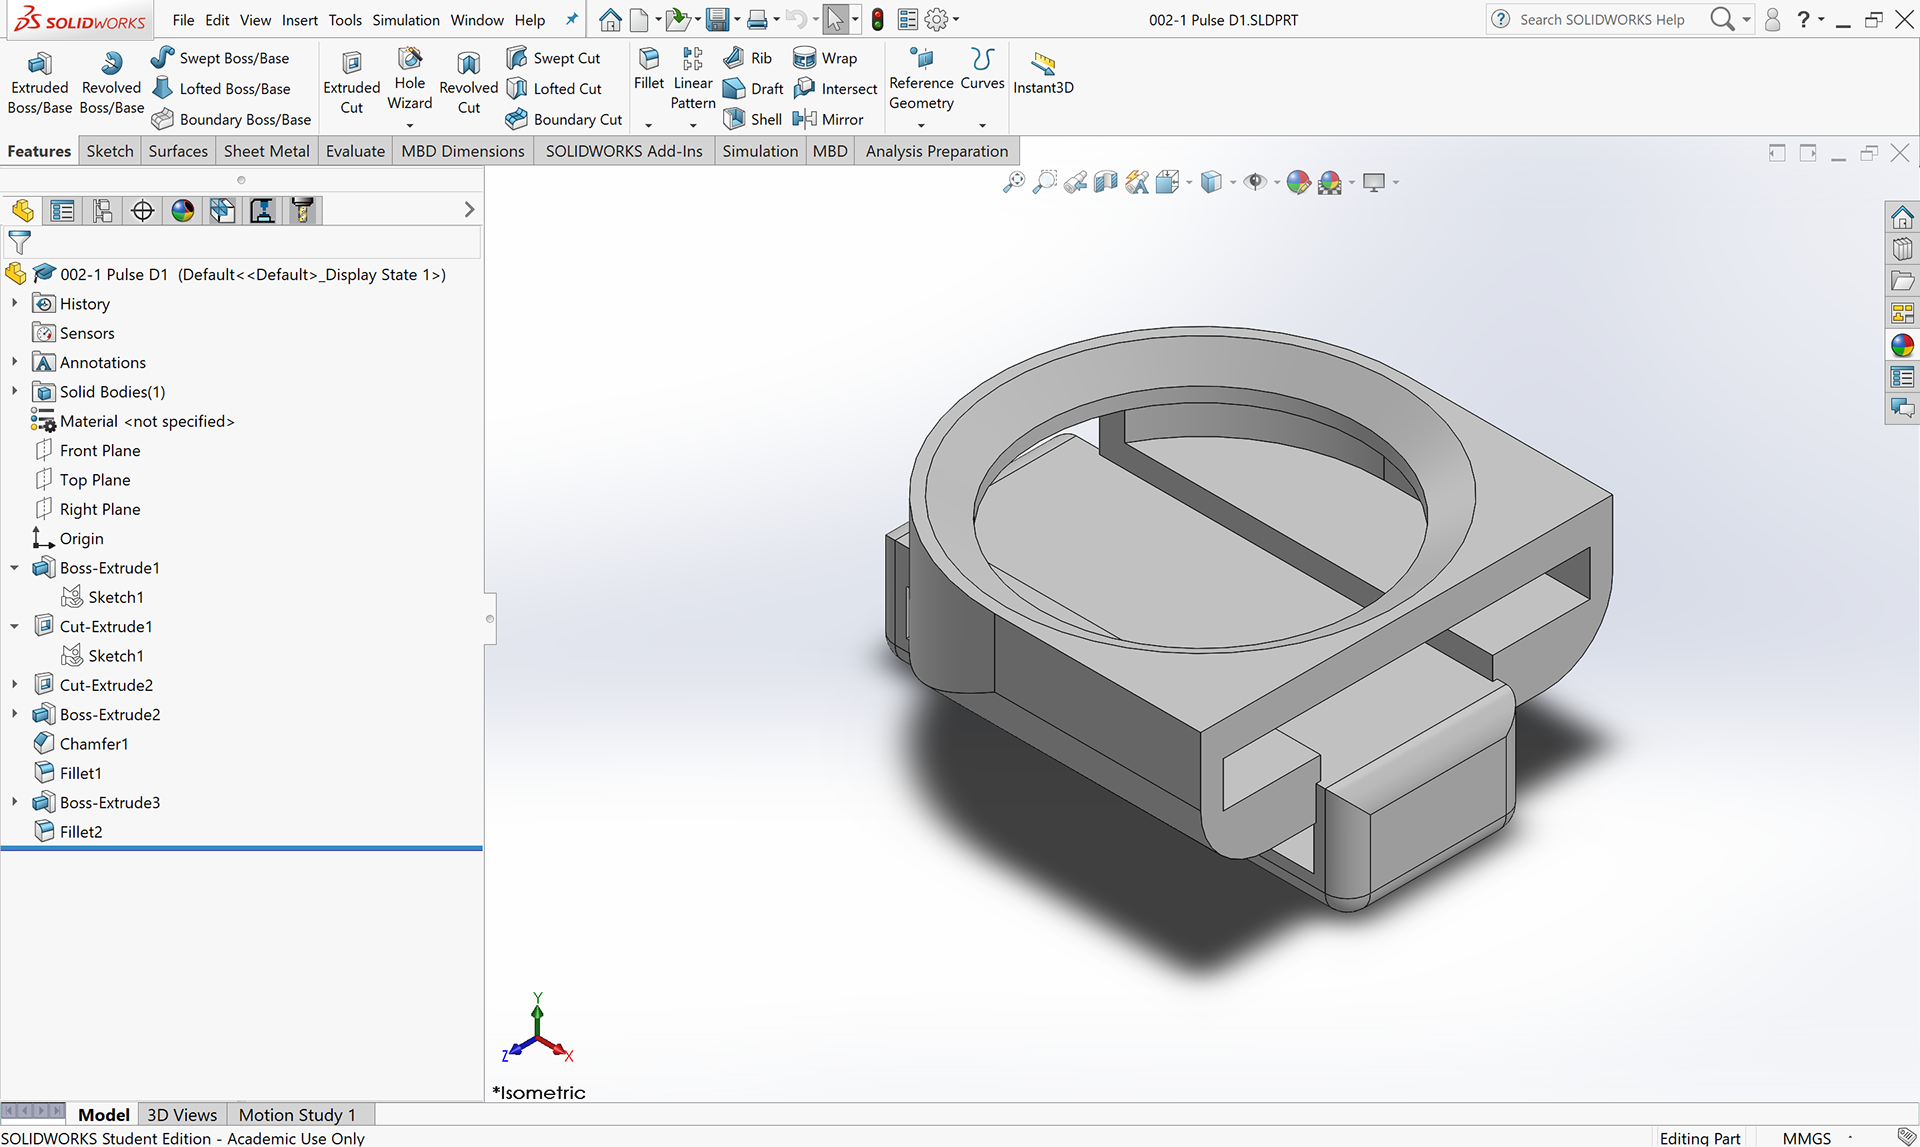
The rest of the project is up to you, and it will vary a lot depending on the watch you used and what additional features you want to add. A 3D printer, CAD software, slicer software, and a trusty set of calipers may come in handy here. And of course, don't forget to put the backplate back on when you're done.
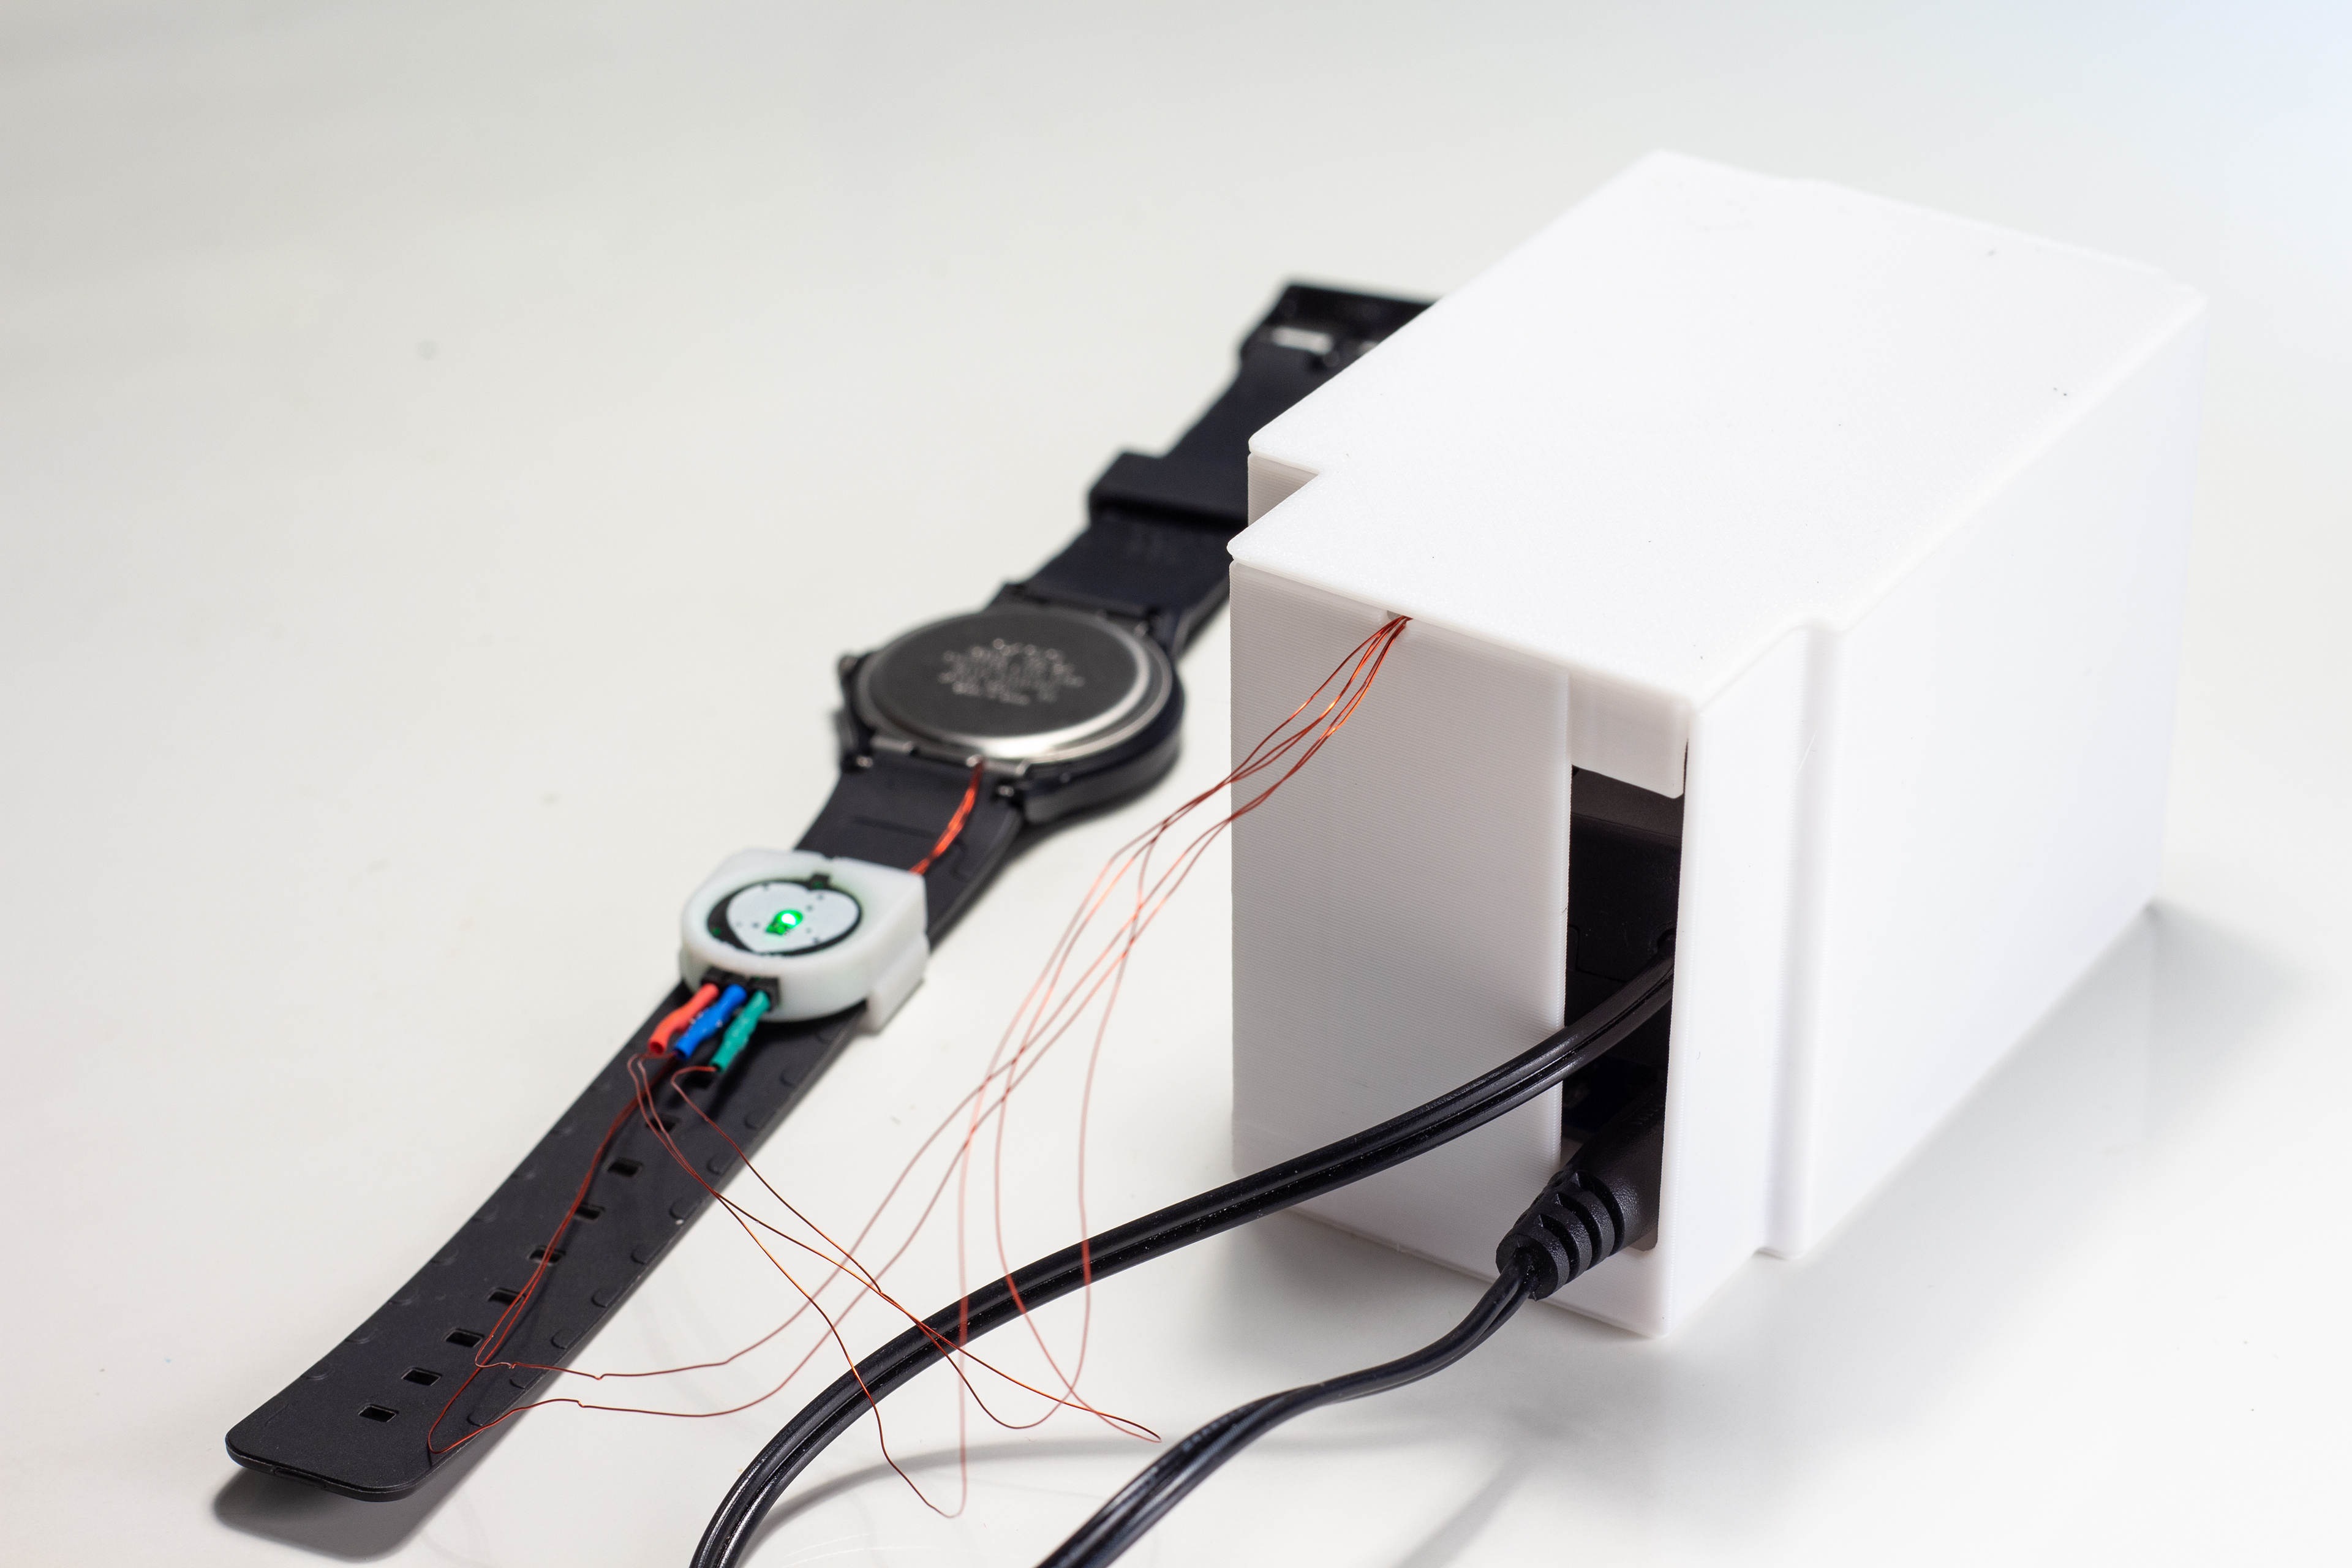
Some options I tried are shown below, and I've also provided my .stl files here. Of course, keep in mind that these are specifically sized for the particular watch I used. Feel free to modify or improve them as you see fit. After all, that's what this project is all about.
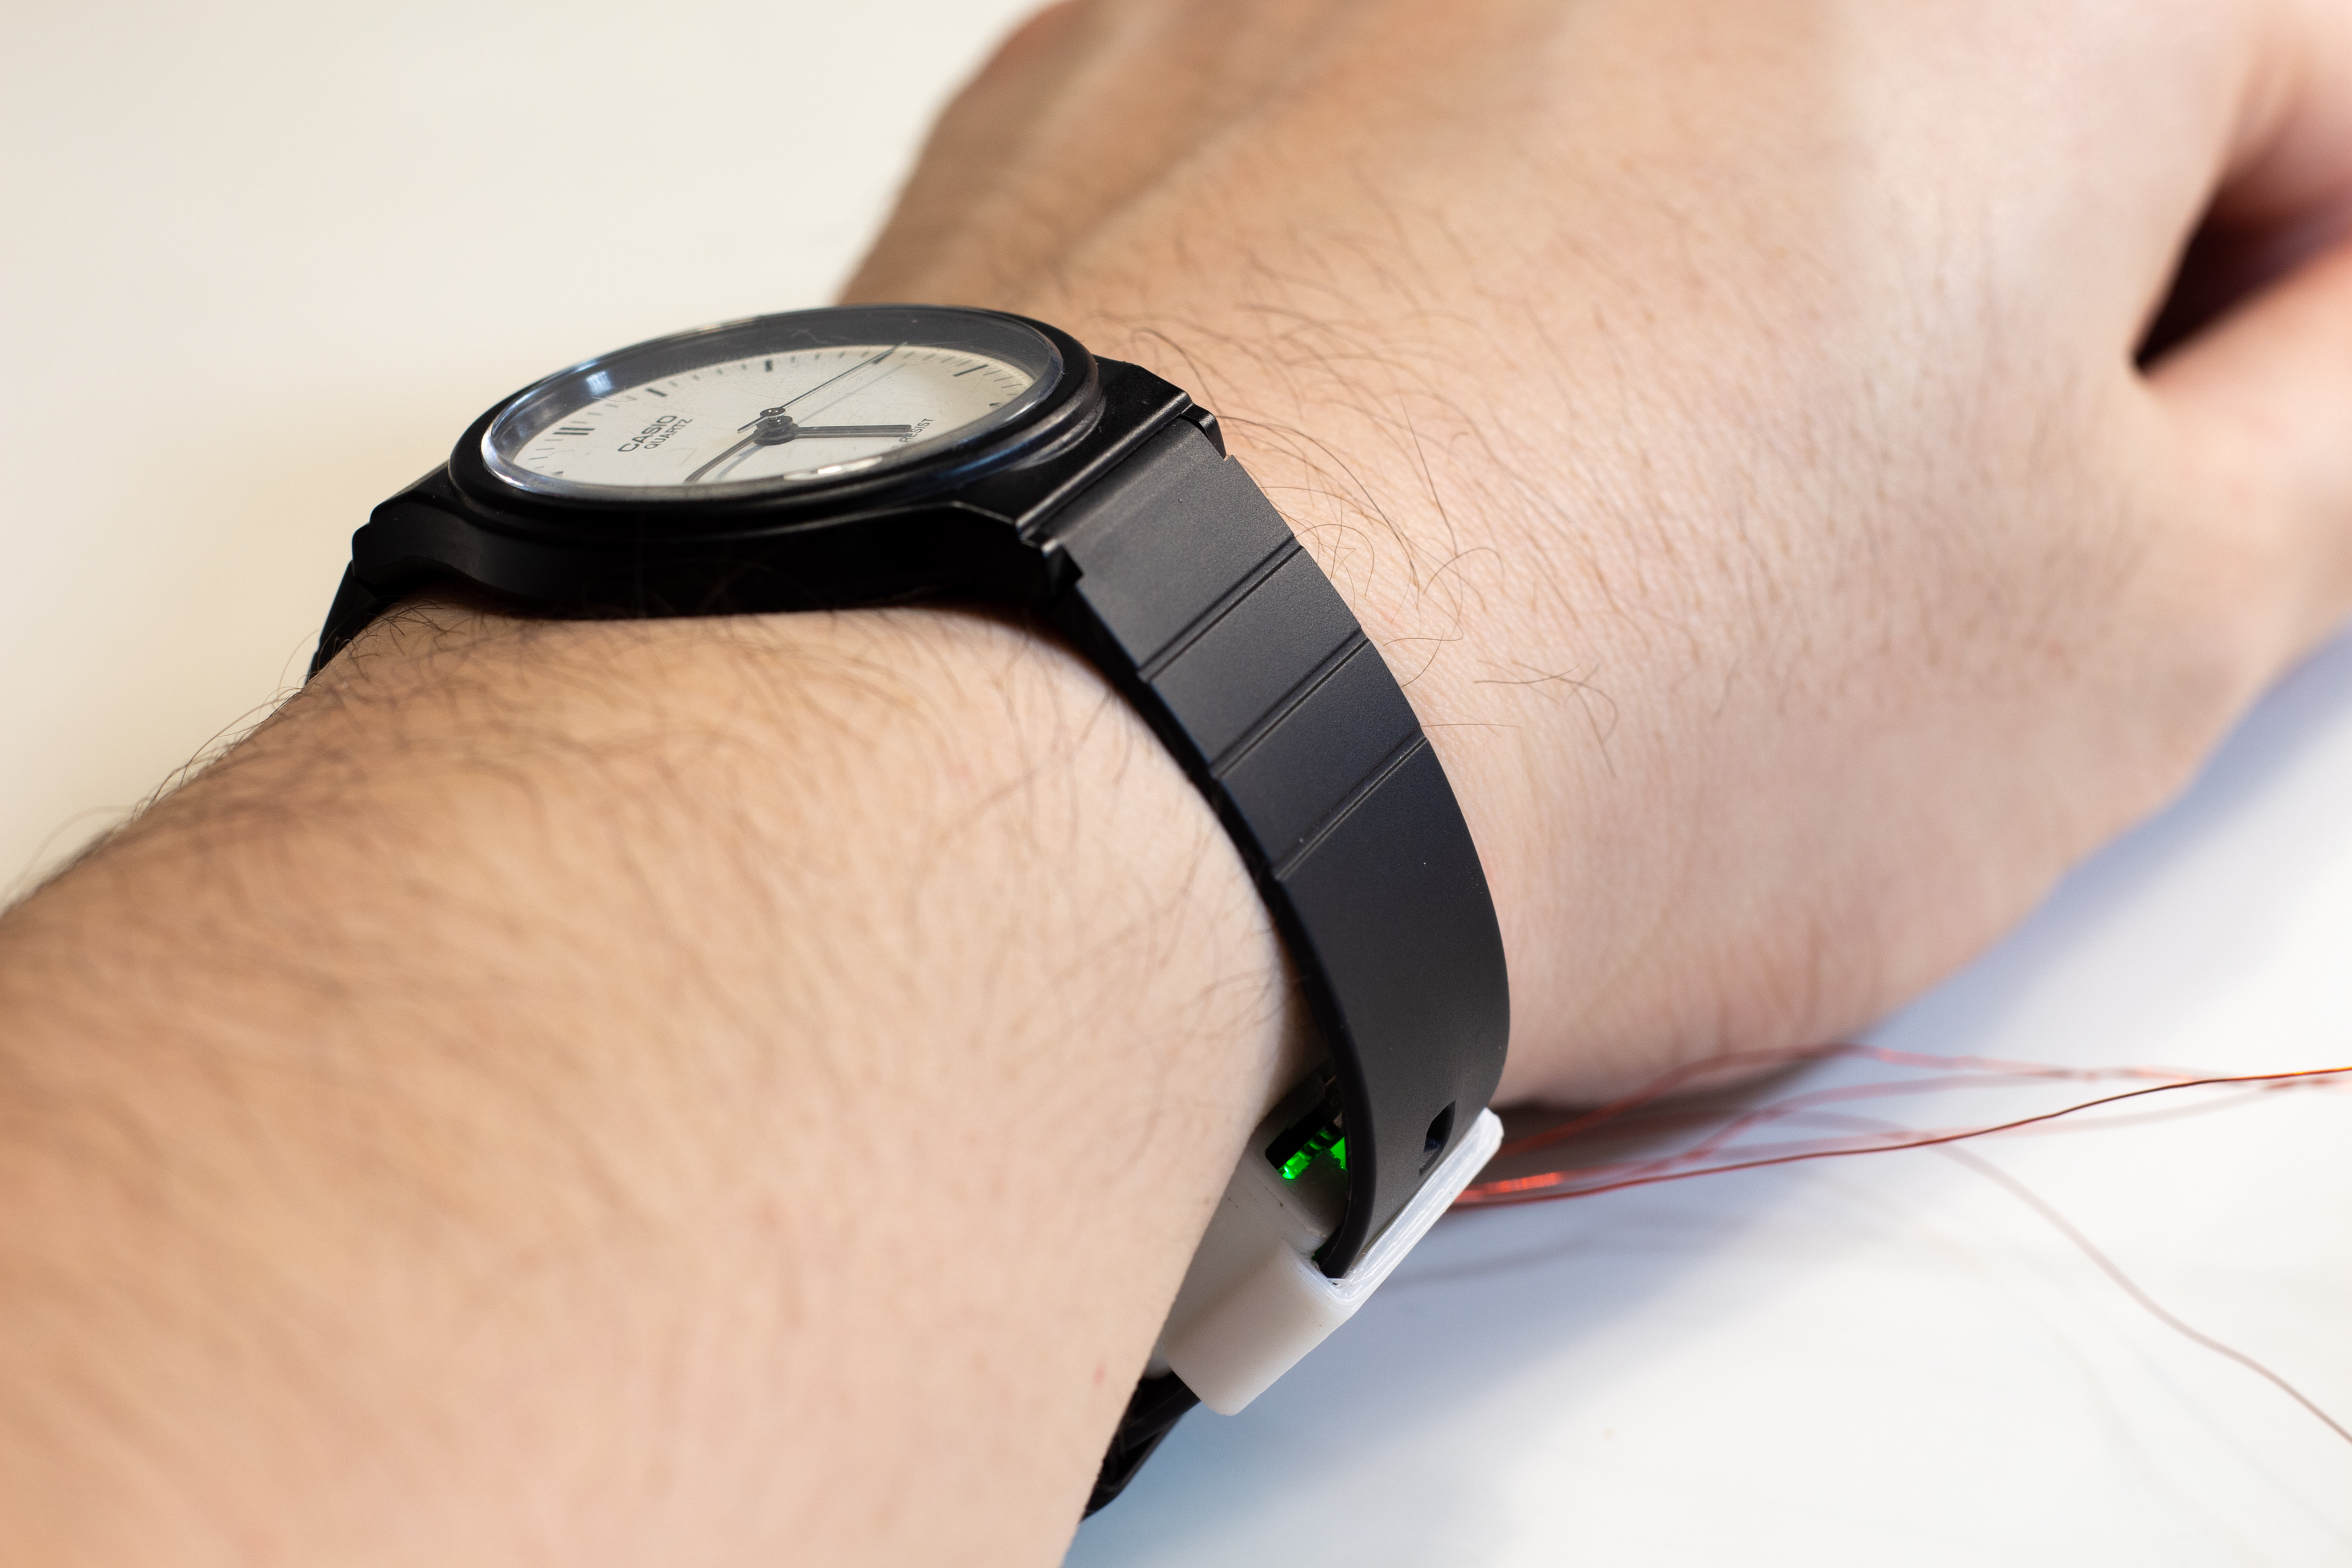
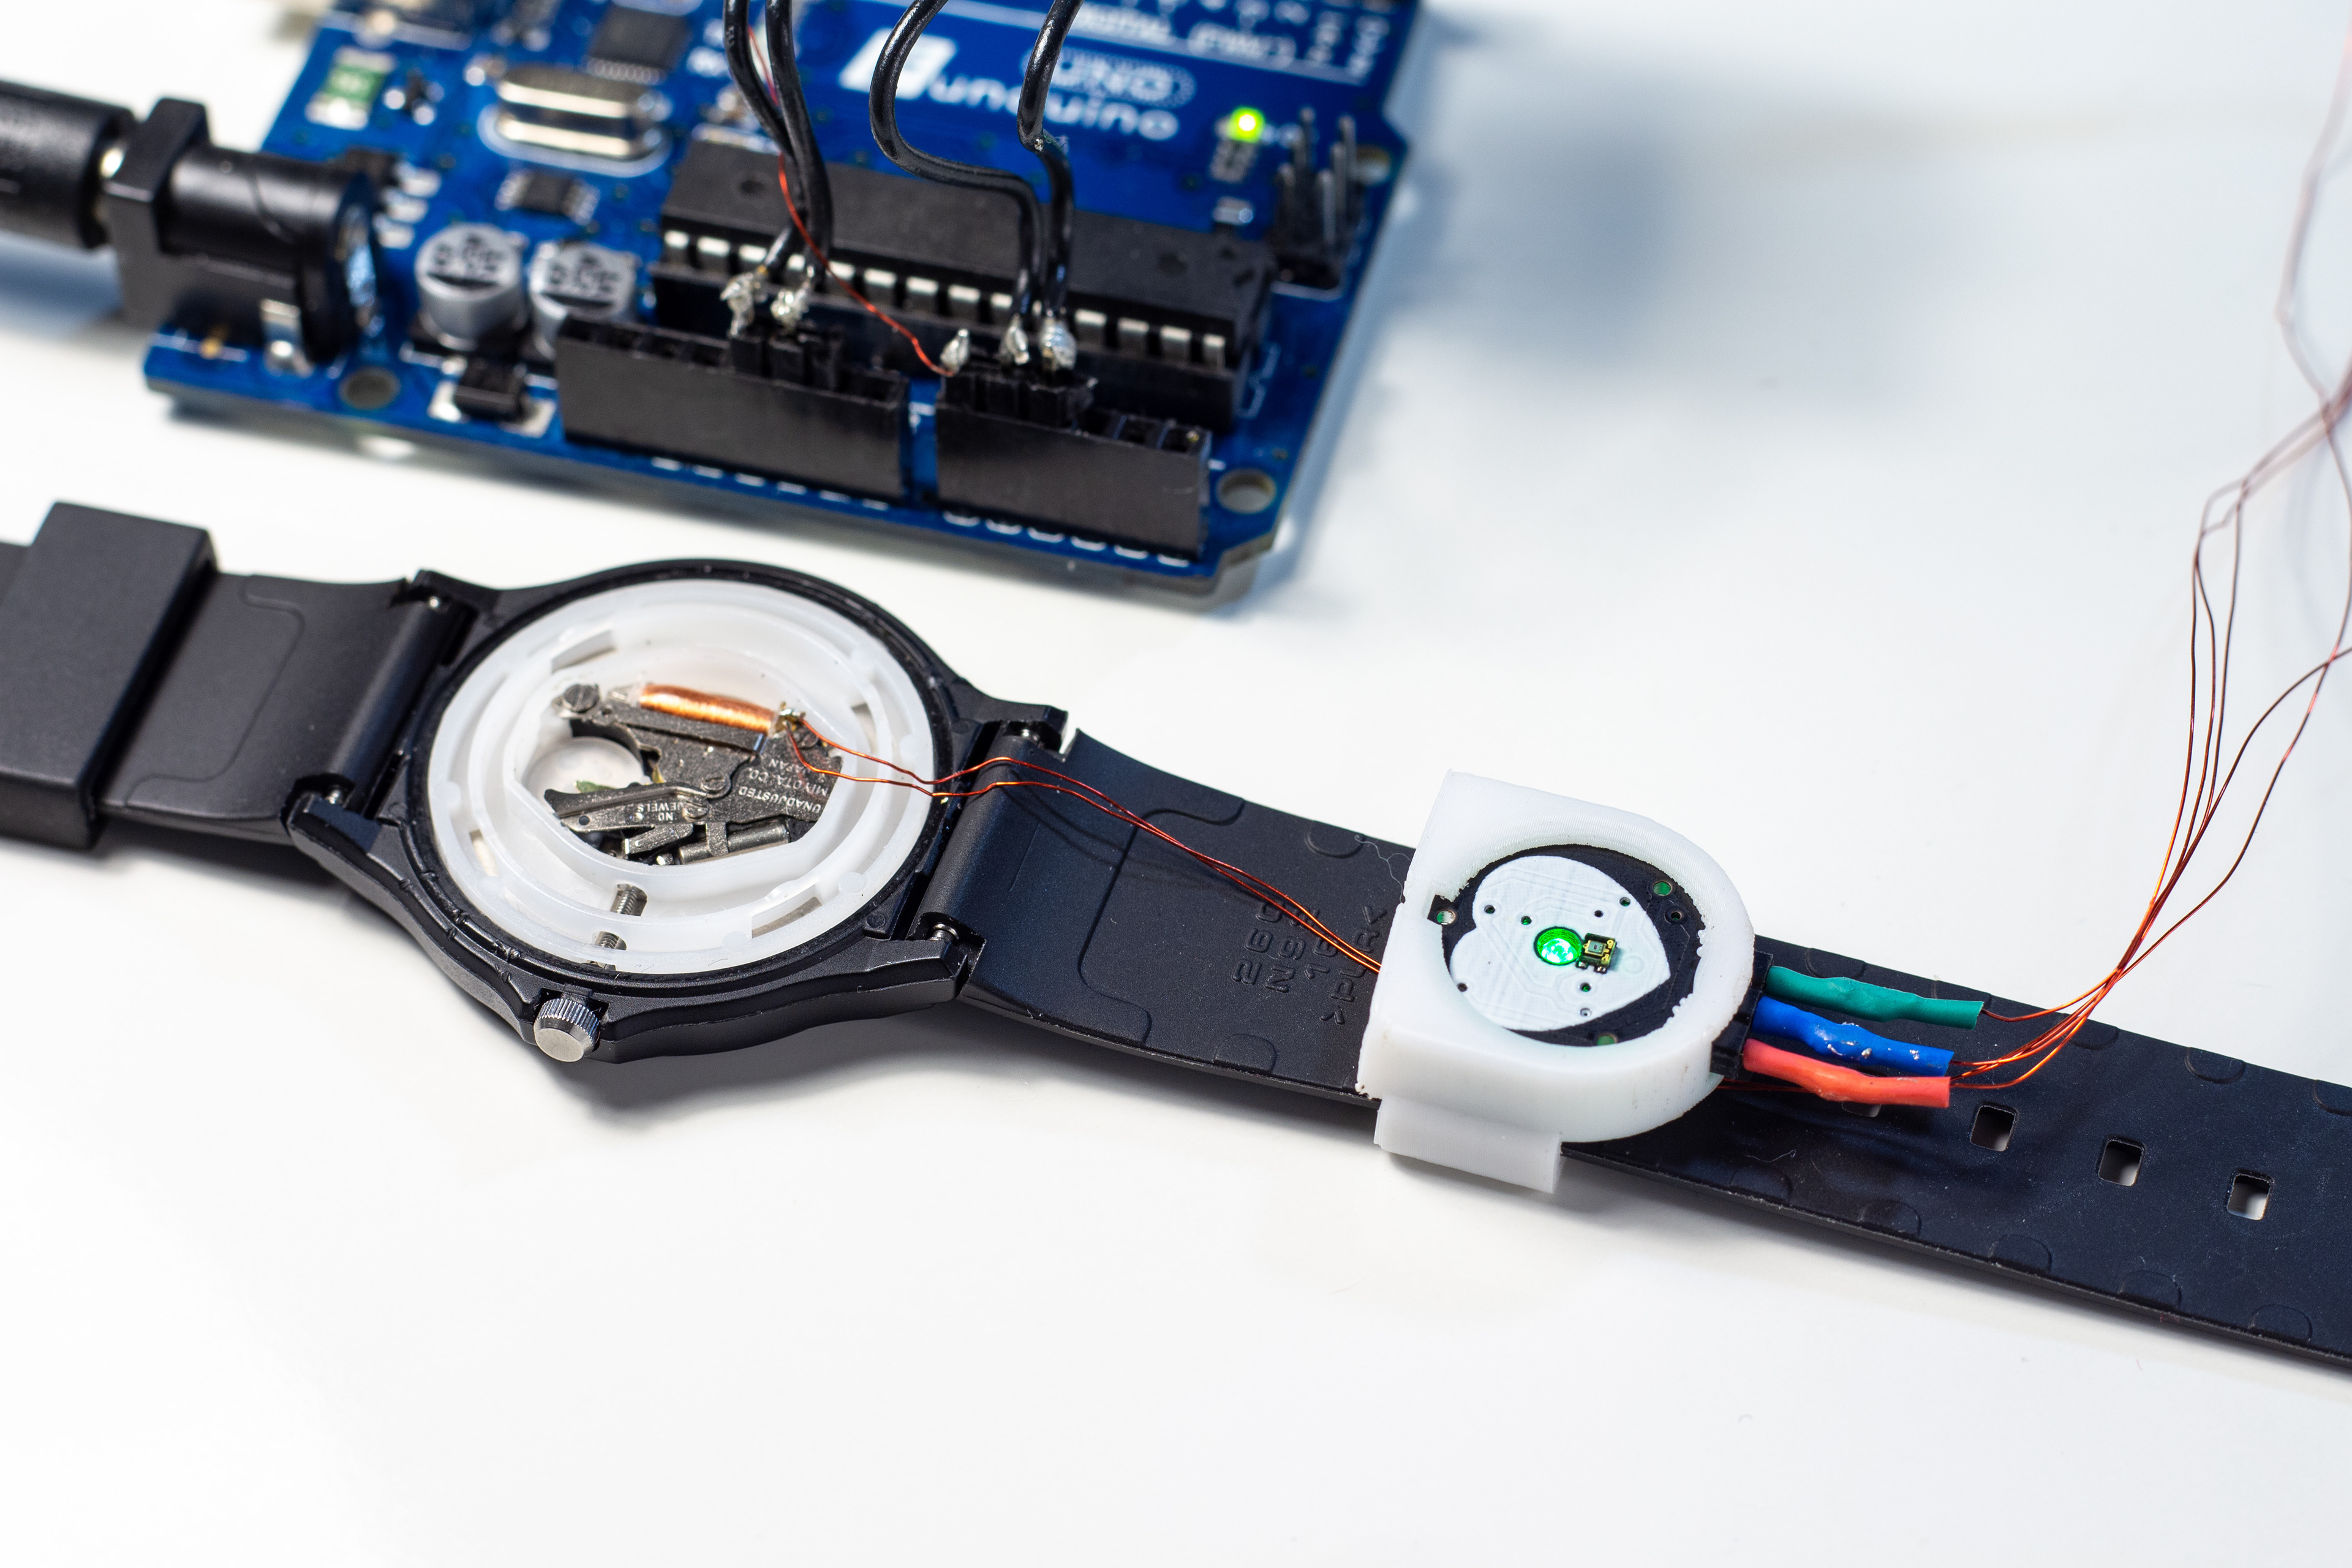
–A holder for the pulse sensor, to mount it on the watch strap (or somewhere else that's accessible).
–A diving bezel-like device to mark an earlier "time" on the watch face (to help track how many heartbeats have passed since then).
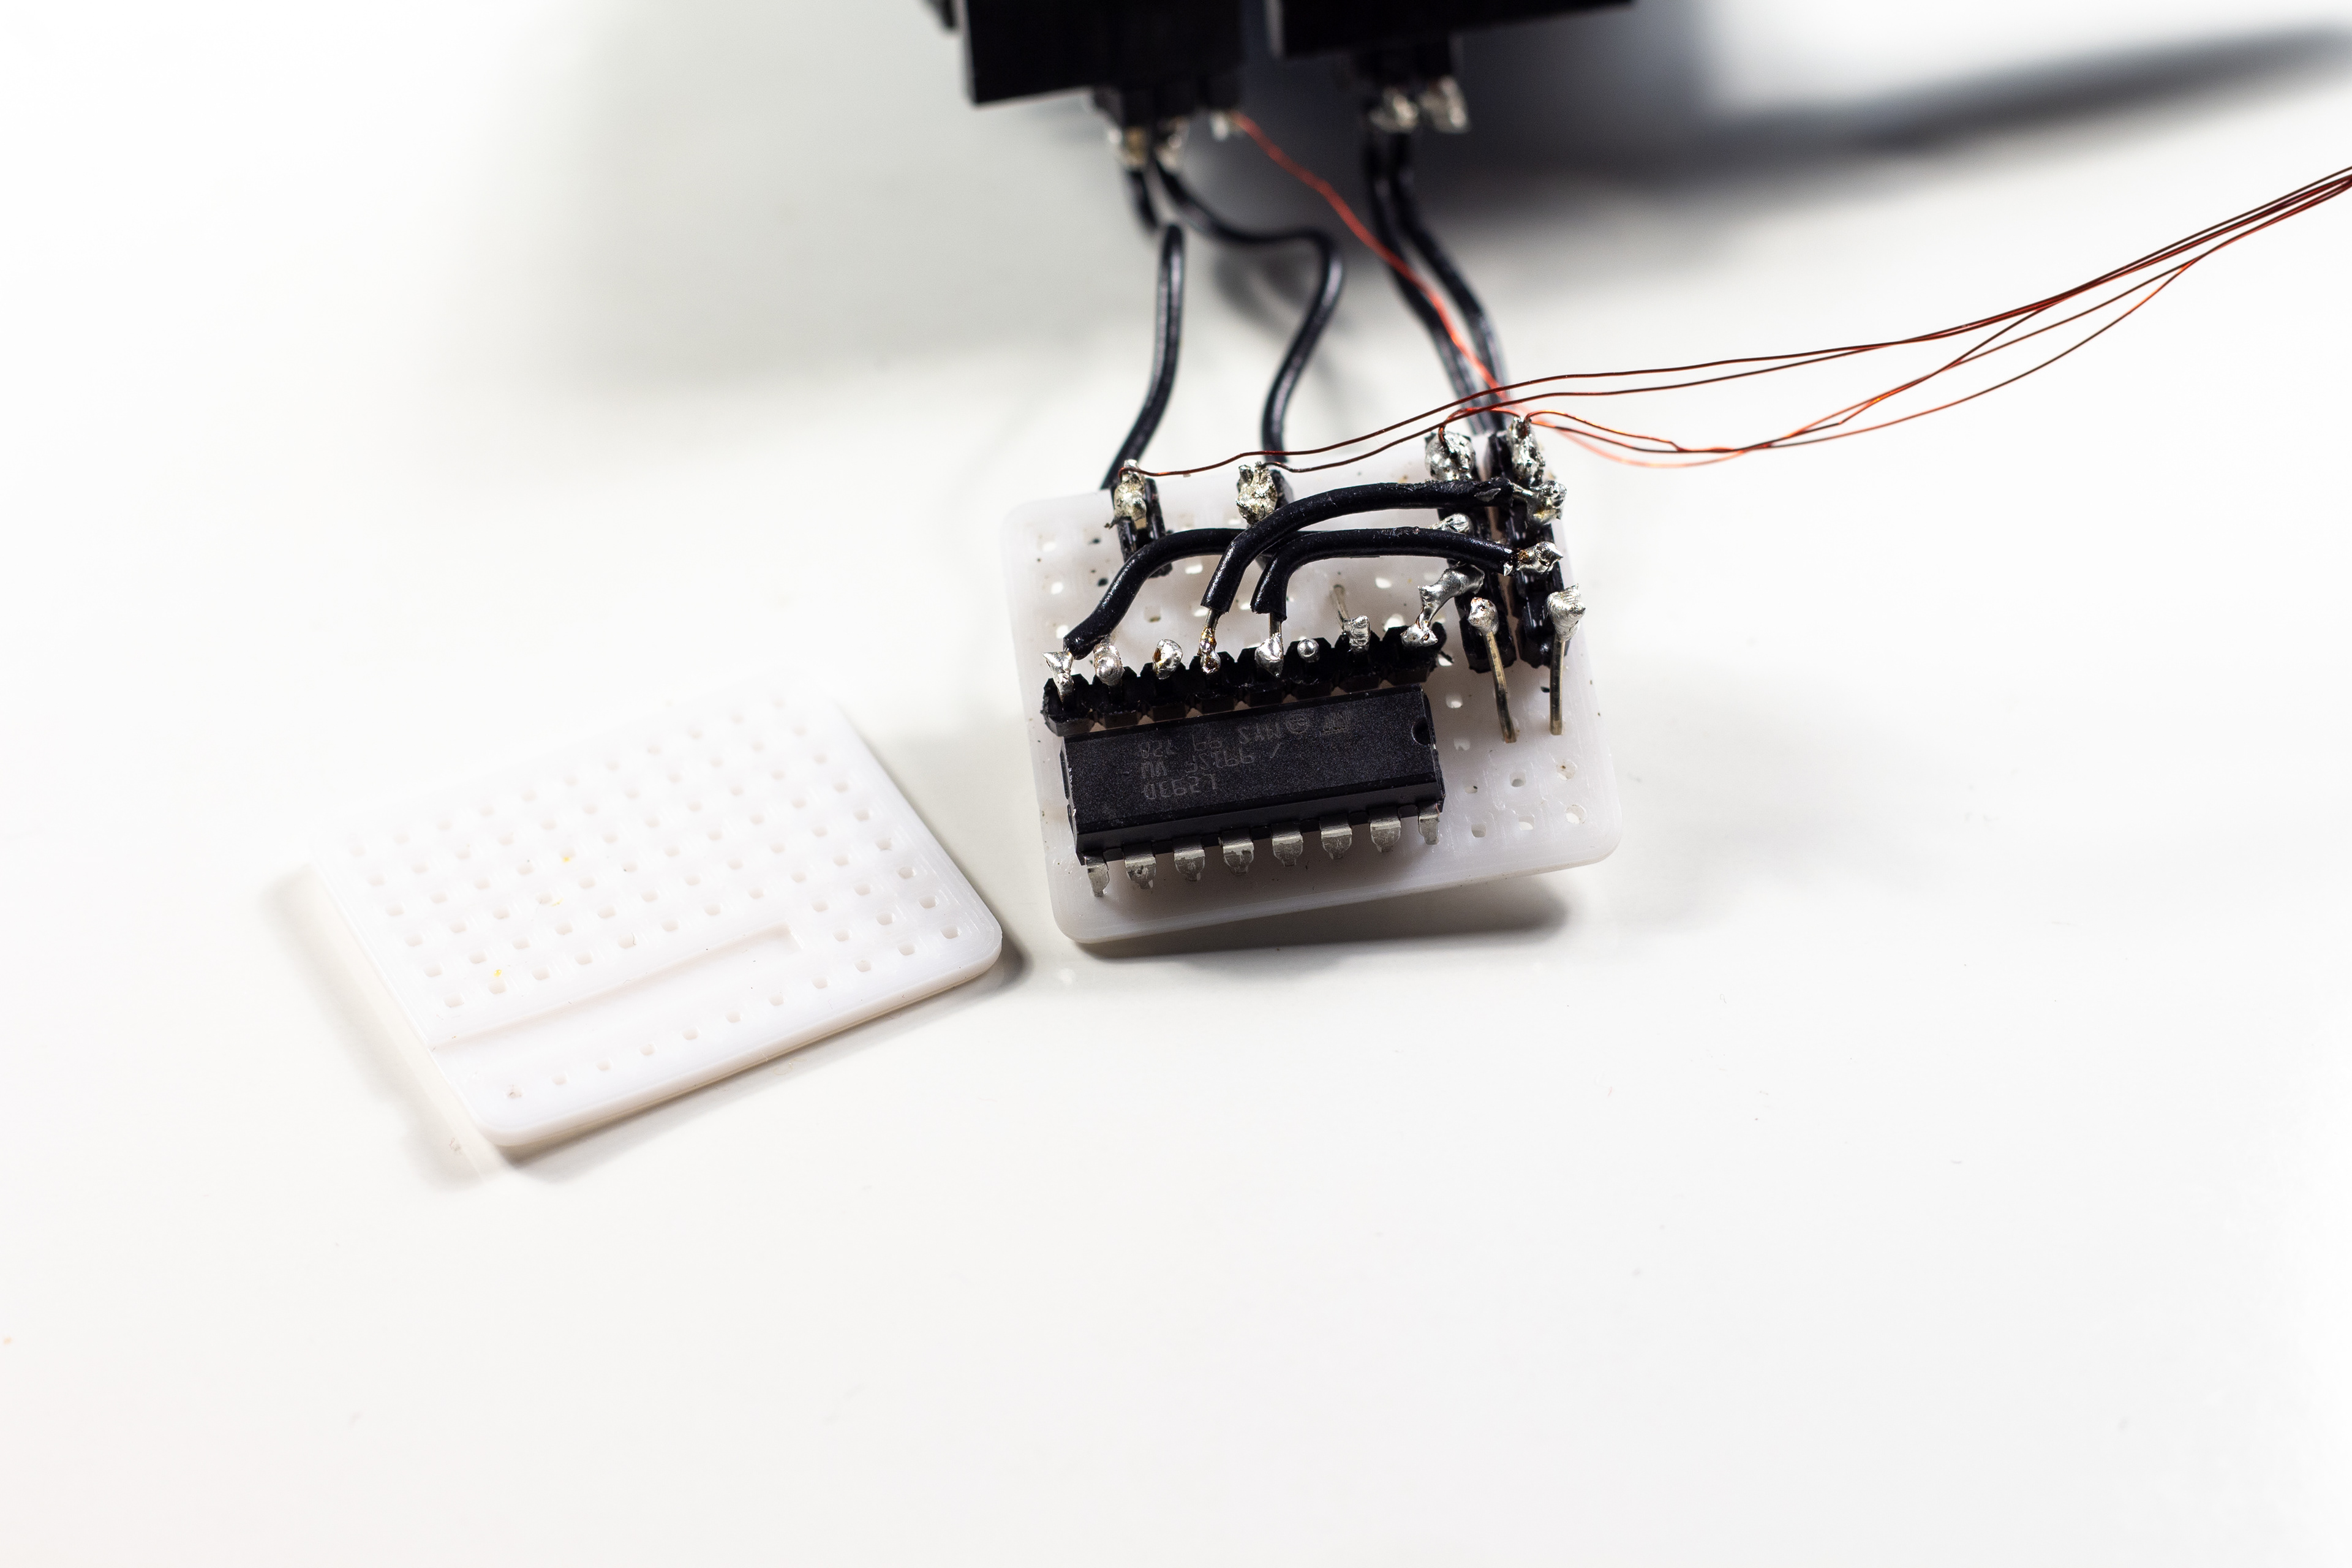
–A custom-sized breadboard/circuitboard to solder electronics to, possibly even small enough to fit inside the case of the watch.
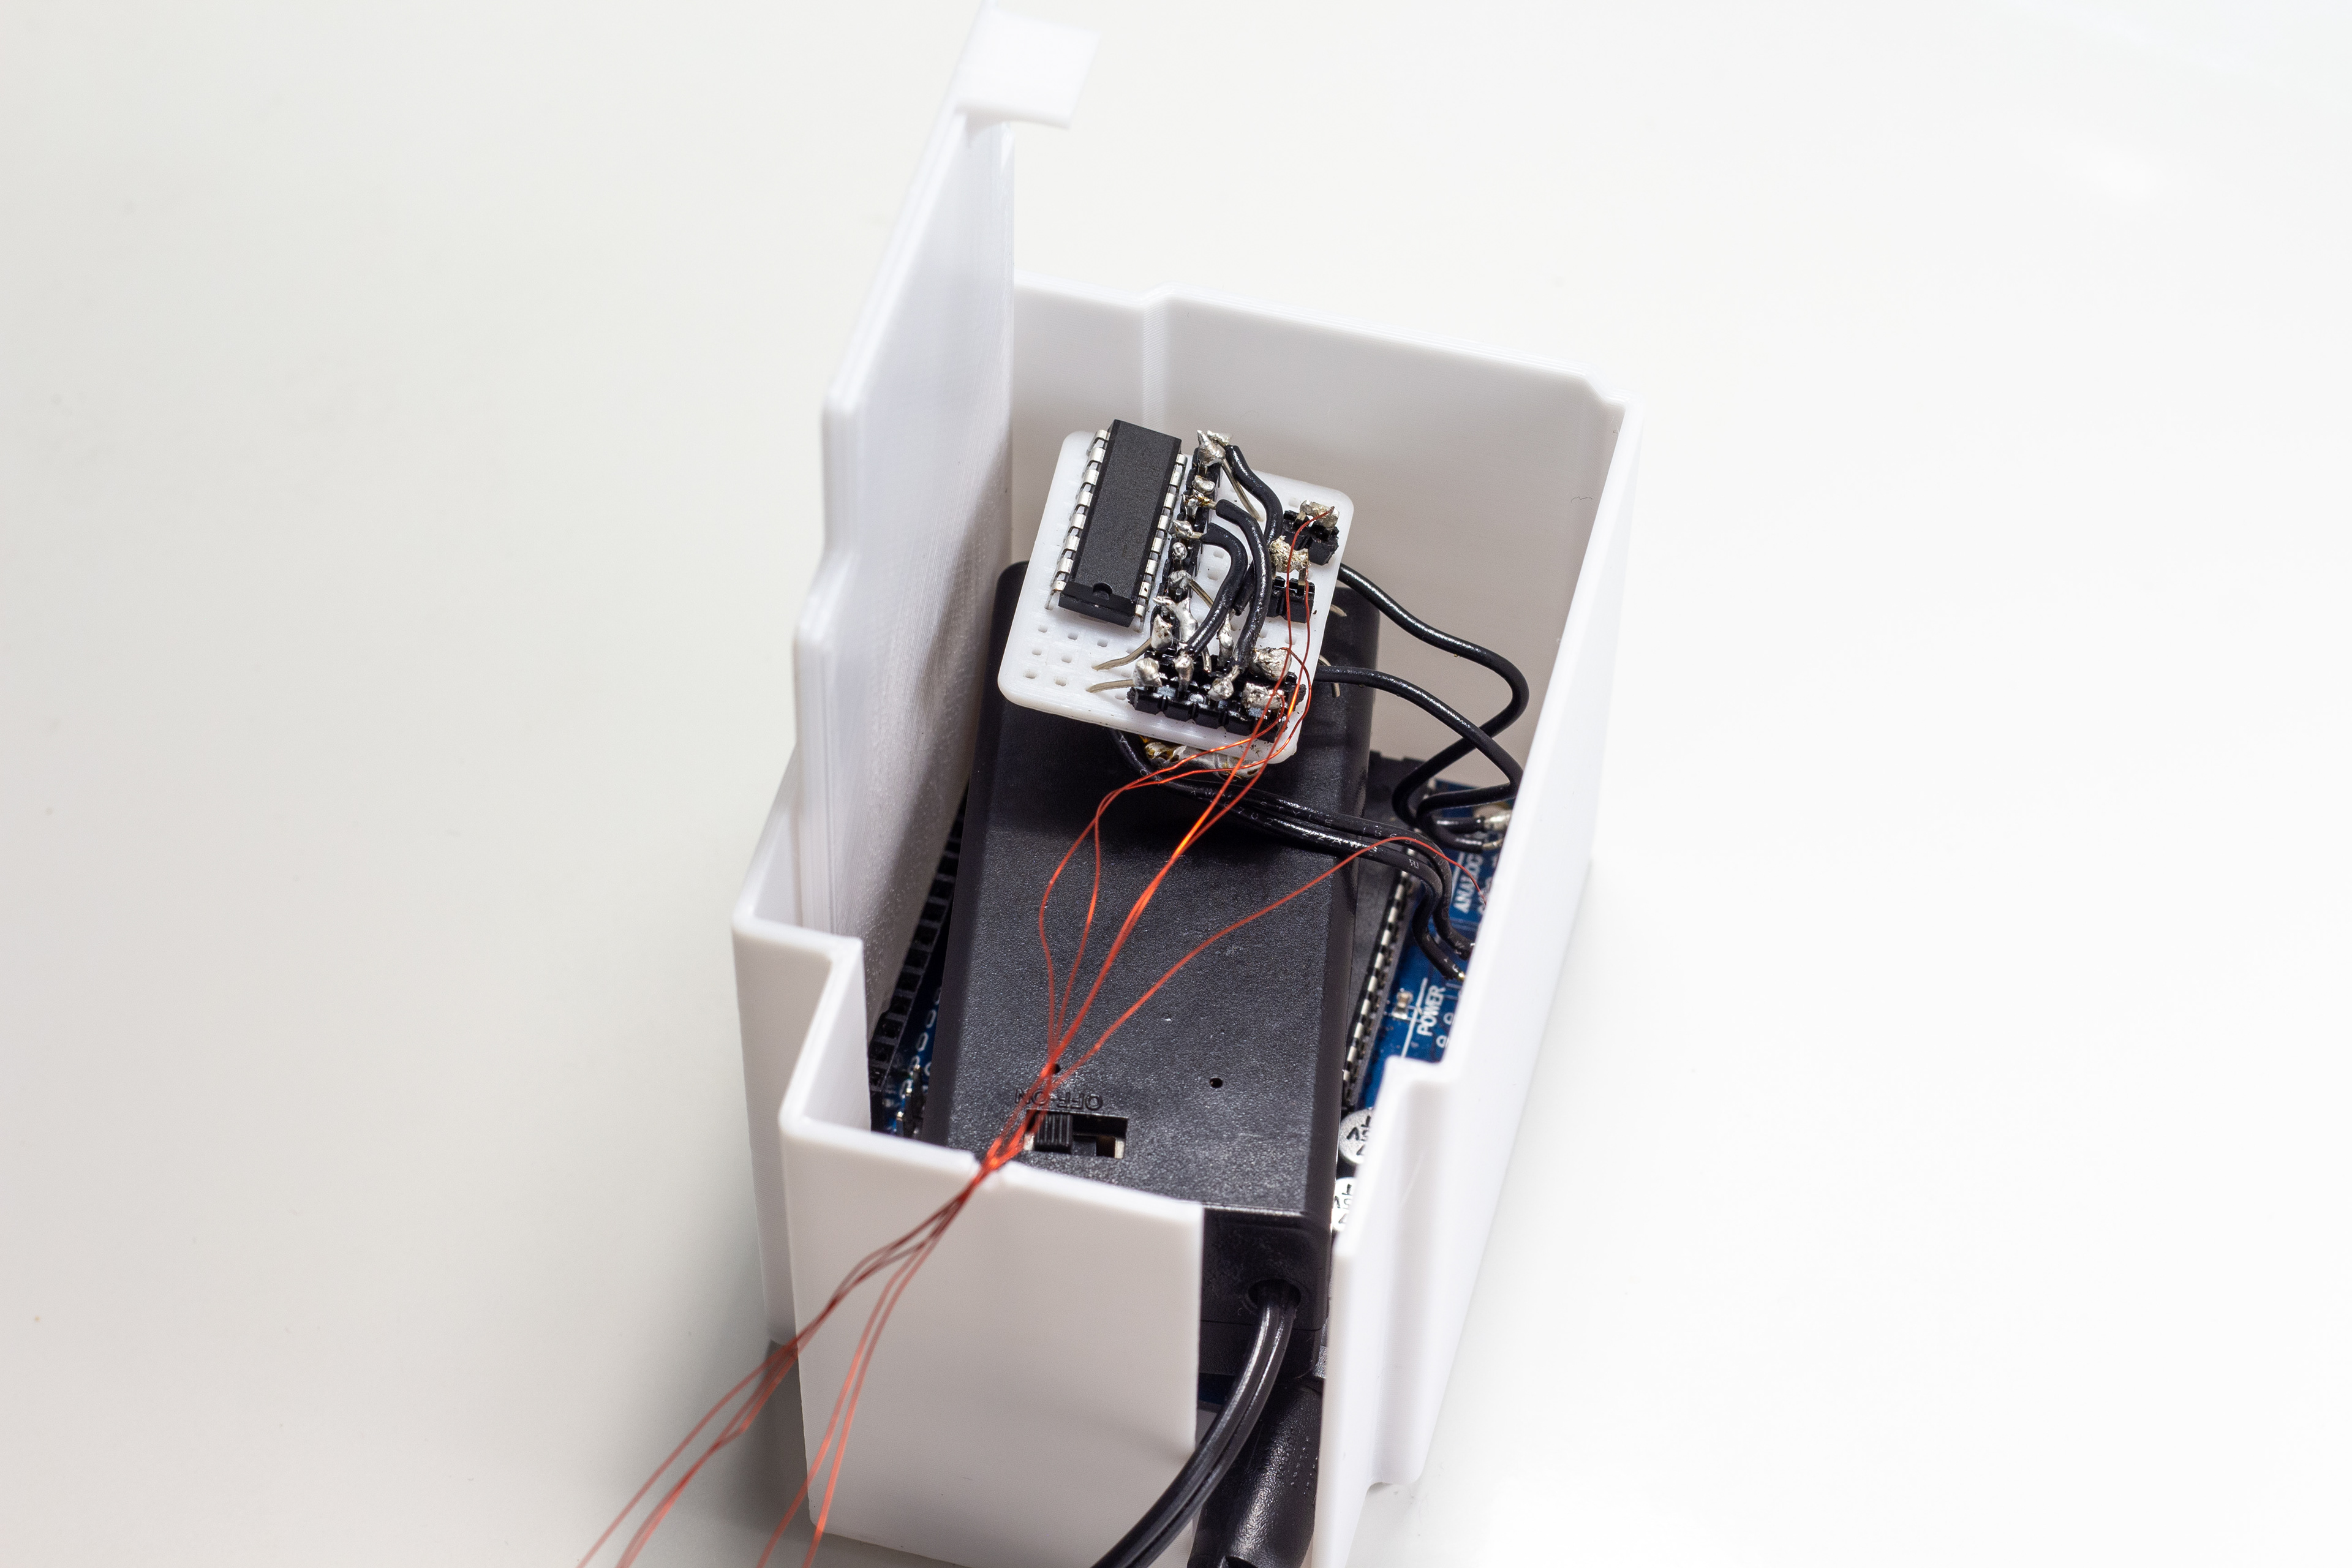
–A portable case to house the Arduino components (if you have a small enough Arduino, this could potentially fit onto the watch itself).
–A display stand for the watch, possibly integrating the electronic components.

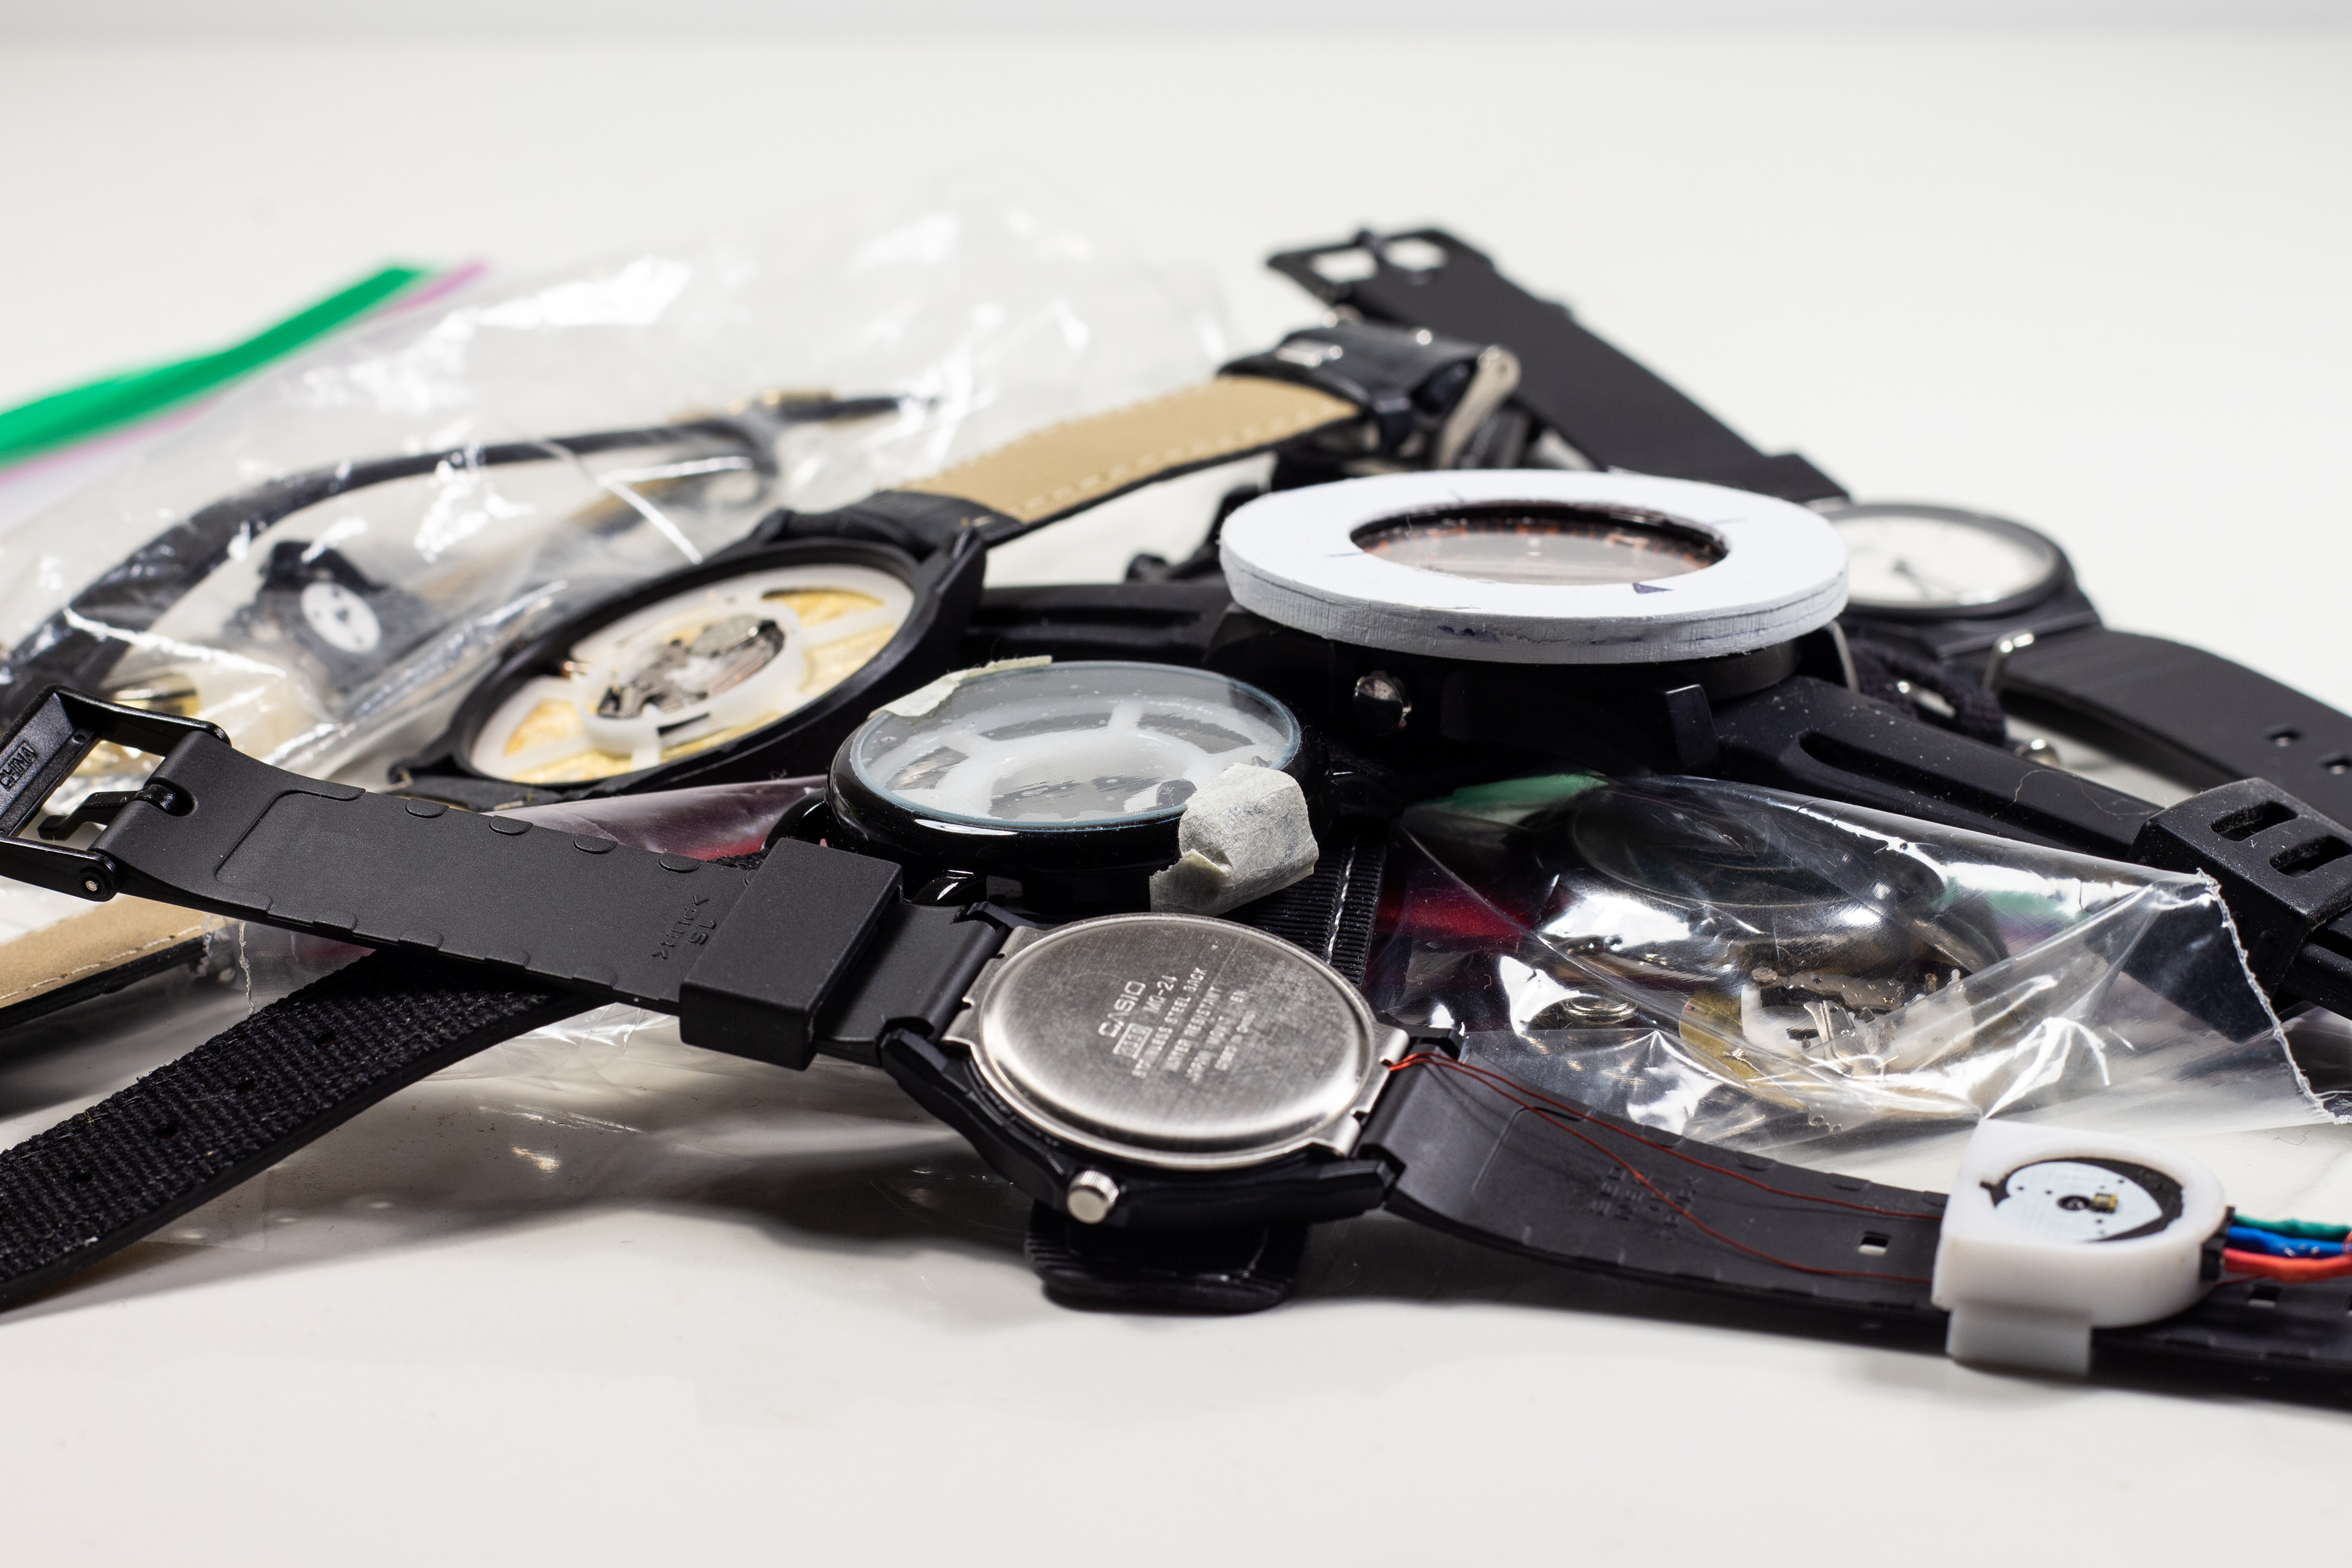
Eight watches were harmed in the making of this project.
That's the end of this tutorial! Congratulations on making it this far. If you've got any questions, comments, or want to share your experience trying out this project (or have ideas for other projects), I'd love to hear it.
—Allen